Why Is Your Spray Gun Poor Spray Pattern (Top 5 Causes & Fixes)
A poor spray pattern usually comes from dirty parts, wrong fluid settings, low air pressure, or an incorrect spray technique. A spray gun poor spray pattern can turn a smooth painting job into a patchy, frustrating mess.
Runs, dry edges, heavy centers, and uneven coverage often point to a small setup problem rather than a ruined spray gun. This guide explains how to read the pattern, find the cause, and fix it with practical steps based on spray finishing methods, manufacturer guidance, and hands-on experience.
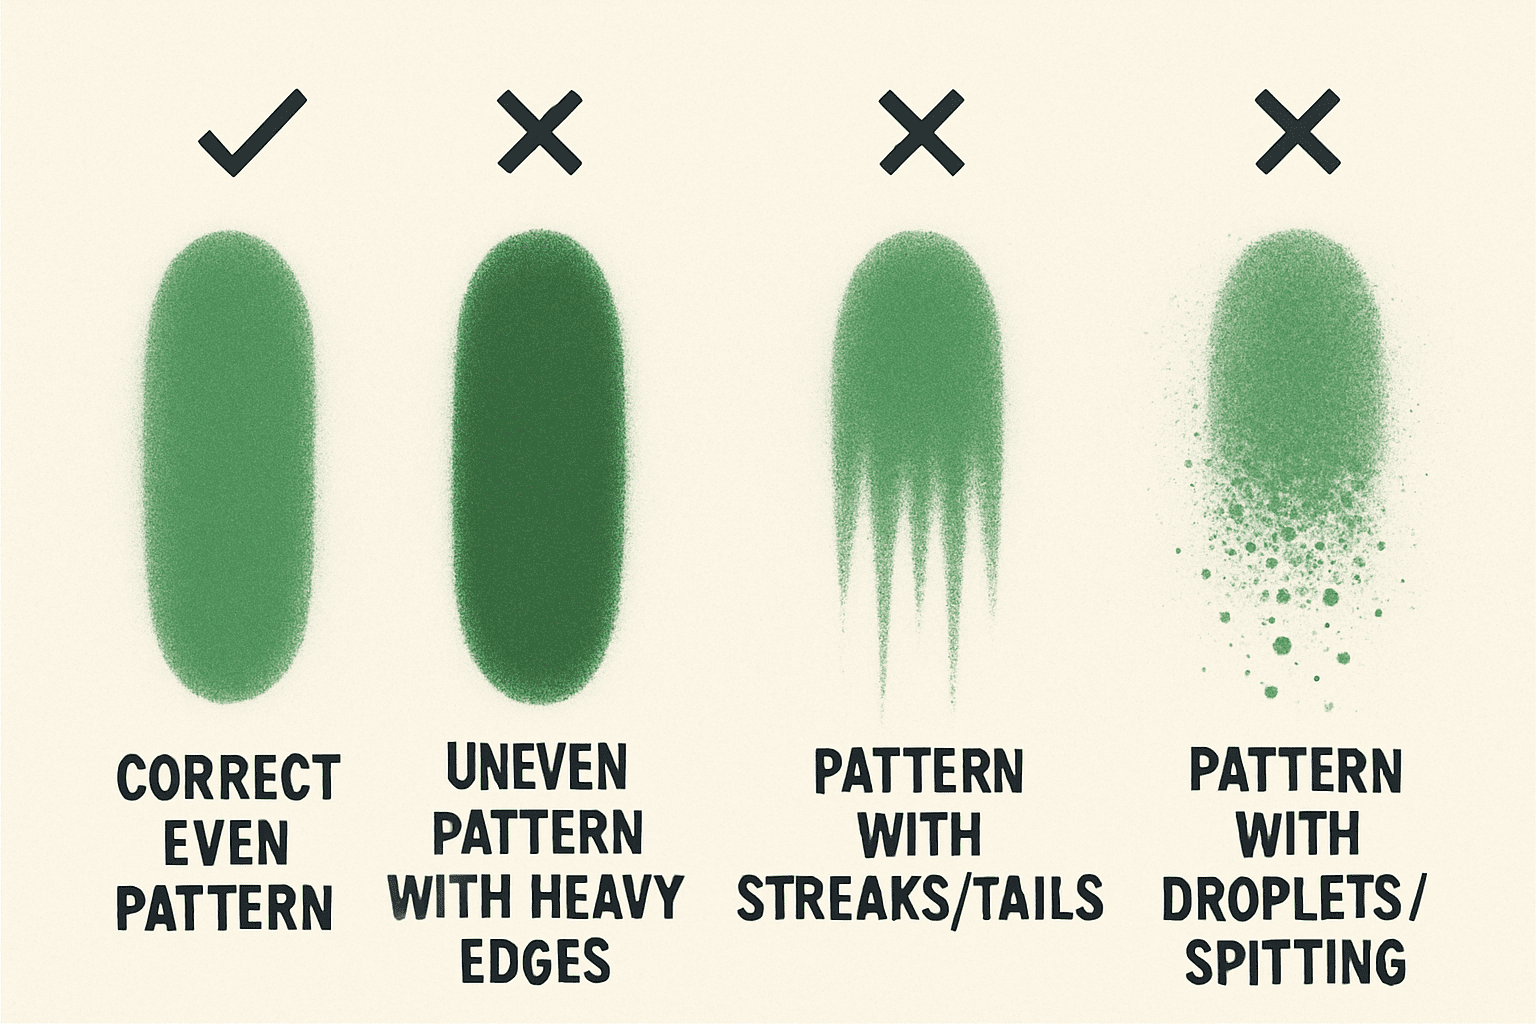
What a Poor Spray Pattern Looks Like
A spray pattern is the shape and spread of paint as it leaves the spray gun. A healthy fan should be even from one side to the other, with a soft edge and consistent paint density. The exact shape depends on the gun type, nozzle, fluid, air pressure, and distance from the surface.
A spray gun poor spray pattern may appear in several ways:
• A heavy spot in the center
• Heavy paint on the top and bottom
• Heavy paint on the left and right
• A narrow or weak fan
• Spitting or pulsing paint
• One side of the fan appearing dry
• Large droplets mixed with fine mist
• Uneven coverage across the test paper
Think of the spray pattern like a flashlight beam. A good beam is broad and steady. A poor beam flickers, narrows, or shines more brightly in one area.
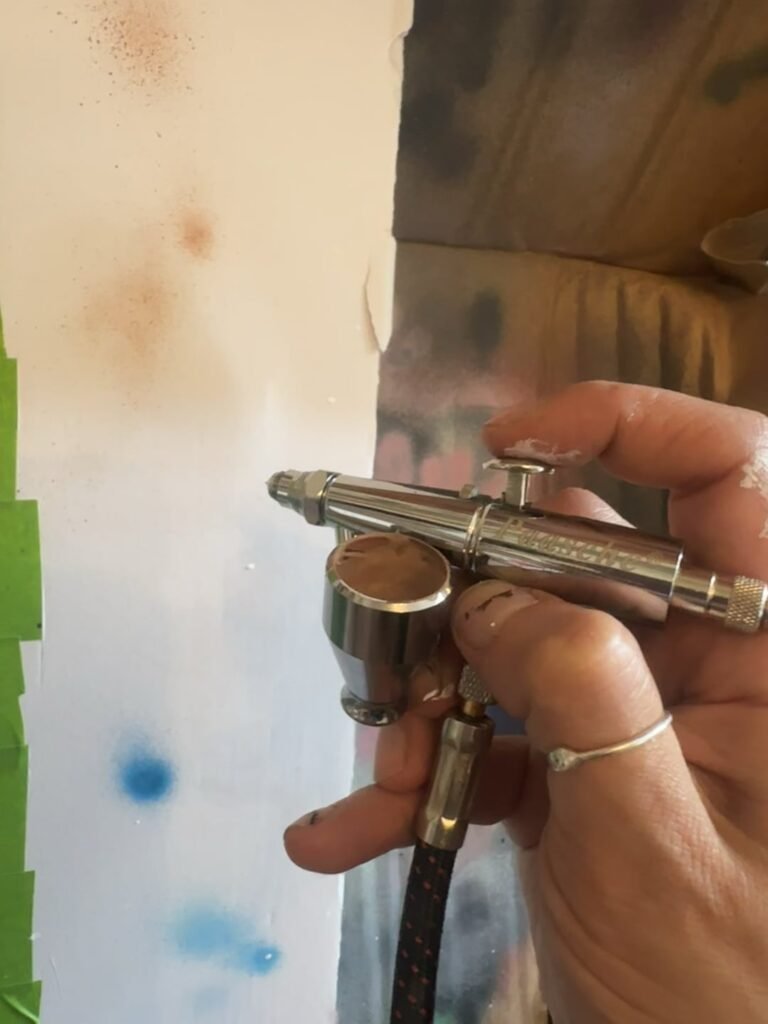
To test the pattern, spray onto clean cardboard or masking paper. Hold the gun at a normal working distance and pull the trigger for about one second. Do not test on the project first, because the test may leave thick spots or dry overspray.
How To Set Up Spray Gun For Auto Paint (Master Your Spray Gun Setup)
Common Causes of a Spray Gun Poor Spray Pattern
Most pattern problems come from a short list of causes. The good news is that many need only cleaning, adjustment, or better material preparation.
Dirty air cap or fluid nozzle
Paint residue around the air cap holes can block airflow. Even a small amount of dried coating can push the fan to one side or create a heavy center. A dirty fluid nozzle can also cause spitting and uneven paint flow.
This is one of the most common reasons for a spray gun poor spray pattern. Clean the air cap, fluid nozzle, and needle after use. Use the correct cleaning fluid for the coating, and never poke tiny air holes with a hard steel object.
A soft brush and the cleaning tools supplied with the gun are safer. Damage to the air cap can permanently change the pattern.
Incorrect air pressure
Too little air pressure may produce large droplets, weak atomization, and a narrow fan. Too much air pressure can create dry spray, excess overspray, bounce back, and a pattern that looks thin at the edges.
Always check pressure at the gun inlet while the trigger is pulled. Static pressure at the compressor or regulator may look correct, but pressure can drop through the hose when air flows.
Many professional spray guns work within a specific pressure range. Follow the gun maker’s instructions instead of using one pressure setting for every gun and coating.
Incorrect fluid flow
If the fluid needle is open too far, the gun may release more paint than the air can atomize. The result can be a wet center, runs, or large droplets. If the needle is closed too far, the fan may look weak and dry.
Start with the fluid control partly open. Increase flow slowly while checking the pattern on test paper. The goal is a balanced fan with a fine, even mist.
Wrong nozzle size
A nozzle that is too small may struggle with thick paint. This can cause poor atomization, pulsing, or a spray gun poor spray pattern. A nozzle that is too large may release too much material and create heavy coverage.
Typical examples include:
• Small nozzles for thin stains, dyes, and some clear coats
• Medium nozzles for primers and general coatings
• Larger nozzles for thick primers, latex paint, and textured products
These are general examples, not fixed rules. The right size depends on the coating, gun design, pressure, and manufacturer instructions.
Paint that is too thick or too thin
Viscosity is the flow resistance of a coating. Thick paint may leave large droplets or fail to atomize. Paint that is too thin may run, sag, or produce weak color coverage.
Use the reducer or thinner listed for the product. Do not add solvent by guesswork. Too much thinner can affect drying, gloss, film strength, and adhesion.
A viscosity cup can help you compare the coating with the product instructions. Temperature also matters. Cold paint often becomes thicker, while warm paint flows more easily.
How to Read the Spray Pattern
Learning to read the test pattern saves time. The pattern often tells you what needs attention before you touch the project.
Heavy center pattern
A heavy center usually means the material flow is too high, the air pressure is too low, or the fluid nozzle is partly blocked. It can also happen when the paint is too thick.
Try these steps:
- Clean the air cap and fluid nozzle.
- Confirm the paint viscosity.
- Increase air pressure slightly within the recommended range.
- Reduce fluid flow in small steps.
- Test again on clean paper.
Do not solve every heavy center by adding more air. Excess pressure may create dry spray and waste material.
Heavy top and bottom pattern
A pattern that is heavy at the top and bottom often points to blocked side air holes in the air cap. The fan air cannot spread correctly, so paint builds up along the vertical edges.
Remove the air cap and inspect the horn holes. Clean them with the proper tool or a soft brush. If the pattern remains uneven after cleaning, the cap may be damaged or the fluid nozzle may not be seated correctly.
Heavy left and right pattern
Heavy sides can result from blocked center holes, incorrect air cap alignment, or a damaged nozzle. Some guns also produce this pattern when the fluid needle does not move smoothly.
Clean the parts, check that the air cap is fully seated, and inspect the nozzle for dents. Replace damaged parts rather than trying to sand or reshape them.
One-sided fan
A one-sided fan is a classic spray gun poor spray pattern. It often means one side of the air cap has a blockage or the cap is not centered.
Remove the air cap and clean both sides. Make sure the cap is installed straight. If one side remains weak, compare it with a known good air cap if possible.
Spitting and pulsing
Spitting is different from a simple uneven fan. It means paint comes out in bursts instead of a smooth stream.
Common causes include:
• Loose fluid nozzle
• Damaged needle or nozzle
• Low paint level in the cup
• Blocked cup vent
• Loose fluid connection
• Leaking seal
• Paint that contains lumps or dried material
Strain the paint before filling the cup. Check the cup lid and vent. A blocked vent can stop paint from flowing smoothly, much like placing your finger over the opening of a drinking straw.
Step by Step: How to Fix a Spray Gun Poor Spray Pattern
Use a systematic process. Changing several settings at once makes it hard to know what fixed the problem.
1. Stop and inspect the gun
Release pressure and follow the manufacturer’s safety instructions. Look for dried paint, loose fittings, damaged seals, and a low fluid level.
Wear suitable eye protection, gloves, and respiratory protection. Many coatings contain solvents or fine particles that can harm your lungs and skin. Use spray equipment in a properly ventilated area, away from flames and ignition sources.
2. Clean the air cap
Remove the air cap carefully. Soak it only in a cleaner approved for the gun and coating. Some strong solvents can damage seals or finish surfaces.
Brush away residue from the air holes. Never use drill bits, pins, or welding tips in precision openings. A slightly enlarged hole can permanently alter the spray pattern.
3. Check the fluid nozzle and needle
Inspect the nozzle for dried paint, scratches, or dents. Check whether the needle tip is bent or worn.
The nozzle and needle work as a matched set in many spray guns. If one part is badly worn, replacing only one may not restore the original pattern. Follow the parts guidance for your model.
4. Check the cup and fluid path
Make sure the cup vent is open and the lid seals correctly. Look for debris in the pickup tube or filter. A clogged filter can restrict flow and create pulsing.
Strain coatings through a suitable paint filter before spraying. This simple habit prevents many blockages.
5. Set air pressure correctly
Connect the air hose and pull the trigger while reading the regulator. Adjust pressure in small steps.
Start within the range listed by the manufacturer. Use the lowest pressure that gives proper atomization. This can reduce overspray while still producing a smooth finish.
6. Adjust fluid flow
Open the fluid control gradually. Spray a short test pattern after each adjustment.
If the center is too wet, reduce fluid or increase air slightly. If the pattern is dry and weak, increase fluid carefully or check whether the coating is too thick.
7. Check spray distance and movement
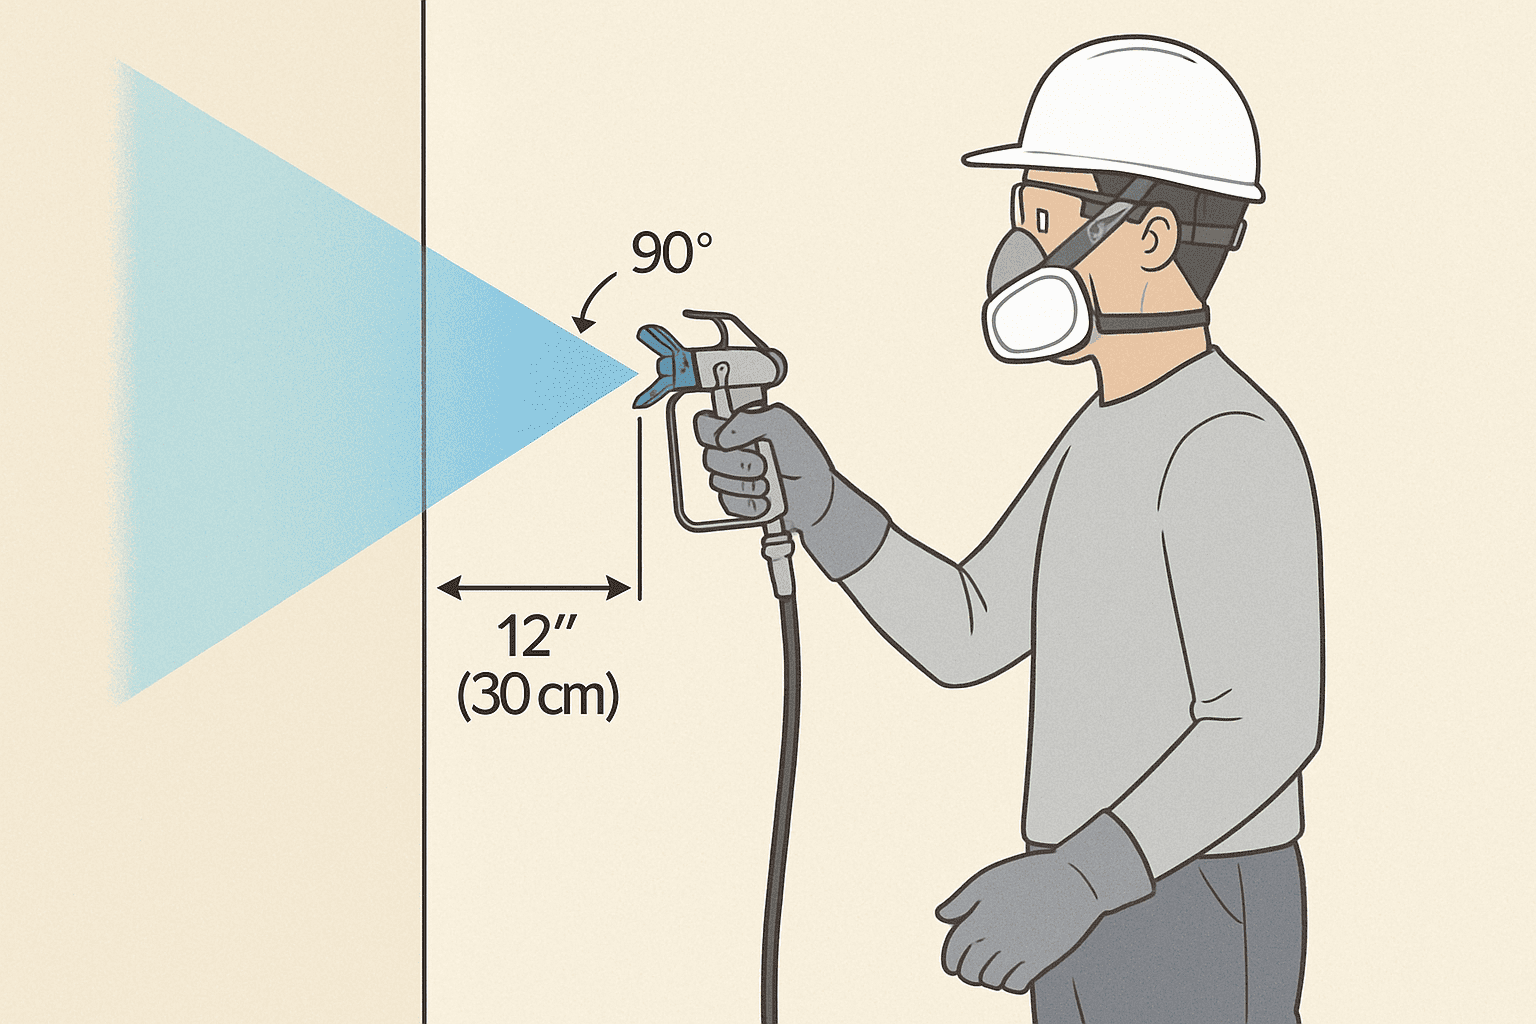
Hold the gun about 6 to 8 inches from the surface unless the manufacturer specifies another distance. Keep the gun square to the surface and move it at a steady speed.
Move your arm, not just your wrist. Start moving before pulling the trigger, and release the trigger before stopping. This prevents heavy spots at the beginning and end of each pass.
8. Test the fan again
Spray onto clean paper. A good pattern should be even and balanced, with no heavy corners or large wet spots.
If the spray gun poor spray pattern continues after cleaning and adjustment, inspect the air cap, nozzle, needle, seals, and compressor supply. A worn part or weak air system may be the real cause.
Spray Technique Mistakes That Create Uneven Coverage
Even a clean gun can produce a poor result when the technique is inconsistent. Many new users swing the gun in an arc. This changes the distance from the surface and creates uneven paint thickness.
Keep the gun parallel to the surface. Use steady, straight passes with a consistent overlap. A common overlap range is about 50 percent, but the coating instructions should guide the final choice.
Avoid spraying too slowly. A slow pass deposits too much material and can cause runs. Avoid spraying too quickly, because it can create dry spray and weak coverage.
Your wrist position also matters. If the gun tilts, the fan strikes the surface unevenly. This can make one side of the pattern look heavier even when the gun itself is working correctly.
In my early spray work, I once blamed a poor air cap for a patchy clear coat. The real problem was my speed. I was slowing down at the end of each pass, which created a heavy band. Once I kept my movement steady, the finish improved without changing the settings.
Compressor, Hose, and Air Supply Problems
A spray gun needs stable airflow. A small compressor may reach the correct pressure while idle but lose pressure during a long pass. This can create a spray gun poor spray pattern that changes as you work.
Check the gun’s air consumption rating and compare it with the compressor’s delivered air volume. Tank size alone does not tell you whether a compressor can keep up. The compressor must deliver enough air continuously.
Air hoses can also restrict flow. Long, narrow hoses, clogged filters, quick connectors, and leaking fittings may reduce pressure at the gun.
Inspect these areas:
• Compressor outlet and regulator
• Water separator and air filter
• Quick disconnect fittings
• Hose diameter and length
• Leaks around connections
• Moisture in the air line
Water in the air line can cause spitting, fish eyes, and uneven atomization. Drain the compressor tank and use suitable air filtration. In humid weather, inspect the separator more often.
How Paint Preparation Affects Spray Quality
Proper paint preparation is as important as gun adjustment. A clean gun cannot atomize coating that contains lumps, skin, or settled pigment.
Mix the coating according to its technical data sheet. Scrape settled material from the bottom of the container and blend it fully. Then strain the paint before it enters the cup.
Temperature affects viscosity. If the paint is cold, allow it to reach the recommended working temperature rather than adding extra thinner. Sudden thinning may change the finish more than expected.
Different products also behave differently:
• Water based coatings may need careful mixing and suitable flow additives.
• Solvent based coatings may require a specific reducer.
• Metallic coatings can show uneven color when sprayed with poor overlap.
• Clear coats may sag when fluid flow is too high.
• Primers often need a larger nozzle than thin topcoats.
Always check the product label and technical data sheet. Coating chemistry varies, so one universal recipe is not reliable.
Adjustments for Different Spray Gun Types
The correct setup depends on the gun design. A high volume low pressure gun uses a large volume of air at lower pressure than a conventional high pressure gun. An airless sprayer uses a pump and tip rather than a traditional air cap.
HVLP spray guns
HVLP guns can reduce overspray and improve transfer efficiency when set up correctly. They still need enough airflow and the correct fluid nozzle.
A weak compressor may cause a spray gun poor spray pattern with an HVLP gun because the air demand can be high. Check the gun’s air consumption instead of assuming that every small compressor will work.
Conventional spray guns
Conventional guns may use higher atomizing pressure. They can produce fine atomization, but high pressure may increase overspray and material loss.
Use the manufacturer’s pressure range. More pressure is not always better.
LVLP spray guns
LVLP guns usually need less air than many HVLP models. They can work well with smaller compressors, but they still need steady airflow and correct setup.
If the pattern becomes weak during long passes, check the compressor and hose before changing the fluid settings.
Airless sprayers
Airless spray problems often involve the tip, filter, pressure, or coating viscosity. A worn tip may create a heavy center or poor fan. A clogged tip can cause a narrow or irregular pattern.
Turn the tip according to the sprayer instructions when clearing a blockage. Never place your hand in front of an airless spray. The injection pressure can force coating through skin and cause a serious medical emergency.
Mistakes to Avoid When Troubleshooting
Random adjustments often make the problem worse. Use one change at a time and record what happens.
Avoid these common mistakes:
• Increasing pressure without checking for a blockage
• Using the wrong thinner
• Cleaning precision holes with hard tools
• Spraying with a damaged nozzle
• Ignoring a blocked cup vent
• Testing only on the project surface
• Holding the gun too far away
• Using a nozzle that does not suit the coating
• Letting paint sit in the gun between coats
• Assuming the compressor pressure is stable
One lesson has stayed with me: cleaning is faster than fighting a bad pattern for an hour. A two minute test and a careful air cap cleaning often solve what appears to be a complicated equipment failure.
When to Replace Parts or Service the Gun
Cleaning will not repair every spray gun poor spray pattern. Parts wear over time, especially the nozzle, needle, seals, and air cap.
Consider replacement or service when:
• The nozzle has a visible dent
• The needle tip is bent or worn
• The air cap holes are damaged
• The fluid control leaks
• The trigger feels rough
• The pattern stays uneven after thorough cleaning
• The gun draws air or paint from an unintended area
• Threads or fittings no longer seal
Use genuine or approved replacement parts when possible. Small differences in nozzle shape and air cap design can change atomization.
If the gun has a warranty, avoid modifying it before contacting the manufacturer. Keep a record of the coating, nozzle size, pressure, and symptoms. Clear notes help a technician identify the fault faster.
A Simple Spray Gun Setup Checklist
Use this checklist before each project:
- Read the coating and spray gun instructions.
- Wear proper personal protective equipment.
- Confirm good ventilation and remove ignition sources.
- Mix and strain the coating.
- Check the nozzle size.
- Clean the air cap and fluid nozzle.
- Confirm the cup vent is open.
- Check hose fittings for leaks.
- Set pressure with the trigger pulled.
- Spray a test pattern on cardboard.
- Adjust only one setting at a time.
- Maintain a steady distance and parallel movement.
This routine takes only a few minutes. It can prevent wasted paint, rework, and a spray gun poor spray pattern on the final surface.
Frequently Asked Questions About Spray Gun Poor Spray Pattern
Why is my spray gun spraying heavy in the middle?
A heavy center often means the fluid flow is too high, the air pressure is too low, or the paint is too thick. Clean the air cap and nozzle first, then reduce fluid flow or adjust pressure within the recommended range.
Why does my spray gun spray to one side?
A one sided pattern usually comes from a blocked air cap hole, an incorrectly seated cap, or a damaged nozzle. Clean the air cap carefully and check whether the pattern improves before replacing parts.
What air pressure should I use for a spray gun?
The correct pressure depends on the gun, nozzle, coating, and spray method. Start with the manufacturer’s stated range and measure pressure at the gun while the trigger is pulled.
Why is my spray gun spitting paint?
Spitting can result from a blocked nozzle, low fluid, a blocked cup vent, loose fittings, damaged seals, or paint debris. Strain the coating, clean the fluid path, and check all connections.
Can thick paint cause a poor spray pattern?
Yes. Thick paint may produce large droplets, weak atomization, and an uneven fan. Use the correct reducer or thinner and follow the coating maker’s viscosity guidance.
Why does my spray pattern change while I am painting?
A changing pattern may indicate compressor pressure loss, moisture in the air line, a blocked filter, or a low paint level. Check the air supply and fluid path before making major gun adjustments.
How often should I clean my spray gun?
Clean the gun after every spraying session, even when the job seems short. Dried coating in the air cap or nozzle is a leading cause of a spray gun poor spray pattern.
Conclusion
A spray gun poor spray pattern is usually a warning, not a mystery. Start with the air cap, fluid nozzle, paint viscosity, air pressure, and fluid flow. Then check the hose, compressor, coating preparation, and your spray technique.
Use a clean test surface and change one setting at a time. With a steady setup routine, you can restore an even fan, reduce wasted paint, and produce a smoother finish. Try these steps on your next project, and share your results or questions in the comments.