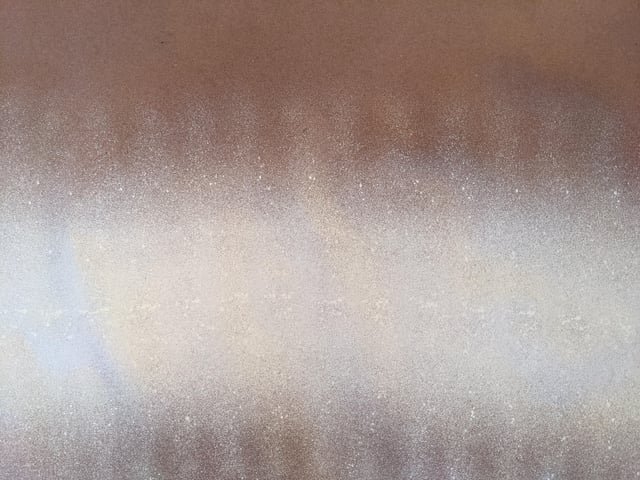
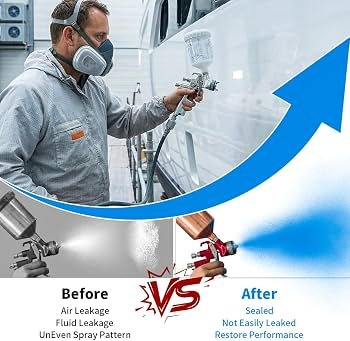
Why Is Your Spray Gun Irregular Spray Pattern: 7 Common Reasons & Solution
An irregular spray pattern usually comes from poor fluid flow, blocked parts, wrong pressure, or an air leak. A spray gun irregular spray pattern can turn a smooth finish into stripes, dry spots, heavy edges, or unwanted spatter.
After years of checking spray equipment, I have found that the pattern often reveals the fault before the gun does. This guide explains the causes, tests, repairs, and setup steps that help restore an even fan.
What Is a Spray Gun Irregular Spray Pattern?
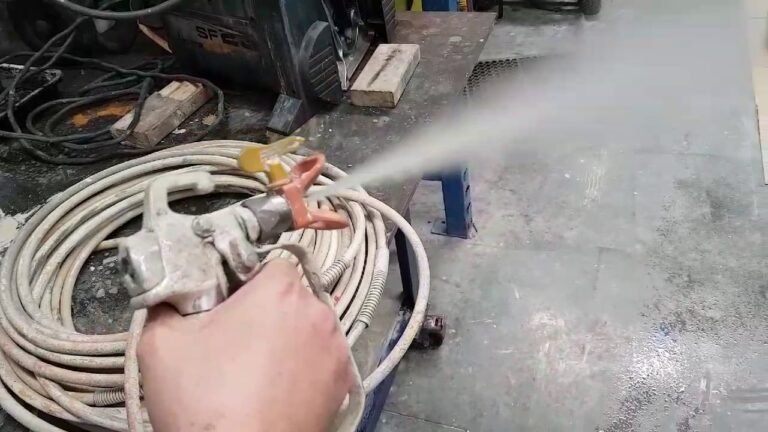
A spray gun irregular spray pattern is an uneven fan of coating from the nozzle. Instead of producing a balanced, oval shape, the gun may spray more material on one side, split in the center, form a tail, or release random droplets.
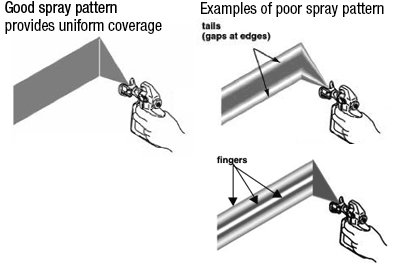
A healthy spray pattern should look full and even from end to end. The edges may be slightly lighter than the center, but they should not show a sharp line, large gap, hook, or heavy buildup.
Common signs include:
• A fan that is wider on one side
• A pattern with a heavy top or bottom edge
• A split or hollow center
• Random spits and large drops
• A fan that changes while you spray
• Uneven coverage across the workpiece
• Excessive overspray around the main pattern
The exact fault depends on the gun type. A conventional spray gun, HVLP gun, LVLP gun, and airless sprayer each use different fluid and air systems. Still, the basic rule is the same: the fluid must leave the tip in a controlled stream, while the air must shape that stream evenly.
Why Is Your Spray Gun Poor Spray Pattern (Top 5 Causes & Fixes)
Main Causes of an Irregular Spray Pattern
Finding the cause is easier when you treat the spray fan like a symptom. A heavy left side points to a different problem than a pulsing fan or a split center.
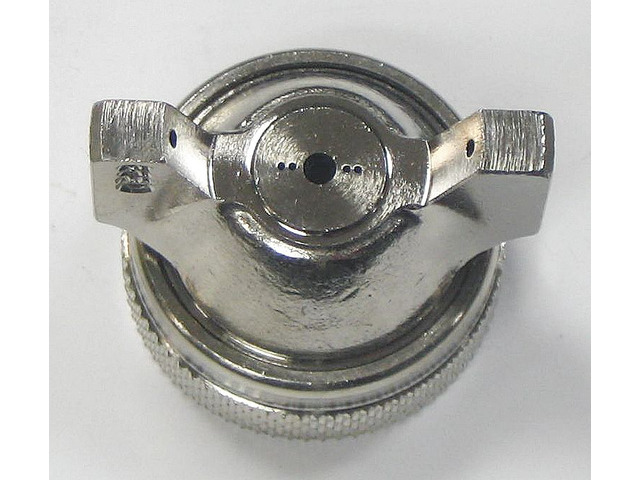
Dirty air cap or fluid nozzle
Dried paint, dust, and tiny bits of coating can block one air hole. When that happens, air pressure becomes uneven around the fluid stream. The result is often a spray gun irregular spray pattern with a heavy side or a bent fan.
A dirty fluid nozzle can also limit paint flow. Even a small piece of dried material may change the shape of the spray. This is common when a gun sits for a short time without proper cleaning.
Incorrect air pressure
Too little air may produce a narrow, weak, or poorly atomized pattern. Too much air can create dry spray, excessive overspray, and an unstable fan.
The pressure shown at the compressor is not always the pressure at the gun. A long hose, small fittings, clogged filters, or a poor regulator can cause pressure loss. Always check pressure at the gun inlet while the trigger is pulled.
Fluid that is too thick or too thin
Thick paint does not break into fine droplets easily. It may create tails, heavy spots, or a rough pattern. Thin material may run, sag, or produce weak coverage.
Use the coating maker’s technical data sheet for the correct thinner, reducer, mix ratio, and application method. Do not add solvent by guesswork. A small change in viscosity can strongly affect atomization.
Damaged nozzle or air cap
A dropped air cap may have a bent horn. A worn fluid needle or nozzle may also allow fluid to escape unevenly. These parts can look fine but still create a clear spray gun irregular spray pattern.
Never use a metal pick to clean the air holes. It can enlarge or distort them. A soft brush, approved cleaning tool, and suitable solvent are safer choices.
Air leaks and loose connections
An air leak can reduce atomizing pressure and make the fan unstable. Check the hose, quick couplers, regulator, air inlet, and packing area.
A leak near the fluid needle may also allow air into the material path. That can cause bubbling in the cup or pulsing at the nozzle.
Low fluid level or blocked pickup tube
A low cup level can let air enter the fluid path. A blocked pickup tube or dirty cup filter can have the same effect. The gun may spray well for a few seconds, then begin to spit.
This is one of the first things I check when a spray pattern changes during a job. The fault is often in the cup, not the air cap.
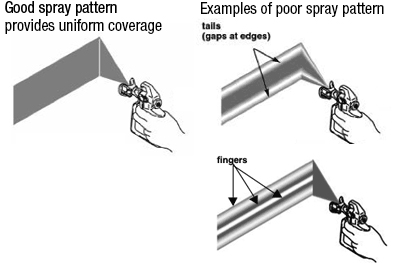
How to Read the Spray Pattern
A test pattern gives you useful information before you touch the gun. Use clean masking paper or cardboard. Hold the gun at the correct distance, then pull the trigger for one short burst.
Keep the gun square to the paper. Do not move it during the test. A moving test can hide the real shape.
Heavy on one side
A heavy left or right side often means a blocked air-cap horn. It may also point to a damaged cap or nozzle. Remove the air cap, clean every opening, and test again.
If the same side remains heavy after cleaning, inspect the cap and nozzle for damage. Replacing the damaged part is usually faster than trying to force it back into shape.
Heavy on the top or bottom
A top-heavy or bottom-heavy pattern can result from a blocked horn, incorrect fan adjustment, or a loose air cap. Make sure the cap is seated correctly and tightened as the manufacturer recommends.
The gun should also be held straight. Tilting the gun can make the pattern appear uneven, especially on vertical panels.
Split center or hourglass shape
A hollow center often indicates too much fan air, too little fluid, or a fluid nozzle problem. A large fan setting with low material flow can stretch the pattern until the center looks weak.
Increase fluid flow slightly, reduce fan air if the gun allows it, and test again. Make only one adjustment at a time.
Heavy center or round pattern
A heavy center may mean too much fluid, too little atomizing air, or a fan that is not opening correctly. Thick material can also create a round and wet spray.
Check the fluid setting, material viscosity, and air pressure. A spray gun irregular spray pattern often improves when these three factors are balanced.
Spitting and pulsing
Spitting usually points to air in the fluid path, a loose nozzle, poor needle seating, a blocked pickup tube, or an empty cup. It may also happen when the trigger is pulled too slowly.
Clean the fluid path and check all seals. If the gun spits only when the cup is nearly empty, refill it and inspect the pickup tube.
Step by Step: How to Fix a Spray Gun Irregular Spray Pattern
Use this process instead of changing several settings at once. Small, controlled tests make the fault easier to find.
- Stop spraying and release pressure safely. Follow the equipment manual, especially with airless and pressure feed systems.
- Check the material level. Make sure the cup or tank has enough coating to cover the pickup tube.
- Inspect the paint. Confirm the mix ratio, strain the material, and check for skin, lumps, or settled pigment.
- Check the air supply. Confirm the compressor can provide the required volume. Measure pressure at the gun while the trigger is open.
- Inspect the hose and fittings. Look for leaks, damaged seals, blocked filters, and loose couplers.
- Remove and clean the air cap. Clean each horn and opening with approved tools. Avoid hard wire that can damage the holes.
- Clean the fluid nozzle and needle. Remove dried coating from the seat and tip. Do not scratch the precision surfaces.
- Reassemble the gun correctly. A nozzle that is not fully seated can cause leaks, spitting, and a spray gun irregular spray pattern.
- Set the fan control near the middle. Set fluid flow and air pressure to the coating maker’s starting point.
- Spray a test fan. Hold the gun at the recommended distance and keep it square to the surface.
- Make one adjustment. Change either air, fluid, fan width, or distance. Then test again.
- Replace damaged parts. If cleaning does not fix the pattern, a worn nozzle, needle, or air cap may be the true cause.
I once spent too long adjusting pressure on a gun that had a tiny piece of cured clear coat in one air horn. The pressure changes only hid the problem for a few seconds. Since then, I always inspect the air cap early in the troubleshooting process.
Correct Spray Gun Setup for an Even Fan
Good setup prevents many pattern problems. Start with clean equipment and a coating prepared for the spray method. Use a proper filter or strainer to keep debris out of the gun.
Set the air pressure according to the gun maker’s instructions. HVLP guns often need more air volume and lower cap pressure than conventional guns. LVLP guns may work with less air volume, but they still need a steady supply.
Hold the gun about 6 to 8 inches from the surface unless the manual gives another distance. Keep it perpendicular to the panel. Move your arm, not only your wrist.
Use a consistent speed. Moving too slowly creates a wet center and runs. Moving too quickly causes dry spray and weak coverage. Overlap each pass by about 50 percent when the coating instructions support that method.
A simple setup checklist includes:
• Clean air cap and nozzle
• Correct material viscosity
• Freshly strained coating
• Stable air pressure at the gun
• Correct fluid tip size
• Proper spray distance
• Straight gun angle
• Smooth hand speed
• Suitable ventilation and personal protective equipment
The correct tip size matters. A small tip may struggle with thick primer, while a large tip may release too much material for a thin finish coat. Always match the tip to the coating and the job.
How to Prevent Spray Pattern Problems
Cleaning is the best long-term defense. Flush the gun as soon as you finish spraying. Dried material becomes much harder to remove and can damage seals during later cleaning.
Do not soak the entire gun in solvent unless the manufacturer allows it. Solvent can damage packings, seals, and lubricated areas. Clean only the parts that need cleaning, and use the recommended product.
Store the gun with the air cap and fluid nozzle clean. Keep parts in a safe place where they cannot fall onto a hard floor. A small dent can change the fan.
Use clean, dry air. Moisture in the air line may affect coatings and cause corrosion. A suitable air filter, water separator, and regulator help maintain stable performance.
Keep a simple maintenance record. Note the coating, tip size, pressure, and thinner used. This makes it easier to repeat a successful setup and spot changes over time.
Safety matters as well. Many coatings and solvents release harmful vapors or create fire risks. Use the safety data sheet, proper ventilation, gloves, eye protection, and a respirator selected for the material and local rules. OSHA guidance and the product safety data sheet should take priority over general advice.
When to Replace Spray Gun Parts
Cleaning cannot repair every problem. Replace the air cap if its horns are bent, cracked, or badly worn. Replace the fluid nozzle and needle as a matched set when the seat shows wear or the gun continues to leak.
Common signs of worn parts include:
• A pattern that stays uneven after careful cleaning
• Fluid leaking from the nozzle when the trigger is released
• A needle that does not seat smoothly
• A damaged or enlarged air hole
• A fan that changes without a setting change
• Persistent spitting with clean material
• Visible scoring on the nozzle or needle
Cheap replacement parts may not fit with the same accuracy as original parts. A poor fit can create another spray gun irregular spray pattern and waste more material than the part costs.
For a professional gun, use parts made for that model. Check the part number, nozzle size, and fluid system before ordering. When in doubt, compare the manual’s exploded diagram with the parts in your hand.
Common Mistakes That Make the Pattern Worse
Many users react to an uneven fan by turning up the pressure. That can increase overspray while leaving the real blockage or damage untouched. Pressure is important, but it is not a cure for every spray gun irregular spray pattern.
Another mistake is thinning the coating too much. Thin paint may flow easily, yet it can run, lose hiding power, and change the final sheen. Follow the product data sheet and test a small area first.
Some users also hold the gun at an angle to reach a difficult spot. This can change the distance across the fan and create uneven film thickness. Reposition your body or the workpiece when possible.
Avoid these habits:
• Spraying without a test pattern
• Cleaning air holes with hard wire
• Mixing products without checking compatibility
• Ignoring a loose nozzle
• Using a dirty compressor filter
• Changing several settings at the same time
• Continuing to spray after the fan becomes unstable
• Reusing contaminated thinner
A good repair should improve both the pattern and the finish. If the fan looks better but the coating still dries rough, check humidity, temperature, material mix, and surface preparation.
Frequently Asked Questions of Spray Gun Irregular Spray Pattern
Why is my spray gun spraying unevenly?
An uneven fan often comes from a dirty air cap, blocked nozzle, wrong air pressure, thick material, or worn parts. Clean the gun, check the material, and test pressure at the gun inlet before replacing parts.
How do I fix a spray gun that sprays heavy on one side?
Remove and clean the air cap, especially the air horn openings. If the same side remains heavy, inspect the cap and fluid nozzle for damage or replace the affected part.
Can low air pressure cause an irregular spray pattern?
Yes. Low or unstable air pressure can reduce atomization and make the fan weak, narrow, or heavy in the center. Check pressure while the gun is triggered because static pressure can give a false reading.
Why does my spray gun spit instead of making a smooth fan?
Spitting can result from air in the fluid path, a low cup level, a blocked pickup tube, a loose nozzle, or dried material. Clean the fluid path and check seals, the cup, and the nozzle seat.
Does paint viscosity affect the spray pattern?
Yes. Material that is too thick may produce tails, heavy spots, and poor atomization. Material that is too thin may run and provide weak coverage, so follow the coating maker’s mix instructions.
Should I replace the air cap or the nozzle first?
The answer depends on the damage and the test pattern. If cleaning does not help, inspect both parts because a damaged air cap affects shaping air while a worn nozzle affects fluid flow.
What is the best spray distance for an even pattern?
Many spray guns work near 6 to 8 inches from the surface, but the correct distance depends on the model, coating, and tip. Follow the equipment manual and keep the distance steady during each pass.
Conclusion
A spray gun irregular spray pattern is usually a clear warning that air, fluid, cleanliness, or worn parts need attention. Start with a test fan, inspect the air cap and nozzle, confirm material viscosity, and check pressure at the gun. Make one change at a time so the real cause does not stay hidden.
With careful cleaning and steady technique, most pattern faults are easy to solve. Test your gun before the next project, follow the coating and equipment instructions, and share your own repair experience or questions in the comments.