Why Is Your Spray Gun Uneven Spray Pattern: The #7 Mistake Causing
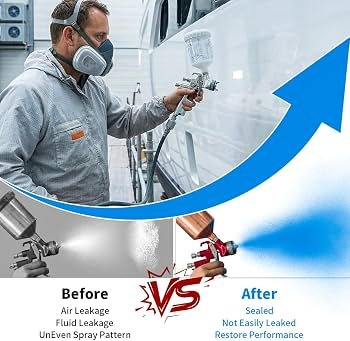
An uneven spray pattern usually comes from blocked parts, poor air flow, wrong settings, or incorrect spraying technique. A spray gun uneven spray pattern can turn a smooth finish into a patchy, rough, or streaked mess.
The good news is that most causes are easy to find and fix. This guide explains how to read the pattern, check the gun step by step, and prevent the problem from returning.
What an Uneven Spray Pattern Looks Like
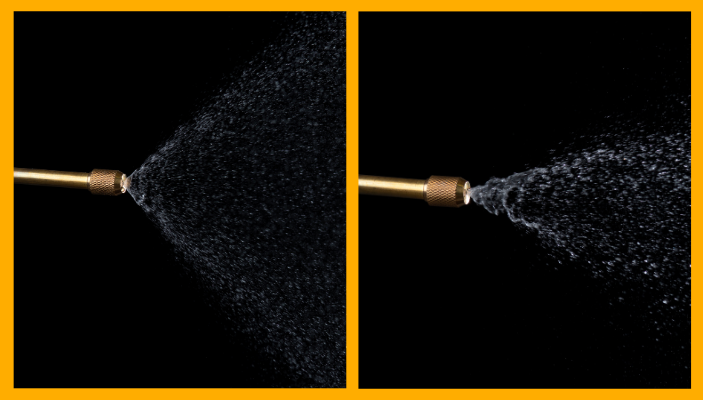
A spray pattern is the shape and spread of material that leaves the gun. A healthy pattern is usually even from side to side, with a soft edge and consistent coverage. The exact shape depends on the gun, fluid nozzle, air cap, paint, and pressure.
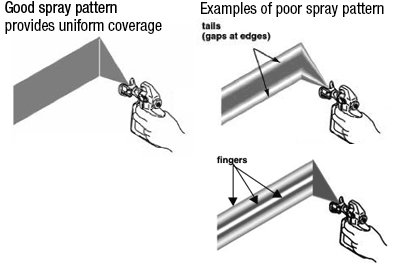
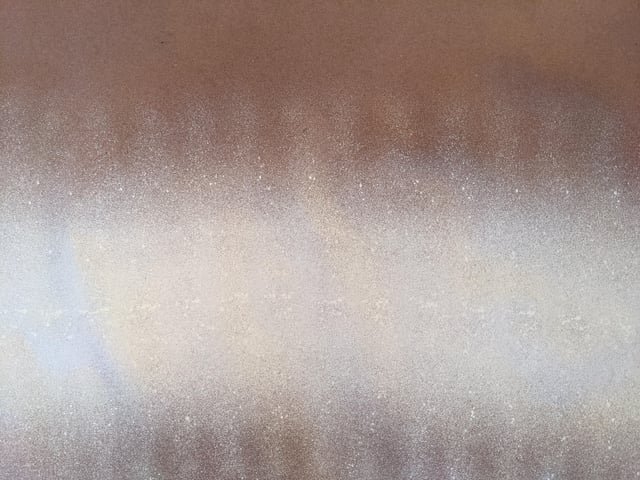
A spray gun uneven spray pattern may show up in several ways:
• A heavy spot in the center
• Heavy paint on both outer edges
• A pattern that sprays more to one side
• A narrow or weak fan
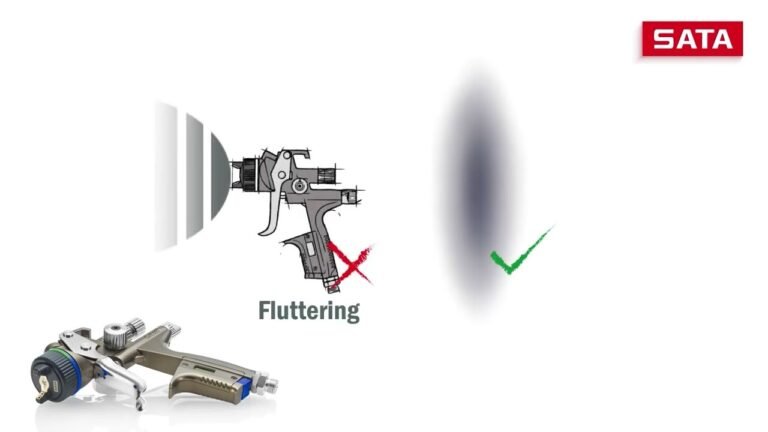
• Paint droplets that spit or pulse
• Dry spray around the edges
• Uneven color or gloss on the surface
Think of the spray pattern like a flashlight beam. If the lens is dirty, the beam becomes weak or distorted. In the same way, a dirty air cap or worn nozzle can bend the spray pattern.
Before changing several settings at once, spray a test pattern on clean cardboard or masking paper. Hold the gun at the same distance you use on the workpiece. This simple test helps you separate a gun problem from a technique problem.
Why Is Your Spray Gun Irregular Spray Pattern: 7 Common Reasons & Solution
Main Causes of a Spray Gun Uneven Spray Pattern
The cause is often small, but the result can cover a large area. The most common problems involve the air cap, fluid nozzle, paint mix, air supply, or spray motion.
A blocked air cap
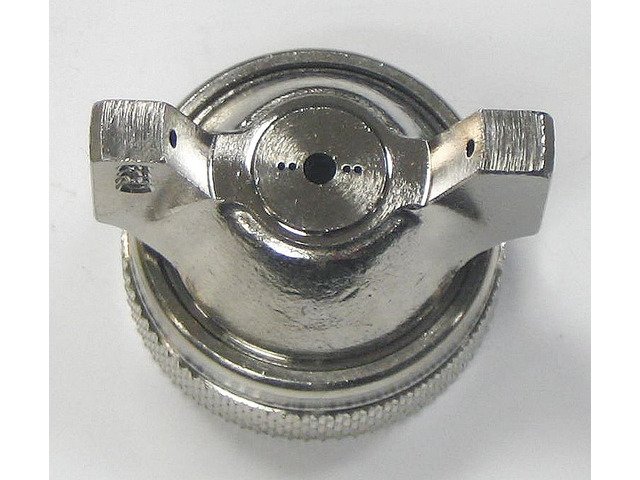
The air cap directs air around the fluid nozzle. Its small holes help shape the fan. Even a small amount of dried paint can block one or more holes.
When this happens, the spray may lean to one side, form a heavy edge, or produce a narrow fan. This is one of the first areas I check because it is quick to inspect and often solves the issue.
A dirty fluid nozzle
The fluid nozzle controls the path of the coating as it leaves the gun. Paint residue around the nozzle can disturb the fluid stream and create an uneven spray gun pattern.
A dirty nozzle may also cause spitting. Never use a metal pick to force material out of the nozzle. A sharp tool can damage the opening and permanently change the spray pattern.
Incorrect fluid or air pressure
Too little air may produce large droplets and a weak fan. Too much air can create dry spray, overspray, or a pattern that breaks apart before it reaches the surface.
Fluid pressure also matters. If the pressure is too low, the coating may not atomize well. If it is too high, the gun may release too much material and create runs or a heavy center.
Always follow the pressure range in the spray gun manual. Pressure readings can vary depending on whether you measure them at the regulator, inlet, or while the trigger is pulled.
Paint that is too thick
Thick paint does not break into fine droplets easily. It may come out in a heavy stream or create a weak, uneven fan.
Use the reducer or thinner recommended for the product. Do not guess based only on how the paint looks in the cup. Temperature, humidity, coating type, and nozzle size all affect viscosity.
Poor paint mixing
Some coatings settle quickly. If the paint is not mixed well, the first part of the job may have a different color or texture than the last part.
Strain the coating before it enters the cup. A clean paint filter can catch lumps, skin, or dried material that would otherwise reach the nozzle.
Low air volume from the compressor
A compressor may show enough pressure while the gun is idle but lose pressure when spraying. This drop can create a spray gun uneven spray pattern, especially during long passes.
Check the compressor’s air delivery rating, often listed as cubic feet per minute. Compare it with the gun’s air demand. A small compressor may work for short bursts but struggle during continuous spraying.
A loose or damaged nozzle
The fluid nozzle must sit correctly against the gun body. If it is loose, dirty, or cross-threaded, air can enter the fluid path and cause sputtering.
Inspect the nozzle, needle, and sealing surfaces. Replace damaged parts rather than trying to repair them with excess force or sealant.
How to Read the Test Pattern
The test pattern can point you toward the faulty part. Use clean test paper and make one short spray pass. Keep the gun square to the paper and hold it at the proper distance.
Here are common pattern clues:
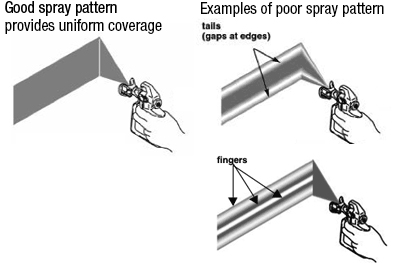
• Heavy center: The fluid output may be too high, the air pressure may be too low, or the nozzle may be worn.
• Heavy top or bottom: The air cap may be dirty, blocked, or damaged.
• Heavy left or right side: One side of the air cap may be blocked, or the cap may not be seated correctly.
• Round pattern: The fan control may be closed, the air cap may be wrong, or the gun may not support a wide fan.
• Spitting pattern: The cup may be low, the nozzle may be loose, the needle may be sticking, or the paint may contain debris.
• Dry outer edges: Air pressure may be too high, the coating may dry too fast, or the gun may be held too far away.
A healthy fan often has a soft, balanced oval shape. It should not look like a solid bar in the center or a pair of dark stripes at the edges.
Check the fan with the gun unloaded
If you suspect an air cap problem, remove the fluid from the cup and test the air pattern according to the manufacturer’s instructions. This can help show whether the air holes are working evenly.
Do not spray unknown liquids into the air. Use the correct cleaning fluid and wear suitable eye, skin, and breathing protection.
Step by Step: How to Fix an Uneven Spray Pattern
Use a calm, repeatable process. Random adjustments often make the problem harder to find.
1. Stop spraying and protect the work area
Move the gun away from the project. Keep the area ventilated, remove ignition sources, and use the personal protective equipment listed for the coating.
Many paints and solvents can harm the lungs, skin, and eyes. Follow the safety data sheet for the product. A proper respirator must match the coating and local safety rules.
2. Check the paint cup
Look for low fluid level, dried paint, skin, or debris. Confirm that the cup vent is open and clean. A blocked vent can stop fluid flow and cause pulsing.
If the paint is thick, mix it only with the correct reducer. Add small amounts and test the viscosity as recommended by the coating maker.
3. Clean the air cap
Remove the air cap as directed by the manual. Soak it only in a cleaner that is safe for its material.
Use a soft brush to clean the holes. Blow clean air through the cap if the manufacturer allows it. Never scrape the holes with a drill bit, needle, or wire.
4. Clean the fluid nozzle and needle
Flush the gun with the approved cleaning solution. Remove the nozzle and needle with the correct tools. Wipe them gently and inspect them under good light.
Look for:
• Dried paint
• Nicks or dents
• A bent needle
• Wear around the nozzle opening
• A damaged gasket
Even a small defect can affect atomization.
5. Inspect the air hose and fittings
A leaking fitting can reduce air volume. A long, narrow, or damaged hose can also limit flow.
Apply the correct leak-check method for your equipment. Do not use open flames to find air leaks. Replace cracked hoses and worn fittings.
6. Set the pressure correctly
Set the regulator while the gun is triggered if the manual gives a dynamic pressure value. This shows the pressure available during actual spraying.
Make one change at a time. Start within the manufacturer’s recommended range, then make small adjustments.
7. Test the pattern again
Spray onto test paper. Keep the gun at a right angle to the surface. If the pattern is still uneven, check the nozzle and air cap for wear or damage.
If cleaning and correct settings do not help, a replacement fluid set may be needed.
Adjusting Spray Technique
Not every spray gun uneven spray pattern comes from a mechanical fault. Your hand position and movement can change the result just as much as a dirty nozzle.
Hold the gun at a right angle to the surface. Keep the distance steady throughout the pass. Moving in an arc makes the ends of the stroke farther away, which can cause dry edges and uneven coverage.
Move your arm, not only your wrist. Start moving before pulling the trigger, then release the trigger just before stopping the arm. This reduces heavy spots at the beginning and end of each pass.
Keep a steady speed. Moving too slowly puts down too much material. Moving too quickly creates thin, dry coverage.
Use the overlap recommended for the coating and gun. Many jobs use about 50 percent overlap, but the correct amount depends on the product, fan width, and surface.
From my own shop experience, the most common mistake is chasing a bad pattern with wrist movement. The operator keeps changing speed and angle, hoping to smooth the finish. It is better to fix the pattern first, then use steady passes.
Choosing the Correct Nozzle and Air Cap
The fluid nozzle controls how much material can pass through the gun. A larger nozzle may suit thick coatings, while a smaller nozzle may suit thin finishes.
Using the wrong nozzle can cause several problems:
• Too small: The coating may struggle to pass through, causing poor flow and dry spray.
• Too large: The gun may release too much material, creating runs and a heavy center.
• Worn: The opening may no longer produce a balanced spray.
• Mismatched: The air cap and fluid set may not work as designed.
Check the coating label and spray gun manual before selecting a setup. Automotive clear coats, primers, latex paint, stains, and industrial coatings can require different nozzle sizes and pressure ranges.
A worn fluid set is not always easy to spot. If the gun has been cleaned with sharp tools or used for a long time, replacement may be more reliable than repeated adjustment.
Cleaning and Maintenance Tips
Good maintenance prevents many spray pattern problems. Clean the gun soon after use, before the coating dries inside the passages.
A basic maintenance routine includes:
• Empty the cup and return unused material to the correct container.
• Flush the fluid path with the approved cleaner.
• Remove and clean the air cap and nozzle.
• Wipe the needle without bending it.
• Check seals and gaskets for damage.
• Lubricate only the parts and products listed in the manual.
• Store the gun in a clean, dry place.
Do not leave the spray gun soaking for hours unless the manufacturer says it is safe. Some solvents can damage seals, plastic parts, or protective finishes.
Do not place the full gun in a parts washer without checking the manual. A quick cleaning routine after each use is safer than aggressive cleaning after the paint has hardened.
One lesson I learned early is that “clean enough” is not the same as clean. A cap may look clear but still have a partly blocked hole. Good light, a soft brush, and a careful test pattern save time later.
How Temperature and Humidity Affect Spray Quality
Weather can change how a coating sprays. Warm conditions may cause the material to dry before it reaches the surface. This can create rough texture and dry edges.
Cold conditions can make the coating thicker. High humidity may slow drying or affect certain coatings. Condensation in the air line can also contaminate the finish.
For consistent results:
• Follow the product’s temperature range.
• Avoid spraying on a cold surface.
• Use a moisture separator where appropriate.
• Drain the compressor tank as directed.
• Keep the paint and work area at a stable temperature.
• Test the coating before spraying the final surface.
Environmental control has limits. A perfect gun cannot overcome a coating that is outside its recommended conditions.
Mistakes That Make the Problem Worse
Some repair attempts can damage the gun or hide the real cause.
Avoid these common mistakes:
• Increasing pressure sharply without checking the paint mix
• Using a needle or drill bit to clean air cap holes
• Mixing incompatible cleaners
• Adjusting fluid, fan, and air controls at the same time
• Spraying without a test pattern
• Using a damaged nozzle because it “still works”
• Holding the gun at an angle
• Ignoring compressor pressure loss
• Continuing to spray after the pattern starts pulsing
Keep a small record of your settings. Write down the nozzle size, pressure, reducer, temperature, and coating. This turns future setup into a repeatable process instead of guesswork.
When to Replace Parts or Get Professional Help
Cleaning usually fixes a spray gun uneven spray pattern caused by residue. It will not fix a bent needle, damaged nozzle, cracked air cap, or worn seal.
Consider replacing parts when:
• The pattern stays uneven after careful cleaning.
• The gun spits with clean, correctly mixed material.
• The air cap holes are damaged.
• The nozzle has dents or visible wear.
• The needle does not move smoothly.
• Fluid leaks around the nozzle or packing area.
Seek professional help if the gun uses high pressure, the coating is hazardous, or you cannot identify the fault safely. Some industrial and automotive coatings require specialized ventilation and respiratory protection.
Manufacturer manuals are the best reference for part compatibility, pressure settings, cleaning chemicals, and service procedures. General advice cannot replace the instructions for your specific model.
Benefits of a Properly Balanced Spray Pattern
Fixing the spray pattern does more than improve appearance. It also improves control and reduces wasted material.
A balanced pattern can provide:
• More even film thickness
• Better color and gloss consistency
• Fewer runs and dry spots
• Less sanding and rework
• Lower material waste
• Faster coverage
• More predictable results
For professional work, even film thickness can affect durability and performance. Too little material may reduce protection. Too much may cause sagging, slow drying, solvent pop, or other coating defects.
A good pattern is not the only factor. Surface preparation, product choice, mixing, temperature, curing time, and technique all matter. The spray gun is one part of the full finishing system.
Frequently Asked Questions About Spray Gun Uneven Spray Pattern
Why is my spray gun spraying more paint on one side?
A blocked air cap hole is the most common cause. Clean the air cap carefully, check that it is seated correctly, and test the gun again.
Why does my spray gun have a heavy center pattern?
A heavy center may result from low air pressure, excessive fluid flow, thick paint, or a worn fluid nozzle. Check the paint mix and settings before replacing parts.
Can dirty air cap holes cause an uneven spray pattern?
Yes. Blocked air cap holes change the air balance around the fluid nozzle. This can make the fan heavy on one side or create dark edges.
Why does my spray gun spit instead of spraying evenly?
Spitting can come from a low cup level, blocked cup vent, loose nozzle, damaged needle, dirty fluid passage, or paint debris. Clean the gun, strain the coating, and inspect the seals and nozzle.
How far should I hold a spray gun from the surface?
The correct distance depends on the gun and coating, but many setups work within a moderate hand-span range. Follow the gun and paint instructions, then keep that distance steady during each pass.
Does higher air pressure fix an uneven spray pattern?
Not always. Higher pressure may create more overspray and dry spray while failing to fix a blocked cap or damaged nozzle. Find the cause first, then adjust pressure in small steps.
Conclusion
A spray gun uneven spray pattern usually points to a blocked air cap, dirty nozzle, poor paint mix, weak air supply, worn parts, or unsteady technique.
Start with a test pattern, clean the gun safely, check the pressure under load, and change only one setting at a time.
A few careful minutes of inspection can prevent hours of sanding and repainting. Use the correct cleaner, follow the product instructions, and practice on test paper before spraying the final surface.
If this guide helped, explore more spray finishing resources or share your own repair tips in the comments.