
How To Fix Spray Gun Splattering: Fixes For A Smooth Finish
Spray gun splattering usually comes from poor fluid flow, low air pressure, dirty parts, or paint that is too thick. Spray gun splattering can turn a smooth finish into a rough, uneven mess in seconds.
I have seen this problem appear even with a good gun and fresh paint, because small setup errors can create large spray defects. This guide explains why spray gun splattering happens, how to diagnose it, and how to prevent it with simple, proven steps.
What Is Spray Gun Splattering?
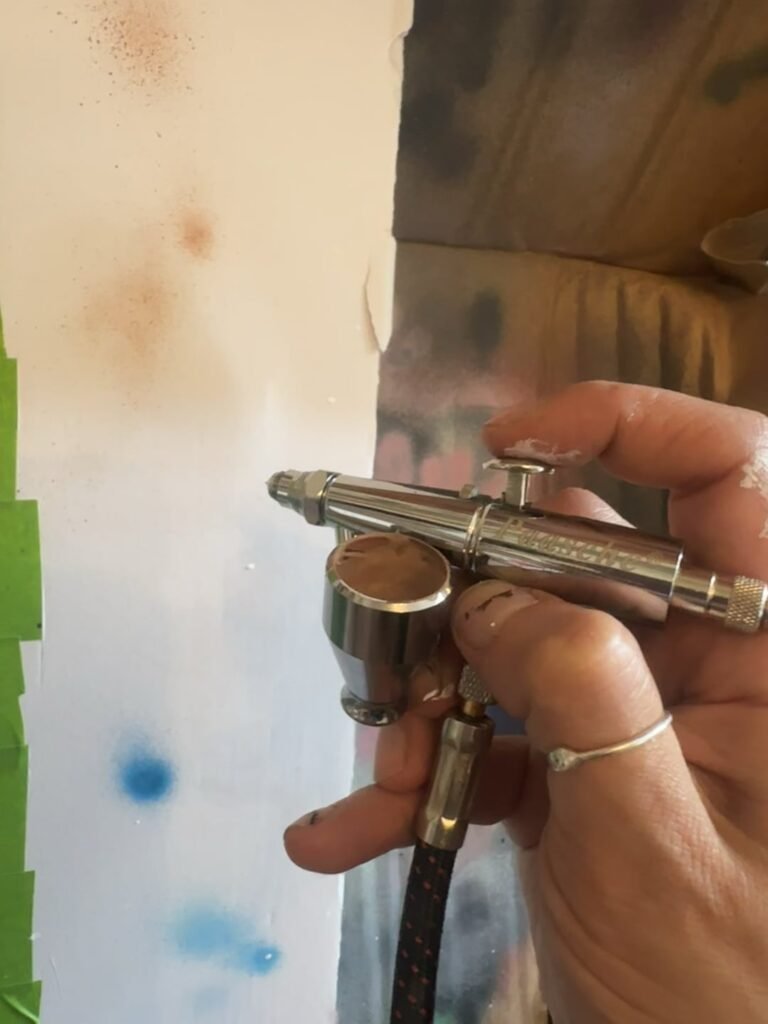
Spray gun splattering happens when a spray gun releases large drops, uneven bursts, or broken streams instead of a fine, steady spray pattern. The result may look like dots, dry patches, orange peel, runs, or rough areas on the surface.
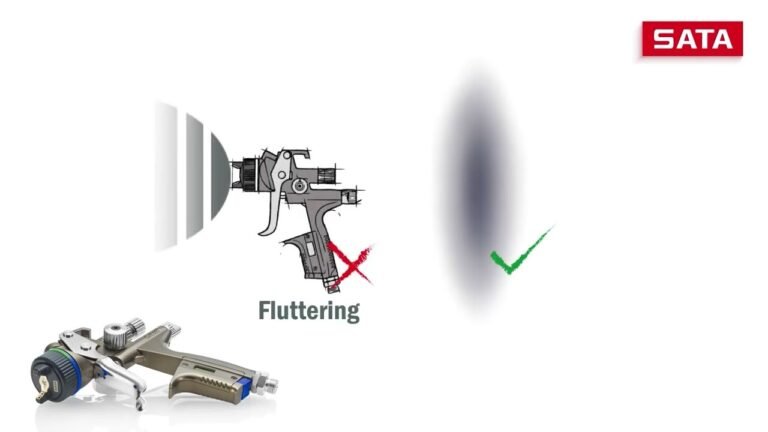
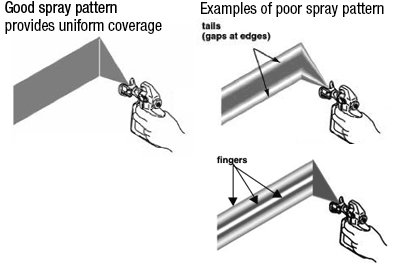
A properly adjusted spray gun should create a soft, even fan. Paint should leave the nozzle as a fine mist. When the fluid breaks into heavy droplets, the gun is not atomizing the coating well.
Spray gun splattering may affect:
• Automotive paint
• Furniture coatings
• House paint
• Cabinet lacquer
• Enamel
• Primer
• Clear coat
• Stain and sealer
The problem can come from the gun, the coating, the air supply, or the way you spray. Finding the real cause is more useful than simply raising the pressure.
Spray Gun Troubleshooting: Quick Fixes for Spits, Sputters, and Uneven Sprays
Common Causes of Spray Gun Splattering
Dirty or blocked spray gun parts
Dried paint on the nozzle, air cap, fluid tip, or needle can disturb the paint stream. Even a small amount of residue may change the spray pattern.
Paint can also collect inside the air holes on the cap. These holes help shape the fan. If one is blocked, the air flow becomes uneven and spray gun splattering may begin.
Clean the following parts after each use:
• Air cap
• Fluid nozzle
• Fluid needle
• Paint cup
• Fluid passage
• Seals and filters
Use the cleaner recommended for your coating. Do not use a sharp metal tool to open air holes. A metal pick can damage the cap and create permanent spray problems.
Paint that is too thick
Thick paint cannot break into fine droplets with ease. The gun may spit, pulse, or release heavy spots.
Viscosity is the paint’s resistance to flow. A high viscosity means the material flows slowly. A low viscosity means it flows more easily.
Always follow the coating maker’s thinning instructions. Do not guess with water, solvent, or reducer. The wrong thinner can cause poor drying, weak adhesion, color changes, or spray gun splattering.
Incorrect air pressure
Low air pressure is one of the most common causes of spray gun splattering. The air does not have enough force to atomize the coating.
High pressure can also cause trouble. It may create dry spray, overspray, bounce back, and an uneven finish. More pressure is not always the answer.
Set pressure based on the gun type and the coating. Check pressure while the trigger is pulled, because static pressure can read higher than working pressure.
Loose or damaged fluid parts
A loose nozzle, worn needle, or damaged seal can allow air to enter the fluid path. This may cause bubbles, pulsing, or spray gun splattering.
Check that the fluid nozzle is seated correctly. Tighten it according to the gun maker’s instructions. Do not force it with excessive pressure, as this can damage the threads or nozzle.
Low or unstable air supply
A small compressor may not provide enough air for a high-volume low-pressure, or HVLP, spray gun. When the compressor cannot keep up, the spray pattern may change during use.
Long hoses, narrow fittings, clogged filters, and poor connectors can also reduce air flow. A pressure gauge at the compressor may not show the same pressure that reaches the gun.
Watch for these signs:
• The spray starts well but becomes rough
• The fan narrows during spraying
• The compressor runs without stopping
• The gun pulses when the trigger is held
• Spray quality changes as the air tank loses pressure
Incorrect spray distance
Holding the gun too far from the surface allows droplets to dry before they land. This often creates a rough, dusty finish.
Holding it too close can cause heavy wet spots and runs. Most spray guns work best at a steady distance set by the manufacturer, often around 6 to 10 inches.
Keep the gun square to the surface. Tilting it can make one side of the fan heavier than the other.

How to Diagnose Spray Gun Splattering
Do not change five settings at once. A slow test saves time and helps you find the true cause.
Step 1: Test the spray pattern
Spray onto clean cardboard or masking paper. Look at the shape of the fan.
A good pattern should be even from top to bottom. A heavy center may point to a fluid or air cap problem. A heavy side may suggest a blocked air hole or an uneven cap.
If the gun spits large drops, focus first on the fluid path and material thickness.
Step 2: Check the paint
Stir the coating well. Strain it through a paint filter before filling the cup. This removes lumps, skin, and dried particles.
Check the paint’s viscosity with the method listed by the coating maker. Some products require a viscosity cup. Others provide a thinning ratio.
Do not thin paint simply because spray gun splattering appears. First inspect the gun and pressure. Over-thinning can create runs and poor coverage.
Step 3: Check air pressure while spraying
Connect a reliable regulator near the gun. Pull the trigger and read the pressure while air is flowing.
If the pressure falls sharply, inspect the compressor, hose, couplers, filter, and regulator. The gun needs stable air, not just a high reading when idle.
Step 4: Inspect the nozzle and air cap
Remove the air cap and look for dried paint. Clean every opening with the correct brush or cleaning tool.
Check the nozzle for wear or damage. A worn fluid tip may produce a poor pattern even after cleaning.
Step 5: Check for leaks
Fill the cup with a small amount of approved cleaning fluid. Spray briefly and watch for air bubbles in the cup.
Bubbles can suggest a loose nozzle, damaged seal, blocked fluid passage, or poor connection. Fix the leak before changing paint settings.
The #9 Reasons Spray Gun Blowing Air: How to Fix an Air-Only Spray Gun Fast
How to Fix Spray Gun Splattering
Once you know the likely cause, use this repair order. It starts with the simplest fixes.
- Stop spraying and empty the gun.
- Clean the air cap, nozzle, needle, and fluid passage.
- Strain the coating into a clean cup.
- Confirm the paint is suitable for the gun and tip size.
- Set the fluid control to a moderate opening.
- Set the fan control to a medium width.
- Adjust air pressure to the coating and gun instructions.
- Spray a test pattern on cardboard.
- Change one setting at a time.
- Recheck the surface after each change.
If the paint is too thick, thin it in small amounts. Mix well after each addition. It is easier to add more reducer than to correct paint that has become too thin.
If spray gun splattering continues after cleaning and adjustment, replace worn parts. A damaged nozzle or needle may look fine but still fail to seal correctly.
Adjust the fluid control
Opening the fluid control too far can overload the air stream. The gun then releases more paint than it can atomize.
Start with a moderate setting. Pull the trigger fully while moving the gun at a steady speed. Increase fluid slowly until you achieve good coverage without large droplets.
Adjust the fan control
A very narrow fan can place too much paint in one small area. A very wide fan may produce thin coverage if the air and fluid settings are not balanced.
Set the fan wide enough for the job. Use a narrower pattern for edges and small parts, but keep the gun moving.
Use the correct spray technique
Move your arm before pulling the trigger. Release the trigger before stopping the arm. This keeps the coating even.
Keep the gun square to the surface. Do not swing your wrist in an arc. Overlap each pass by about half the fan width unless the coating maker gives different instructions.
A steady hand often fixes what seems like a gun problem.

Preventing Spray Gun Splattering
Prevention is easier than repair. A simple routine can protect both the finish and the spray gun.
Prepare the coating correctly
Use fresh material from a sealed container. Stir slowly to avoid adding air bubbles.
Filter the coating before it enters the cup. This step takes less than a minute and can prevent a blocked tip.
Measure thinner or reducer. Avoid adding an unknown amount by eye.
Maintain the spray gun
Clean the gun as soon as the job ends. Dried coating is much harder to remove and may damage small parts.
Use soft brushes and approved cleaning tools. Lubricate the needle or moving parts only with products approved for that gun.
Replace these parts when needed:
• Fluid needle
• Fluid nozzle
• Air cap
• Cup seal
• Needle packing
• Air valve seal
Protect the air system
Drain moisture from the compressor tank. Water in the air line can create rough spots, craters, and inconsistent spray.
Use a suitable moisture separator and filter. Keep hoses clean and inspect couplers for leaks.
In humid weather, condensation can become a bigger issue. Let the compressor and air line reach a stable condition before starting a large project.
Control the work area
Dust, cold temperatures, and strong air movement can affect the finish. Follow the coating label for temperature and humidity limits.
Use proper ventilation and wear the required respirator, gloves, eye protection, and protective clothing. Paint mist can harm your lungs and may contain solvents or other hazardous substances.
Never spray near flames, sparks, pilot lights, or poorly protected electrical equipment when using flammable coatings.

Spray Gun Settings for a Smooth Finish
There is no single pressure or tip size that works for every product. The correct setting depends on the material, gun, nozzle, surface, and environment.
Use the coating label and gun manual as your starting point. General guidance can help, but it should not replace the manufacturer’s specifications.
Tip size
A small tip suits thin materials such as stains and some finishes. A larger tip may be needed for primer, latex paint, or heavy coatings.
If the tip is too small, the gun may struggle and produce spray gun splattering. If it is too large, the gun may apply too much material.
Pressure
Use the lowest pressure that gives a clean, even pattern. This can reduce overspray and improve transfer efficiency.
If the pressure is too low, the pattern may break apart. If it is too high, the finish may become dry and rough.
Fluid flow
Increase fluid flow only when the coating is not covering well. Too much fluid can create runs, sags, and heavy centers.
Spray distance and speed
Keep a steady distance from the surface. Move at a consistent speed and overlap each pass evenly.
A slow pass applies more material. A fast pass applies less. Both can cause defects when used without adjusting the fluid and air settings.
Common Mistakes That Cause Splattering
Many spray problems come from rushed preparation rather than poor equipment.
Spraying without a test panel
A small cardboard test can reveal problems before they reach the project. Test after changing paint, thinner, pressure, tip size, or temperature.
Raising pressure too quickly
High pressure may hide a dirty tip for a moment, but it can create dry spray and waste material. Clean and inspect the gun before increasing pressure.
Using the wrong thinner
A thinner must match the coating. The wrong product may cause separation, slow drying, surface defects, or weak bonding.
Letting paint sit in the gun
Even a short pause can allow fast-drying material to collect around the tip. Flush the gun if you expect a long break.
Ignoring the compressor
A compressor that is too small may deliver poor results even when the spray gun is clean. Compare the gun’s air consumption with the compressor’s actual output.
Spraying too close
This creates wet spots and can make the finish appear to splatter. Keep the gun moving before and after each pass.
When to Replace the Spray Gun
Cleaning and adjustment solve many cases of spray gun splattering. However, replacement may be sensible when the gun has serious wear or damage.
Consider a rebuild or replacement if:
• The nozzle is damaged
• The needle will not seal
• The air cap is bent
• Threads are stripped
• Seals leak after replacement
• The pattern stays uneven after proper cleaning
• Repair parts cost nearly as much as a new gun
A quality spray gun can last for years with proper care. Low-cost guns may still work well, but their seals, machining, and replacement parts can vary. Choose equipment based on the coating, project size, and expected use.
A Practical Spray Gun Splattering Checklist
Use this checklist before changing major settings:
• Is the air cap clean?
• Is the fluid tip clean and undamaged?
• Is the needle seated correctly?
• Is the paint strained?
• Is the paint viscosity correct?
• Is the air pressure measured while spraying?
• Is the compressor large enough?
• Are the hose and fittings free of leaks?
• Is the gun the correct distance from the surface?
• Is the gun moving at a steady speed?
• Is the coating within its temperature and humidity range?
This process prevents guesswork. In my own troubleshooting, the biggest lesson has been simple: start with cleaning, then check material, then adjust air and technique. Replacing equipment should be the last step, not the first.
Frequently Asked Questions About Spray Gun Splattering
Why is my spray gun splattering paint?
The most common causes are a dirty nozzle, thick paint, low air pressure, worn parts, or an unstable air supply. Clean the gun, strain the paint, and test the pressure while pulling the trigger.
Can low pressure cause spray gun splattering?
Yes. Low pressure may not atomize the paint into a fine mist, so the gun releases large droplets or an uneven pattern. Raise pressure in small steps only after checking the gun and paint.
Does thick paint make a spray gun splatter?
Yes. Thick paint needs more force to atomize and may overload the gun. Use the correct thinner or reducer and follow the coating manufacturer’s instructions.
How do I stop a spray gun from spitting?
Clean the air cap, fluid tip, needle, and fluid passage first. Then check for loose parts, damaged seals, air leaks, and paint that contains lumps or debris.
Why does my spray gun splatter only sometimes?
Intermittent splattering often points to unstable air pressure, moisture, a loose connection, or partial blockage. It may also happen when the gun cup is nearly empty or the compressor cannot keep up.
Can the wrong nozzle size cause splattering?
Yes. A nozzle that is too small may struggle with thick coatings, while one that is too large may release too much material. Match the nozzle size to the coating and the gun manufacturer’s guidance.
Is spray gun splattering caused by bad spraying technique?
Technique can contribute to the problem. Uneven speed, poor distance, and an angled gun can create heavy spots that look like splattering, even when the equipment works correctly.
Conclusion
Spray gun splattering is usually a sign of an unbalanced setup, not a mystery. Dirty parts, thick paint, poor air flow, worn seals, incorrect pressure, and uneven technique are the main causes.
Start with a clean gun and filtered paint. Check pressure while spraying, use the correct tip, and test every adjustment on cardboard. Work safely, follow the coating instructions, and replace damaged parts when cleaning no longer solves the problem.
Use this troubleshooting process on your next project, and share your results or questions with other painters who are working toward a smoother finish.