
Spray Gun Troubleshooting: Quick Fixes for Spits, Sputters, and Uneven Sprays
A well-tuned spray gun turns paint into a fine, even coat that looks like glass. But when things go wrong, the finish can fall apart fast. Sputtering, uneven patterns, runs, or dry spray can ruin hours of prep. The good news: most spray gun issues come from a short list of causes. With a simple checklist and a calm approach, you can find the problem fast and get back to a smooth, clean finish.
How Do You Troubleshoot a Spray Gun?
Troubleshooting a spray gun is like solving a small mystery. You start with the symptom you see, match it to a likely cause, then test one fix at a time. Work from the easiest checks to the deeper ones. This method saves time, reduces waste, and protects your gear from damage.
Start With the Symptom, Not the Whole Gun
Do not take the entire gun apart right away. Focus on the exact issue: is the gun sputtering, not spraying, or making a bad pattern? Each symptom points to a short list of likely causes. This makes the fix faster and avoids new problems.
- Name the symptom in clear words. Example: “spits paint,” “pattern heavy on one side,” “no paint.”
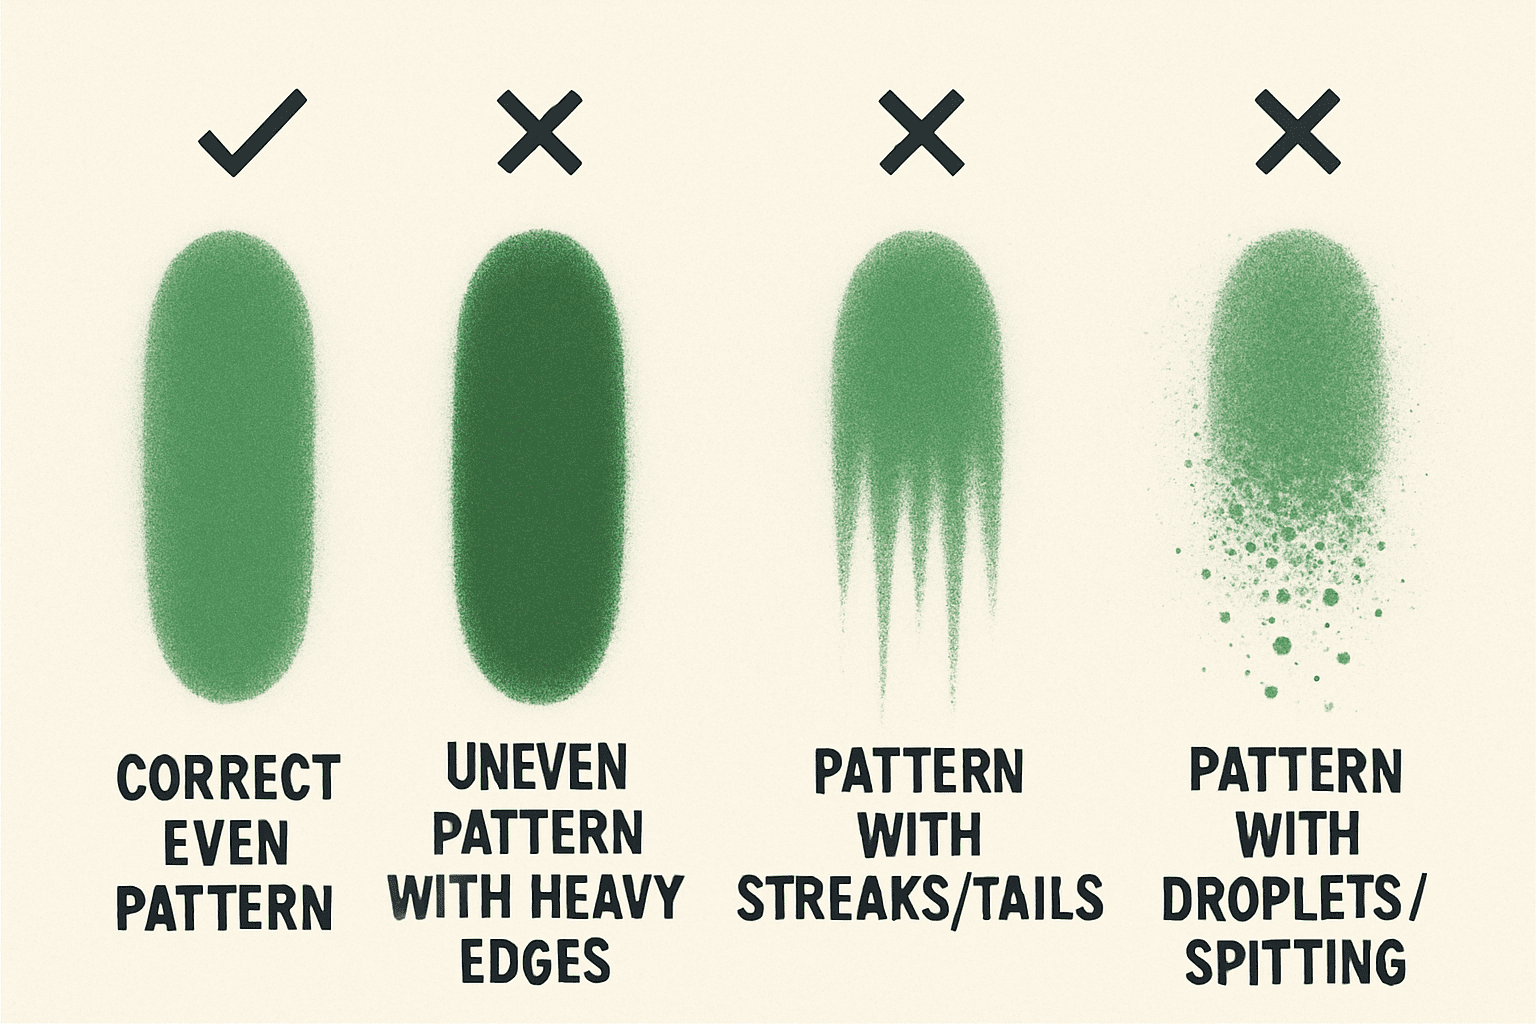
- Look at the pattern on cardboard. It tells a story about air, paint, and nozzle.
- Check the last thing you changed: paint type, tip size, pressure, or distance.
- Fix simple stuff first: pressure, mix, and cleanliness.
The Basic Spray Gun Troubleshooting Checklist
This quick checklist finds 80% of spray problems. Keep it handy near your booth or job site. It works for HVLP, LVLP, conventional, and even airless systems with small tweaks. Use it before you strip the gun down.
- Is the paint strained, mixed, and at the right thickness?
- Is the air pressure set and measured with the trigger pulled?
- Is the air cap clean? Are the horns and holes free of paint?
- Is the fluid nozzle tight and clean?
- Is the needle smooth and undamaged?
- Is the pickup tube and filter clean?
- Is the cup vent open? Is the lid seal good?
- Is the compressor CFM enough for the gun?
- Is the hose size correct? Are there leaks in fittings?
- Is the spray distance and speed correct?
The 5-Minute Spray Gun Check
This fast test can save a project. It is simple and safe if you follow basic steps. Always relieve pressure before opening parts. Then follow this order in real time.
- Spray a test fan on cardboard with the trigger fully pulled.
- Note the shape: even fan, heavy sides, center blob, or misty dry look.
- Clean the air cap with solvent and a soft brush; never poke holes with metal.
- Check the fluid nozzle tightness and clean it if needed.
- Pull the needle and inspect for bends or dried paint; clean and re-seat.
- Check pressure at the gun with the trigger pulled; set air per tech sheet.
- Strain and thin paint if needed; verify correct nozzle and needle set.
- Test spray again and adjust distance, speed, and overlap.
Why Is My Spray Gun Sputtering?
Sputtering means air mixes with paint inside the gun when it should not. It shows as random spits or a broken flow. The most common causes are thick paint, loose parts, clogs, or empty cups. Fixes are simple once you know the exact cause.

Source: co.uk
Thick or Poorly Mixed Paint
Thick paint does not flow well. It starves the fluid path and pulls air, which causes sputters. Poor mixing adds chunks and micro-bubbles. This breaks the spray into random spits.
- Stir paint well with a drill mixer or stick; scrape the bottom of the can.
- Strain paint through a fine mesh filter.
- Thin to spec using the product tech sheet.
- Keep a consistent viscosity during the job.
Partially Clogged Fluid Nozzle
A small clog at the nozzle disturbs the flow. Paint exits in pulses or spits. This can happen fast if paint starts to tack up between coats.
- Remove the nozzle and soak it in the right cleaner.
- Use soft brushes; avoid metal picks that change the orifice size.
- Inspect under good light; look for dried rings.
- Reassemble and test spray.
Dirty or Damaged Needle
A nick, bend, or dried paint on the needle can cause air to leak into the fluid path. This produces spits and a rough fan. Needle health is key to a clean pattern.
- Remove and inspect the needle; roll it on glass to check straightness.
- Clean dried paint with solvent and a lint-free rag.
- Replace if bent or scratched; do not try to “straighten” a damaged needle.
- Lightly lube the needle with gun-safe lube during reassembly.
Loose Fluid Nozzle
A loose nozzle lets air leak around the seat. Air then pushes into the paint path, and sputters start. It also risks stripping the threads.
- Tighten the nozzle per the manual; do not over-torque.
- Use the correct wrench to avoid damage.
- If it loosens often, inspect threads and seals.
Air Leaking Into the Fluid Path
Leaky seals, cracked caps, or damaged O-rings can mix air with paint. This is a common cause of random spits. It often gets worse as pressure increases.
- Inspect O-rings at the fluid nozzle and cup.
- Look for cracks in cups and lids.
- Replace worn seals; keep spares in the kit.
Low or Unstable Air Pressure
If air pressure drops while spraying, atomization fails. The gun spits chunks or heavy droplets. This also hurts transfer efficiency.
- Measure pressure at the gun with the trigger pulled.
- Check the regulator and hose for pressure drops.
- Make sure the compressor CFM meets gun specs.
Empty or Poorly Sealed Paint Cup
A near-empty cup, loose lid, or blocked vent creates vacuum issues. Paint flow surges and causes spits. Gravity or siphon cups both need proper venting.
- Fill the cup to a stable level.
- Check and clean the cup vent.
- Replace worn cup gaskets.
Why Is My Spray Gun Spitting Paint?
Spitting looks like the gun coughs out blobs. It often leaves craters and rough spots in the finish. The root is usually a dirty nozzle, bad needle, or mismatch between parts and paint. Fix the source to prevent repeat issues.
Dirty Fluid Nozzle
Dirt or dried paint reduces nozzle flow and shape control. Paint comes out in bursts. This is the top cause of spitting.
- Soak and clean the nozzle after every job.
- Never let paint dry inside the gun.
- Inspect with magnification if needed.
Damaged Fluid Needle
A scarred needle cannot seal. It lets paint weep, then spit. It also causes leaks at the nozzle.
- Replace the needle if you see wear lines or bends.
- Keep a matched needle/nozzle set on hand.
- Do not mix brands unless approved.
Loose Nozzle
If the nozzle is even a bit loose, expect spitting. Threads need to be clean and snug. Vibration can loosen parts over time.
- Remove, clean, and re-seat the nozzle.
- Tighten to spec; avoid over-tightening.
- Check again mid-project on long jobs.
Dried Paint Inside the Gun
Paint that dries in fluid passages breaks loose later. It then spits out as chunks. This ruins clean coats and clogs filters.
- Disassemble and flush the gun fully.
- Clean the fluid passage, nozzle, and needle.
- Always clean right after use.
Paint That Is Too Thick
Thick paint strains the system and produces bursts. It cannot atomize well. The result is spit and poor blend lines.
- Thin paint to the tech data sheet.
- Test on cardboard until the fan is even.
- Use a larger nozzle if needed.
Incorrect Needle-to-Nozzle Combination
Needle and nozzle must match size. A mismatch causes gaps or tight spots. Both can create spitting and air leaks.
- Use factory-matched sets.
- Verify sizes stamped on parts.
- Do not mix worn parts with new ones.
Master Spray Gun Techniques: 15 Techniques For A Smoother, More Professional Finish
Why Is My Spray Gun Not Spraying Paint?
No paint flow means a block, a closed control, or no supply. The fix is usually simple. Work in a clean space and test with the trigger pulled.
Fluid Control Knob Is Closed
This happens often after cleaning or storage. The gun will blow air but no paint. It is a quick fix.
- Open the fluid control 1 to 1.5 turns to start.
- Test spray and adjust to taste.
- Mark your usual setting for next time.
Clogged Fluid Nozzle
A clogged nozzle stops flow. The gun may hiss air only. This shows up after long breaks or use of fast-drying coatings.
- Remove and soak the nozzle.
- Clean with soft tools only.
- Strain paint and test again.
Clogged Pickup Tube or Filter
If a tube or filter is blocked, paint will not reach the nozzle. The gun may sputter, then stop. This is easy to miss inside the cup.
- Pull the pickup tube and clean it.
- Replace inline or cup filters as needed.
- Avoid thick strainers that choke flow.
Paint Is Too Thick
Thick paint will not flow at low pressure. It needs thinning or a bigger tip. If the gun is starved, no paint comes out.
- Thin to the right viscosity.
- Use the proper nozzle size for the product.
- Keep paint warm if allowed by the product.
Blocked Paint Passage
Dried paint can lock inside the body. Even with clean nozzle and tube, no paint flows. Full cleaning is needed.
- Strip and soak the gun body in the right solvent.
- Use brush sets for internal passages.
- Lubricate seals and reassemble.
Incorrect Nozzle Size
A tiny nozzle will not pass thick paint. It makes the gun seem “dead.” This is common with primers and heavy build coats.
- Check the product’s tip size chart.
- Swap to a larger nozzle and matching needle.
- Test on cardboard for atomization.
Damaged Needle
A bent or seated needle can jam. The trigger moves, but the needle does not lift. Paint stays off.
- Remove and inspect the needle.
- Replace if worn or bent.
- Check the spring and packing while inside.
Cup Vent Is Blocked
A blocked vent stops paint flow from gravity or siphon cups. It builds vacuum in the cup. Flow falls to zero.
- Clear the vent hole in the lid.
- Clean and dry the vent filter if present.
- Inspect the cup gasket seal.
Decoding Spray Gun Nozzles: Sizes, Types, and How to Choose the Right Nozzle
Why Is My Spray Gun Not Spraying Evenly?
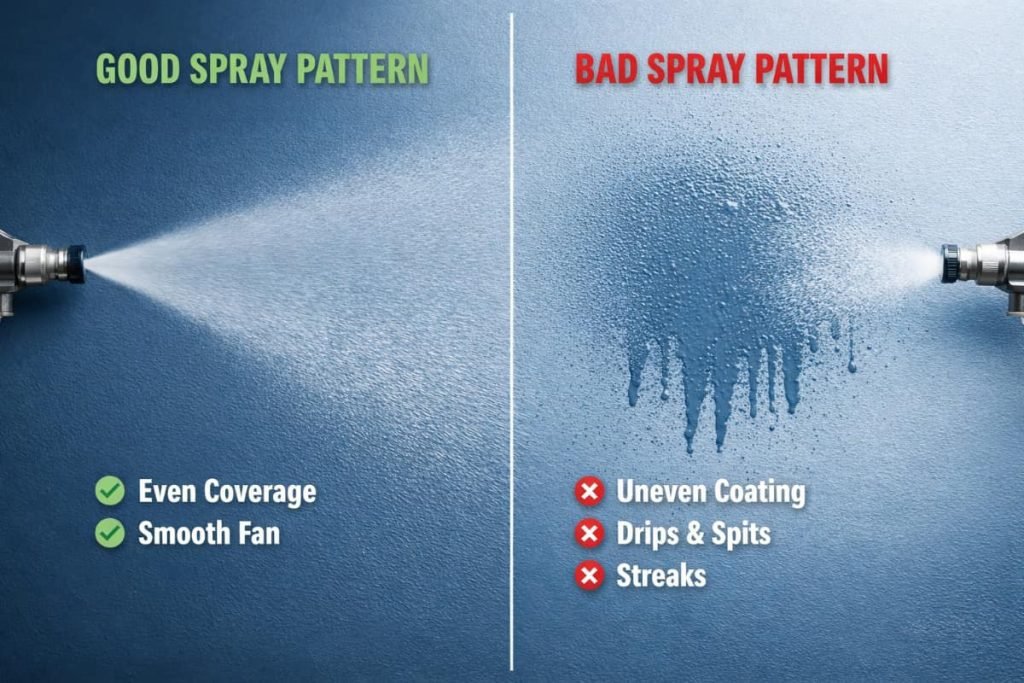
An uneven spray gives patchy or stripy results. You may see heavy edges or a thick center. Causes include dirty caps, wrong pressure, or bad technique. A fast test on cardboard will show the pattern flaw.
Uneven Spray Pattern
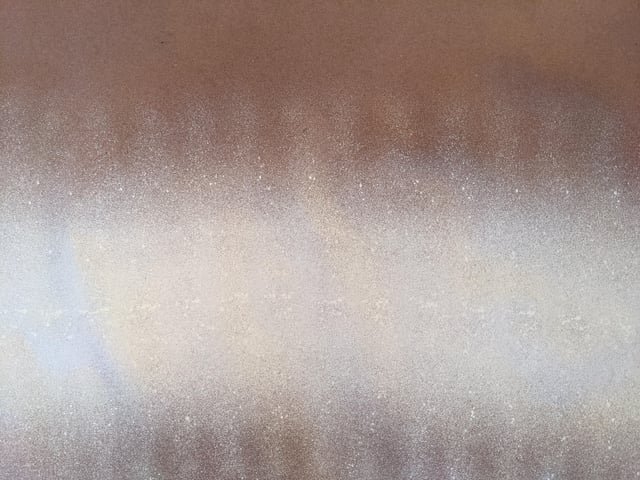
A healthy fan looks even, with soft edges. If one side is heavy, the cap or port is blocked. Adjust, clean, and test until the fan is balanced.
- Spray a 1-second burst on cardboard.
- Study the fan shape and density.
- Match the flaw to the cap or nozzle issue.
Dirty Air Cap
Paint on the cap blocks air holes. That makes one side heavy. It can also twist the fan.
- Remove the cap and soak it.
- Clean gently with soft brushes.
- Never use needles or wire on the holes.
Incorrect Air Pressure
Low pressure makes big droplets. High pressure over-atomizes the paint. Both cause uneven coats.
- Set pressure with the trigger pulled.
- Follow the gun spec and product sheet.
- Adjust in small steps until the fan looks right.
Wrong Paint Viscosity
Paint that is too thick lays heavy. Thin paint drifts and gets dry edges. Match the product to the tip and pressure.
- Thin or thicken per the tech sheet.
- Keep temp and humidity in mind.
- Use a viscosity cup or simple test sticks.
Incorrect Spray Distance
Spraying too close gives a narrow heavy band. Too far causes a dusty, weak coat. Distance is key to even results.
- Aim for 6–8 inches for many HVLP guns.
- Follow the product and gun manual.
- Keep the gun square to the surface.
Moving the Gun Too Slowly
Slow passes flood the center and sag. You also get heavy overlaps. This leaves a blotchy finish.
- Increase your speed slightly.
- Reduce fluid or narrow the fan if needed.
- Practice on cardboard to set rhythm.
Moving the Gun Too Quickly
Fast passes starve the surface. You get stripes and light spots. Coverage looks thin and spotty.
- Slow down a bit and watch the wet edge.
- Increase fluid or reduce distance as needed.
- Keep overlap at 50% for full coverage.
Why Is My Spray Gun Spray Pattern Uneven?
Pattern flaws point you to the exact blockage or setting issue. Read the fan like a map. Then fix the match: air path, fluid path, or technique.
Spray Pattern Heavy on One Side
This means an air cap horn hole is blocked on the light side. Air pushes paint to the heavy side. Cleaning fixes this fast.
- Remove and clean the air cap.
- Check horn holes and side ports.
- Re-test and adjust fan control.
Spray Pattern Heavy in the Center
Too much fluid or too little air makes a center-heavy fan. Droplets are big and pile up.
- Increase air pressure slightly.
- Reduce fluid flow a bit.
- Thin paint or use a smaller nozzle if needed.
Spray Pattern Heavy on Both Ends
This is an over-atomized fan. The edges look strong, and the center is weak. High pressure or thin paint is to blame.
- Lower air pressure slightly.
- Thicken the paint or reduce reducer.
- Move closer if you were too far away.
Split or Broken Spray Pattern
This looks like missing chunks in the fan. Dried paint or a damaged nozzle often causes it.
- Clean the air cap and nozzle.
- Check for cracks or chips.
- Replace worn parts if needed.
Round Spray Pattern Instead of a Fan
Your fan control may be closed or the air horns are blocked. You get a round spot.
- Open the fan control.
- Clean horn holes.
- Verify the air cap type and assembly.
How to Test a Spray Pattern on Cardboard
A pattern test takes seconds and guides your next step. It reduces guesswork and waste. Do this before you touch the surface.
- Hold the gun at normal distance and angle.
- Pull the trigger for a quick burst.
- Study the shape: even fan, heavy side, or dry edge.
- Adjust pressure, fan, and fluid based on the result.
Why Is My Spray Gun Spraying Too Much Paint?
Too much paint builds runs, sags, and heavy texture. The cause is usually an open fluid control, thin paint, or a large tip. Air and distance play a role too.
Fluid Control Is Too Far Open
If the fluid needle is wide open, too much paint flows. You flood the surface fast.
- Close the fluid control slightly.
- Add a bit more air if atomization suffers.
- Balance until the fan lays smooth and even.
Paint Is Too Thin
Thin paint pours through the nozzle. It hits hard and runs. Overspray also increases.
- Reduce thinner or add retarder only as needed.
- Match nozzle size to the product.
- Re-test on cardboard.
Nozzle Is Too Large
A large tip dumps paint. This is great for primer, not for thin finish coats.
- Swap to a smaller nozzle and needle.
- Verify the product’s tip size chart.
- Adjust air and fluid after swapping.
Spray Gun Is Too Close to the Surface
Close distance means wet, narrow bands. It also increases the chance of runs.
- Step back to the recommended distance.
- Keep the gun square to the surface.
- Watch the wet edge for balance.
Gun Is Moving Too Slowly
Slow passes load up paint. You will see sags and heavy lapping.
- Increase your pass speed.
- Close fluid control a touch.
- Aim for consistent rhythm across panels.
Air Pressure Is Too Low
Low air cannot atomize paint. Drops are big and hit heavy.
- Raise pressure in small steps.
- Verify with the trigger pulled.
- Retest pattern after each change.
Spray Gun Settings: How to Adjust Pressure, Fluid, Air & Spray Pattern
Why Is My Spray Gun Spraying Too Little Paint?
Too little paint brings dusty coats and banding. Causes include closed fluid control, thick paint, or a small nozzle. Other times, high air pressure starves the fan.
Fluid Control Is Too Restricted
If the fluid is nearly closed, the fan looks dry. Coverage is weak.
- Open the fluid knob 1/4 turn at a time.
- Watch for an even wet edge.
- Adjust fan width to match part size.
Paint Is Too Thick
Thick paint barely flows. The fan looks patchy.
- Thin to spec and strain again.
- Warm the paint if allowed.
- Use a larger nozzle.
Nozzle Is Too Small
A tiny or worn tip starves flow. Heavy coatings need bigger orifices.
- Check the product’s tip chart.
- Install a larger size with matching needle.
- Retest at proper pressure.
Air Pressure Is Too High
Too much air breaks the fan into dust. Paint dries mid-air.
- Lower pressure in small steps.
- Move closer if you were far away.
- Watch for smooth, glassy flow.
Partial Nozzle Blockage
A small clog limits flow. The fan shows thin bands.
- Clean the nozzle and air cap.
- Check filters and strainers.
- Re-test pattern.
Poor Paint Flow From the Cup
A blocked vent or loose pickup tube starves the gun. Flow drops mid-pass.
- Clear the cup vent and check gaskets.
- Seat the pickup tube fully.
- Keep paint level above the pickup.
How Do You Fix Orange Peel With a Spray Gun?
Orange peel shows as a pebbled texture. It comes from poor leveling before the paint dries. Causes include thick paint, low air, or wrong distance. Fix the root and watch the finish smooth out.
Paint Viscosity and Orange Peel
Thick paint will not level. It holds texture and sets. This is the top cause.
- Thin the paint to the maker’s spec.
- Use proper reducers or water and retarder as listed.
- Keep temp and humidity in the safe zone.
Air Pressure and Atomization
Low pressure makes large droplets. They land rough and stay rough.
- Raise air pressure slightly.
- Balance atomization with fluid flow.
- Retest on cardboard after each tweak.
Spray Distance
Too far means dry droplets. They cannot flow into a smooth coat.
- Move closer within spec.
- Keep the gun square to the panel.
- Watch the wet edge form evenly.
Nozzle Size
A small nozzle can choke flow. The paint arrives too thick to level.
- Use the recommended tip for your product.
- Thin paint if you must stay with a small nozzle.
- Rebalance pressure and fluid.
Paint Drying Too Quickly
Fast drying freezes the texture in place. Hot, dry air makes it worse.
- Add retarder if allowed.
- Lower booth temp and avoid direct heat.
- Shorten flash times only if safe.
How to Reduce Orange Peel on Cabinets and Furniture
Flat panels show orange peel fast. Small changes help a lot here. Keep your process tight.
- Use a test board to lock in pressure and fluid.
- Keep passes parallel and overlaps at 50%.
- Aim for a steady, glossy wet coat without runs.
- Sand nibs between coats with fine paper and tack rag.
Spray Gun Types: A Complete Guide to 9 Different Paint Sprayers
How Do You Fix Runs and Drips With a Spray Gun?
Runs happen when too much paint lands too fast. Causes include open fluid, close distance, or slow passes. Fix the control and adjust your rhythm.
Too Much Fluid
A wide-open fluid control floods panels. It is a common error after cleaning.
- Close the fluid knob slightly.
- Raise air a little if atomization falls.
- Re-test on cardboard.
Spraying Too Close
Close distance puts a heavy band on the surface. You get instant sags.
- Step back to normal distance.
- Keep the gun square, not angled.
- Watch reflection to see film build.
Moving Too Slowly
Slow hands leave deep wet tracks. They drip under gravity.
- Speed up the pass a bit.
- Narrow the fan for tight areas.
- Keep overlap at 50%.
Excessive Overlap
Too much overlap doubles the film. Inside curves and corners catch extra paint.
- Use consistent 50% overlap.
- Reduce fan width for edges and tight spaces.
- Feather the trigger at starts and ends.
Spraying Vertical Surfaces
Gravity pulls wet paint down. Technique must adjust for this.
- Use lighter coats and faster passes.
- Increase flash time between coats.
- Work top to bottom and watch for sags.
How to Repair a Dried Paint Run
A dry run looks bad but is fixable. Take it slow and protect the area around it.
- Let it cure fully per the product sheet.
- Level it with a razor blade or hard block and fine paper.
- Sand smooth, then polish or re-coat as needed.
How Do You Fix Dry Spray With a Spray Gun?
Dry spray feels dusty and rough. It comes from paint drying in the air. Distance, pressure, and climate all matter. You can fix it with a few tweaks.
Spray Gun Too Far Away
Paint dries before landing. The fan loses gloss.
- Move the gun closer within spec.
- Keep passes parallel to the surface.
- Watch for a smooth wet edge.
Excessive Air Pressure
High pressure shatters droplets and speeds evaporation.
- Lower air pressure in small steps.
- Reduce fan width if needed.
- Re-test the pattern.
Fast-Drying Paint
Some coatings flash quick on hot days. They need help to flow.
- Add retarder if listed by the maker.
- Use the right reducer speed for the climate.
- Avoid heavy airflow across the work.
Hot or Dry Conditions
Heat and low humidity pull solvents out fast.
- Spray in cooler hours or control booth climate.
- Increase flash only if the coat still levels.
- Keep the gun distance tight.
Incorrect Paint Thinning
Too thin and it dries mid-air. Too thick and you chase other issues.
- Follow the tech sheet for ratios.
- Strain and test before coating the job.
- Adjust only in small amounts.
Overspray Landing on the Surface
Clouds of overspray can settle and feel dusty.
- Reduce pressure to limit bounce-back.
- Improve masking and containment.
- Spray with planned airflow away from panels.
Why Is My Spray Gun Making a Rough Finish?
A rough finish can come from poor atomization, dust, or overspray. The texture feels sandy or sharp. Fix the root cause to restore a smooth film.
Poor Atomization
Big droplets land rough. They do not level.
- Raise air pressure slightly.
- Thin paint or use a larger tip if allowed.
- Verify distance and speed.
Paint Too Thick
Thick paint holds peaks. It will not flow.
- Thin to spec and strain.
- Keep paint at room temp.
- Use the right nozzle.
Excessive Overspray
Overspray dries on contact and adds grit.
- Lower pressure and narrow the fan.
- Improve containment and aim.
- Spray closer within spec.
Dust on the Surface
Dust shows through every coat. It ruins gloss and feel.
- Wipe with a tack cloth before each coat.
- Keep the area clean and ventilated.
- Wear clean clothing and a cap.
Incorrect Spray Technique
Arcing or uneven speed creates streaks and rough edges.
- Keep the gun square and distance steady.
- Move in straight lines with 50% overlap.
- Pull the trigger after movement starts, and release before stopping.
Paint Drying Before It Levels
Fast flash holds texture. The finish locks rough.
- Use slower reducer or add retarder.
- Reduce booth heat or airflow.
- Apply slightly wetter coats without flooding.
Why Is My Spray Gun Clogging?
Clogs appear when paint dries in the path or debris enters the gun. You may see pattern issues and pressure spikes. Good prep and cleaning prevent most clogs.
Dried Paint in the Nozzle
If paint sits in the nozzle, it bakes on. That narrows flow.
- Clean right after spraying.
- Soak tips in proper solvent only.
- Use soft picks designed for spray tips.
Dried Paint in the Air Cap
Cap buildup blocks air. It makes odd patterns and spits.
- Soak the cap and brush it clean.
- Never scrape with hard tools.
- Inspect horns and side ports.
Clogged Paint Filter
Filters trap trash. When full, they choke paint flow.
- Replace or clean filters often.
- Do not omit filters; they save nozzles.
- Use strainers at the cup and the gun.
Thick Paint or Coating
Heavy materials clog small tips fast.
- Use the right nozzle size.
- Thin to spec and keep paint warm if allowed.
- Work in shorter sessions to avoid drying.
Unfiltered Paint
Chunks and skins go straight to the gun. Clogs follow soon.
- Strain all paint before use.
- Cover cups between coats to stop skinning.
- Use fine mesh for clear coats and lacquers.
Paint Left Sitting in the Gun
Idle time lets paint dry in passages.
- Flush the gun during long breaks.
- Keep a small solvent load in the gun if allowed.
- Clean fully after each session.
Why Is My Spray Gun Leaking Paint?
Leaks waste paint and damage finishes. They also make cleanup harder. Find the leak point, then fix or replace the seal.
Paint Leaking From the Nozzle
This is often a bad needle seat or dried paint. Paint dribbles after you release the trigger.
- Clean the needle and nozzle.
- Replace worn needle/nozzle sets.
- Check spring tension and packing.
Paint Leaking From the Needle Packing
Packing seals the needle shaft. If it is loose or worn, paint seeps out.
- Tighten packing gently until leak stops.
- Replace packing if still leaking.
- Lubricate the needle with gun-safe lube.
Paint Leaking From the Cup
A torn gasket or cracked lid lets paint out. Movement and vibration can make it worse.
- Replace the cup gasket or lid.
- Check the vent and threads.
- Do not overfill the cup.
Damaged O-Rings and Seals
Time, solvents, and wear break seals down. Small leaks follow.
- Inspect all O-rings during cleaning.
- Use solvent-safe replacements from the maker.
- Keep spares in your kit.
Loose Fluid Nozzle
A loose nozzle weeps paint. It also sucks in air and spits.
- Tighten to spec with the right tool.
- Inspect threads and seats for damage.
- Replace if stripped.
Over-Tightening Spray Gun Components
Too much torque can warp parts. Seals then fail.
- Follow the manual for torque guidelines.
- Stop at snug, not strained.
- Use hand tools, not power tools.
Why Is Air Coming Out but No Paint Is Spraying?
This means your air system is fine, but the fluid system is blocked or closed. It is one of the simplest issues to fix. Check the path from cup to nozzle.
Air System vs Fluid System
Air blows, but fluid does not move. That points to a fluid-side problem.
- Check the fluid control, cup vent, tube, and filters.
- Verify paint level and viscosity.
- Inspect for clogs or dried paint.
Blocked Fluid Passage
Dried paint inside the body can block the path.
- Strip and soak the gun in the right solvent.
- Use brush kits for small passages.
- Rebuild with fresh seals.
Closed Fluid Control
If the fluid knob is closed, only air flows.
- Open it 1–2 turns and test.
- Adjust for desired flow.
- Mark the sweet spot.
Blocked Cup Vent
No vent means no flow. The cup pulls a vacuum.
- Clear the vent hole and filter.
- Replace the lid if cracked.
- Test with the lid loose to confirm, then fix.
Clogged Pickup Tube
Paint cannot reach the gun body if the tube is blocked.
- Pull and clean the tube and screen.
- Replace damaged parts.
- Strain paint before filling.
Thick or Dried Paint
Heavy or skinned paint will not flow.
- Discard skinned paint.
- Thin fresh paint to spec.
- Strain before use.
Why Does My Spray Gun Lose Pressure?
A pressure drop causes poor atomization and weak fans. It often comes from air supply limits or leaks. Fix the source and test again with the trigger pulled.
Compressor CFM Is Too Low
Your compressor may not keep up with the gun’s demand. Pressure sinks during long passes.
- Compare the gun’s CFM to the compressor’s CFM at 90 PSI.
- Use a larger compressor or smaller-demand gun.
- Avoid long, continuous bursts if supply is limited.
Air Hose Is Too Small
A narrow hose chokes airflow. You lose pressure at the gun.
- Use 3/8-inch hose for most HVLP and conventional guns.
- Keep hose runs short and straight.
- Replace old, kinked hose.
Air Leaks
Small leaks add up. Joints, quick-connects, and fittings all can hiss.
- Spray soapy water on joints; watch for bubbles.
- Replace bad fittings and tape threads.
- Check tools, not just the gun.
Dirty Air Filter
A clogged filter starves flow. Pressure drops under load.
- Replace or clean filters often.
- Install a regulator and water separator near the gun.
- Drain the compressor tank daily.
Faulty Regulator
Bad gauges or sticky regulators make pressure unstable.
- Test with a known-good regulator at the gun.
- Replace if pressure drifts or sticks.
- Mount it close to the gun for accuracy.
Pressure Drop at the Gun
Measuring at the tank is not enough. You need pressure at the handle.
- Check with the trigger pulled.
- Adjust at the gun regulator.
- Verify hose and fitting sizes.
How Do You Fix Low Air Pressure on a Spray Gun?
Low pressure ruins atomization. It shows up as large droplets and weak fans. Fixes target the air path, from compressor to cap.
Check Pressure With the Trigger Pulled
Static readings lie. Real pressure shows under flow.
- Pull and hold the trigger while checking.
- Set to the maker’s PSI with the trigger pulled.
- Re-test the pattern.
Match Compressor CFM to the Gun
If CFM is short, pressure falls. Guns need steady volume.
- Compare specs and upgrade if needed.
- Add an auxiliary tank only if CFM is close.
- Consider LVLP if your compressor is small.
Check Air Hose Diameter
Hose size matters a lot for HVLP.
- Use 3/8-inch ID hose and short runs.
- Avoid tight coils and kinks.
- Replace old hoses that collapse.
Inspect Quick-Connect Fittings
Some couplers choke flow. They also leak.
- Use high-flow couplers.
- Replace worn or loose connectors.
- Keep spares ready.
Look for Air Leaks
Leaks steal pressure under load.
- Test joints with soapy water.
- Tighten and seal threads with Teflon tape.
- Recheck after warm-up.
Avoid Relying on Tank Pressure Alone
Tank PSI does not equal gun PSI. Loss happens along the path.
- Put a regulator at the gun.
- Measure at the handle.
- Adjust while spraying.
Why Is My Spray Gun Producing Too Much Overspray?
Overspray wastes paint and dusts nearby parts. The cause is often high pressure or long distance. You can dial it in fast.
High Air Pressure
High PSI makes fine mist that floats away.
- Lower pressure in small steps.
- Rebalance fluid and fan.
- Watch for better transfer efficiency.
Incorrect Spray Distance
Too far and paint turns to fog.
- Move closer within spec.
- Keep distance steady across each pass.
- Use 50% overlap.
Wide Fan Setting
A wide fan makes more mist on edges.
- Narrow the fan slightly.
- Add a touch of fluid to maintain coverage.
- Keep technique smooth and even.
Poor Transfer Efficiency
Wrong settings or technique leave more paint in the air.
- Match tip and pressure to the coating.
- Keep gun square and distance stable.
- Consider HVLP for higher transfer.
Incorrect Paint Viscosity
Thin paint mists easier and drifts.
- Use the correct reducer or water ratio.
- Test on cardboard to confirm.
- Adjust only a little at a time.
Masking and Containment
Good masking traps overspray.
- Use paper, plastic, and drop cloths.
- Control airflow away from the job.
- Build a simple spray booth if needed.
Why Does My Spray Gun Make Bubbles or Foam?
Bubbles in the cup or line mean air is entering the fluid path. This breaks atomization and creates defects. Fix the leaks and confirm seals.
Air Entering the Fluid Path
Air leaks mix with paint and foam it.
- Check nozzle tightness and seals.
- Inspect the needle seat and packing.
- Replace worn parts.
Loose Fluid Connections
Loose cup or tube joints pull air.
- Tighten the cup and pickup tube fittings.
- Replace crushed or split tubes.
- Test with a different cup lid.
Damaged Seals
Bad O-rings let air in.
- Inspect and replace O-rings at each cleaning.
- Use solvent-safe parts from the maker.
- Lubricate seals lightly on assembly.
Over-Mixing Paint
Aggressive stirring adds bubbles.
- Stir gently and let paint rest.
- Strain before filling the cup.
- Avoid shaking cans unless the product calls for it.
Contaminated Coating
Water, oil, or dust can foam paint.
- Keep containers sealed and clean.
- Use clean mixing cups and sticks.
- Filter paint before use.
Paint Compatibility Problems
Some reducers react and cause foam.
- Follow the tech sheet for reducers and ratios.
- Avoid mixing brands without testing.
- Do a small sample spray first.
Why Is My Spray Gun Air Cap Not Working Properly?
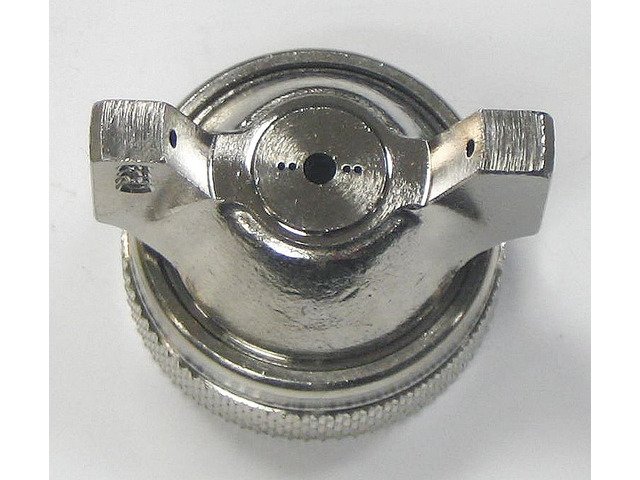
The air cap shapes the fan and atomizes paint. Small blockages cause big problems. Keep it clean and undamaged.
Blocked Air Cap Holes
Even tiny clogs change the fan.
- Soak the cap and brush gently.
- Never poke with metal tools.
- Blow dry with clean air.
Damaged Air Cap
Dents or scratches disrupt flow.
- Inspect under bright light.
- Replace if damaged; repairs seldom help.
- Store caps in a protective case.
Incorrect Air Cap Assembly
Wrong orientation or parts cause odd patterns.
- Confirm the cap and ring are seated right.
- Check fan knob and horns orientation.
- Refer to the manual diagram.
Paint Buildup Around the Horns
Buildup blocks side air and twists the fan.
- Clean horns after each coat if needed.
- Wipe with a solvent-damp cloth.
- Avoid touching the fan with gloved fingers.
Cleaning the Air Cap Safely
Careful cleaning extends cap life.
- Use soft nylon brushes.
- Use the correct solvent for your coating.
- Dry and oil light metal threads to prevent corrosion.
Why Is My Spray Gun Needle Not Moving?
The needle opens and closes paint flow. If it sticks, nothing works right. Dried paint, packing tension, or damage are common causes.
Dried Paint Around the Needle
Paint can glue the needle in place.
- Disassemble and soak parts in solvent.
- Clean the bore and needle gently.
- Lubricate and reassemble.
Needle Packing Adjustment
Too-tight packing grips the needle.
- Back off the packing nut slightly.
- Test for smooth trigger pull.
- Tighten only until leaks stop.
Bent Needle
A bent needle binds in the nozzle.
- Roll it on glass to check straightness.
- Replace if not true.
- Avoid dropping the needle during cleaning.
Damaged Needle Spring
A broken spring will not return the needle.
- Inspect and replace spring if weak or broken.
- Verify correct spring for your model.
- Reassemble in the right order.
Incorrect Reassembly
Wrong order or missing parts block movement.
- Follow the parts diagram step by step.
- Check trigger pins and linkages.
- Do a dry test pull before adding paint.
How Do You Troubleshoot an HVLP Spray Gun?
HVLP guns run at lower pressure but high volume. They are efficient but sensitive to airflow and viscosity. Use settings and sizes that match your coating.
HVLP Gun Has Poor Atomization
Big droplets and a rough fan mean low air or thick paint.
- Raise pressure at the gun within spec.
- Thin paint slightly and strain well.
- Check hose diameter and couplers.
HVLP Gun Is Sputtering
Sputters point to a loose nozzle or air in fluid.
- Tighten the nozzle and check seals.
- Clear the cup vent and filler screen.
- Inspect the needle for damage.
HVLP Gun Produces Too Much Overspray
Even HVLP can overspray at high PSI or long distance.
- Lower PSI and move closer within range.
- Narrow the fan and reduce bounce-back.
- Improve masking and airflow control.
HVLP Gun Has Weak Paint Flow
This means thick paint or too-small tip.
- Thin to spec for HVLP rates.
- Use a larger tip set.
- Open fluid control in small steps.
HVLP Air Pressure Problems
HVLP needs volume, not just PSI.
- Use 3/8-inch hoses and high-flow fittings.
- Confirm compressor CFM meets gun demand.
- Measure pressure with the trigger pulled.
HVLP Nozzle and Needle Problems
Wear or mismatch hurts the fan.
- Replace worn sets together.
- Verify sizes per the coating maker.
- Keep spares for primers and clears.
How Do You Troubleshoot an LVLP Spray Gun?
LVLP uses lower volume and can work with smaller compressors. It needs precise tuning. It is great for small jobs and tight areas.
LVLP Gun Has Poor Atomization
Low volume can starve the cap.
- Increase PSI within LVLP range.
- Thin paint slightly and use proper reducers.
- Keep hose short and couplers high-flow.
LVLP Gun Spits Paint
Spitting often comes from thick paint or a small tip.
- Use a larger tip within LVLP limits.
- Thin and strain the paint.
- Check for loose nozzles and blocked vents.
LVLP Gun Loses Airflow
Small hoses and cheap fittings choke LVLP guns.
- Upgrade to high-flow quick-connects.
- Use minimal hose length.
- Test pressure at the gun with trigger pulled.
Compressor CFM Problems
LVLP helps but still needs steady CFM.
- Confirm compressor output is stable.
- Avoid running other air tools at the same time.
- Consider a small tank buffer near the gun.
LVLP Nozzle Selection
Right tip size is critical with LVLP.
- Follow the maker’s tip chart for your coating.
- Keep multiple tips for different materials.
- Replace worn tips early.
How Do You Troubleshoot an Airless Paint Sprayer?
Airless systems push paint at high pressure through a tip. Issues differ from HVLP/LVLP. Safety matters—never test with your hand. Use cardboard or a board instead.
Airless Sprayer Has Low Pressure
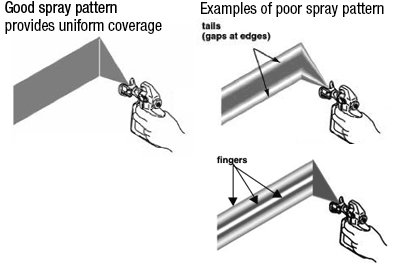
Low pressure causes tails and poor fans.
- Check inlet screens and gun filters.
- Inspect pressure control and prime valve.
- Verify tip size; replace worn tips.
Airless Sprayer Is Pulsing
Pulsing makes uneven coats and stripes.
- Bleed air from the system.
- Clean or replace the inlet ball and seat.
- Ensure the suction tube seals well.
Airless Spray Tip Is Clogged
A clogged tip gives tails or no fan.
- Reverse the tip to clear if it is a reversible type.
- Soak and clean stubborn clogs.
- Strain paint before use.
Airless Sprayer Produces a Poor Fan
A worn tip makes a narrow, fuzzy fan.
- Replace the tip at the first sign of wear.
- Use the right tip size for the coating.
- Maintain rated pressure at the gun.
Airless Sprayer Is Spitting
Spitting comes from trapped air or empty supply.
- Check paint level and suction tube seals.
- Prime until a steady stream flows.
- Tighten all fluid connections.
Airless Sprayer Has Excessive Overspray
High pressure and big tips waste paint.
- Lower pressure to the minimum for a clean fan.
- Use the smallest tip that still covers well.
- Work closer and with steady speed.
How Does Paint Viscosity Affect Spray Gun Problems?
Viscosity controls how paint moves and breaks into droplets. Too thick or thin triggers many issues. Read the tech sheet and test before each job.
Paint Too Thick
Thick paint clogs, spits, and orange peels.
- Thin to spec for your gun type.
- Warm paint to room temp if allowed.
- Use a larger tip for heavy materials.
Paint Too Thin
Thin paint runs, mists, and oversprays.
- Reduce thinner or add retarder carefully.
- Lower air if atomization is too fine.
- Test on cardboard and adjust.
How to Check Paint Viscosity
Simple tests beat guesswork.
- Use a viscosity cup and track seconds.
- Or lift a mixing stick; look for a steady ribbon.
- Match results to the product’s recommendations.
When to Thin Paint
Not every paint needs thinning. Follow the label.
- Thin only if the gun or pattern demands it.
- Adjust in small amounts and test.
- Record your ratios for future jobs.
Water-Based vs Solvent-Based Coatings
Each has its own reducers and behavior.
- Use water or the maker’s thinner for water-based paints.
- Use listed reducers for solvent-based products.
- Do not cross-mix without testing.
Why Straining Paint Matters
Straining removes clumps, skins, and dirt.
- Strain into the cup every time.
- Use fine mesh for clears and finishes.
- Keep covers on to avoid new debris.
How Does Spray Gun Pressure Affect Troubleshooting?
Pressure sets atomization and fan control. Low pressure gives big drops. High pressure gives mist and overspray. Always measure with the trigger pulled.
Low Air Pressure Problems
Low PSI causes spitting, orange peel, and thin coverage.
- Raise pressure in small steps.
- Check hose size and couplers.
- Confirm compressor CFM.
High Air Pressure Problems
High PSI causes overspray, dry spray, and grainy texture.
- Lower PSI slowly and retest.
- Move a bit closer if you were far away.
- Balance with fluid control.
Pressure at the Gun vs Compressor
Pressure at the tank is not what the gun sees.
- Mount a regulator at the gun.
- Tune while spraying the test panel.
- Record your ideal PSI for each product.
Adjusting Pressure in Small Steps
Big jumps make it hard to learn the sweet spot.
- Change 2–3 PSI at a time.
- Spray, study, and adjust again.
- Stop when the fan is even and glossy.
Why the Trigger Should Be Pulled During Pressure Checks
Airflow changes pressure. Static numbers mislead.
- Hold the trigger and read the gauge.
- Set to the maker’s spec under flow.
- Recheck if the hose or couplers change.
How Does Nozzle Size Affect Spray Gun Troubleshooting?
Tip size controls flow and droplet size. The wrong size causes runs, dry spray, or uneven fans. Match the tip to the coating every time.
Nozzle Too Small
A tiny tip starves flow and causes orange peel.
- Move up a size and thin if needed.
- Watch for a smoother fan.
- Keep pressure in range.
Nozzle Too Large
A big tip floods the surface. Runs and sags follow.
- Drop down a size for thinner coatings.
- Balance with pressure and fluid.
- Test on cardboard first.
Nozzle Size for Primer
Primers are thicker and need larger tips.
- Many jobs use 1.7–2.2 mm for conventional/HVLP guns.
- Always check the product sheet.
- Use higher PSI for heavy builds within spec.
Nozzle Size for Paint
Base coats and enamels use mid sizes.
- Common sizes: 1.3–1.5 mm for many finishes.
- Tune for the exact product and climate.
- Keep viscosity consistent across coats.
Nozzle Size for Clear Coats
Clears need smooth flow and fine atomization.
- Often 1.2–1.4 mm for many clears.
- Adjust PSI for gloss and flow without runs.
- Keep dust control tight.
Worn Nozzles and Spray Problems
Wear enlarges tips and ruins patterns.
- Replace tips that show oval wear or tails.
- Keep a log of hours or gallons per tip.
- Store spares clean and labeled.
How Does Spray Technique Cause Spray Gun Problems?
Good technique prevents many flaws. Keep distance, speed, and angle consistent. Practice on cardboard until it feels natural.
Keep the Gun Square to the Surface
Angling the gun makes uneven bands.
- Keep the fan perpendicular.
- Move your body, not just your wrist.
- Use two hands for control if needed.
Maintain a Consistent Distance
Distance changes film build fast.
- Lock in a set gap and use guides if helpful.
- Adjust only if the pattern demands it.
- Watch the reflection to judge wetness.
Keep Your Speed Consistent
Speed sets film thickness.
- Count your pass speed if needed.
- Practice on a test panel to find rhythm.
- Hold a steady overlap across the panel.
Use the Correct Overlap
Overlap blends passes. Too much or too little causes bands.
- Aim for 50% overlap.
- Adjust fan width for narrow parts.
- Watch the edge of the wet fan as your guide.
Start and Stop the Spray Correctly
Trigger timing prevents blobs and tails.
- Begin moving, then pull the trigger.
- Release before you stop moving.
- Feather edges to blend.
Avoid Arcing the Gun
Arcing changes distance through the pass.
- Move the gun in straight lines.
- Use your shoulder and elbow, not just wrist.
- Practice on long boards to build muscle memory.
What Should You Check When a Spray Gun Suddenly Stops Working?
When a gun fails mid-job, stay calm. Follow a quick triage from air to fluid to tip. Most fixes take minutes.
Check the Air Supply
No air, no spray. Start here.
- Verify compressor is on and charged.
- Check hose connections and kinks.
- Read pressure at the gun with trigger pulled.
Check the Paint Supply
Empty cups cause sudden stops.
- Refill and strain paint.
- Verify the cup vent is open.
- Seat the pickup tube.
Check the Nozzle
Clogs happen mid-pass.
- Reverse-clean if airless; soak if HVLP/LVLP.
- Brush the air cap gently.
- Reassemble and test.
Check the Needle
A stuck or broken needle kills flow.
- Inspect spring and packing.
- Clean and lubricate.
- Replace if bent or worn.
Check the Trigger
Linkage pins can slip out.
- Verify free motion and full pull.
- Re-seat pins and screws.
- Test without paint first.
Check the Hose and Fittings
Leaks drop pressure and flow.
- Listen for hissing.
- Tighten or replace fittings.
- Swap hoses to isolate the fault.
How Do You Clean a Spray Gun to Prevent Problems?
Clean guns spray better and last longer. Do it right after you finish, not “later.” It takes minutes and saves hours of rework.
Clean the Gun Immediately After Spraying
Do not let paint dry inside.
- Empty the cup and add solvent or water.
- Spray into a waste container until clear.
- Disassemble for a full clean.
Clean the Fluid Nozzle
This is the most sensitive orifice. Treat it well.
- Soak in proper solvent.
- Use soft brushes and tip picks only.
- Rinse and inspect under bright light.
Clean the Air Cap
Air holes shape the fan. Keep them open.
- Soak and brush gently.
- Avoid metal picks.
- Dry and oil threads lightly.
Clean the Needle
A clean needle seals well.
- Wipe with solvent and a lint-free rag.
- Inspect for wear lines.
- Replace if damaged.
Clean the Paint Cup
Cups hold debris and skins.
- Rinse with solvent or water.
- Clean the vent and gasket groove.
- Dry before storage.
Inspect Seals and O-Rings
Seals fail when ignored.
- Check for cracks and swelling.
- Replace with solvent-safe parts.
- Keep a small seal kit on hand.
Avoid Damaging Small Air Holes
One scratch ruins patterns.
- Use only nylon or soft brass brushes.
- Never use drill bits or needles.
- Store caps in a safe case.
Spray Gun Troubleshooting Chart: Problem, Cause, and Fix
Use this quick chart at the bench. Match your symptom, check the likely causes, and use the fixes in order. Test after each step to avoid chasing your tail.
Sputtering or Spitting
Sputtering points to air in the fluid path, clogs, loose nozzles, or thick paint. Fix the fastest items first and retest on cardboard.
- Likely causes:
- Loose fluid nozzle
- Dirty nozzle or needle
- Blocked cup vent
- Thick or poorly mixed paint
- Fast fixes:
- Tighten nozzle, clean nozzle/needle
- Open vent, strain and thin paint
- Replace seals if leaking
No Paint
No paint means a closed control, clogs, or blocked vent. Work from the cup to the tip.
- Likely causes:
- Closed fluid control
- Clogged pickup tube or filter
- Blocked fluid passage
- Paint too thick
- Fast fixes:
- Open fluid knob 1–2 turns
- Clean tube and replace filter
- Soak and brush passages
- Thin per tech sheet
Uneven Pattern
Pattern flaws map to air cap or pressure issues. Clean, then tune.
- Likely causes:
- Dirty air cap
- Incorrect PSI
- Wrong viscosity
- Incorrect distance
- Fast fixes:
- Clean cap and horns
- Adjust PSI with trigger pulled
- Thin or thicken paint
- Set proper distance
Runs and Drips
Runs follow too much fluid or close distance. Adjust control and rhythm.
- Likely causes:
- Open fluid control
- Spraying too close or too slow
- Excessive overlap
- Fast fixes:
- Close fluid slightly
- Step back and speed up
- Use 50% overlap
### Orange Peel
Pebbled texture means poor flow and leveling. Viscosity and PSI matter.
- Likely causes:
- Thick paint
- Low PSI
- Long distance or fast dry
- Fast fixes:
- Thin to spec
- Raise PSI slightly
- Move closer, add retarder if allowed
Dry Spray
Dusty finish means paint dried mid-air.
- Likely causes:
- High PSI
- Long distance
- Hot, dry climate
- Fast fixes:
- Lower PSI
- Move closer
- Slow reducer or retarder
Excessive Overspray
Too much paint in the air wastes money and time.
- Likely causes:
- High PSI
- Wide fan, long distance
- Thin paint
- Fast fixes:
- Lower PSI and narrow fan
- Move closer
- Adjust viscosity
Low Pressure
Weak atomization and sagging fans follow low PSI.
- Likely causes:
- Small hose or leaks
- Low compressor CFM
- Bad regulator
- Fast fixes:
- Use 3/8-inch hose, fix leaks
- Match compressor to gun
- Replace regulator
Leaking Paint
Leaks come from worn seals and loose parts.
- Likely causes:
- Worn needle packing
- Loose nozzle
- Bad cup gasket
- Fast fixes:
- Tighten/replace packing
- Tighten nozzle
- Replace gasket
Clogging
Clogs start with dirty paint and poor cleaning.
- Likely causes:
- Unstrained paint
- Dried paint inside
- Wrong tip for thick products
- Fast fixes:
- Strain paint
- Clean fully after use
- Use larger tip
When Should You Replace a Spray Gun Part?
Parts wear slowly, then fail fast. Watch for the signs. Replacing at the right time keeps your finish consistent.
When to Replace the Fluid Nozzle
Nozzles wear and go out of round. Patterns get fuzzy.
- Replace if you see tails or oval wear.
- Swap if cleaning does not restore the fan.
- Keep a log of gallons sprayed per nozzle.
When to Replace the Needle
A worn needle will not seal. Leaks and spits follow.
- Look for grooves and scratches.
- Replace with the matching size.
- Avoid mixing brands.
When to Replace the Air Cap
Caps dent easily and clog over time.
- Replace if holes are damaged.
- Store in a case to prevent drops.
- Choose the right cap for your coating style.
When to Replace O-Rings and Seals
Hard, cracked, or swollen seals must go.
- Inspect during each cleaning.
- Replace with solvent-safe parts.
- Lubricate lightly to prevent tearing.
Signs of a Worn Spray Tip
Airless tips wear fast with abrasive coatings.
- Fan gets narrow; coverage takes more passes.
- Tails appear even at high pressure.
- Replace at the first sign of wear.
How Can You Prevent Spray Gun Problems?
Prevention beats repair. A few good habits save time, money, and stress. Build them into every job.
Strain Paint Before Spraying
Strainers stop clogs and spits.
- Use fine mesh, especially for clears.
- Strain each new batch and when topping off.
- Keep lids on the cup to prevent skins.
Check the Gun Before Every Project
A short check avoids mid-job surprises.
- Inspect nozzle, needle, and cap.
- Test spray on cardboard.
- Verify pressure with the trigger pulled.
Use the Correct Nozzle
Tip size sets flow and atomization.
- Match tip to the product chart.
- Keep multiple sizes for primer, base, and clear.
- Replace at signs of wear.
Keep the Air Supply Clean
Clean, dry air prevents fish-eyes and dust.
- Use filters, regulators, and water separators.
- Drain the tank often.
- Replace filters on a schedule.
Clean the Gun After Every Use
Never let paint dry inside.
- Flush, soak, and brush gently.
- Wipe and dry all parts.
- Store reassembled and ready.
Store the Gun Properly
Good storage keeps parts true and clean.
- Hang or case the gun to protect the cap.
- Keep dust covers on cups and caps.
- Store away from heat and sunlight.
Keep Replacement Parts Available
Spare parts keep jobs moving.
- Stock tips, needles, nozzles, and seals.
- Keep cleaners and strainers ready.
- Track usage to predict wear.
Spray Gun Troubleshooting Safety Tips
Safety comes first with pressurized systems and solvents. A few rules protect you and others. Respect the tools and the coatings.
Relieve Pressure Before Cleaning
Pressure can eject parts or spray solvent.
- Shut off air and relieve pressure at the gun.
- Open the cup slowly away from your face.
- Never point the gun at anyone.
Wear Suitable Respiratory Protection
Spray mists are not safe to breathe.
- Use a proper respirator for your coating type.
- Replace filters per maker guidelines.
- Keep masks stored clean and sealed.
Protect Your Eyes and Skin
Solvents and paint irritate eyes and skin.
- Wear goggles and gloves.
- Use coveralls or sleeves.
- Wash hands before breaks.
Ventilate the Work Area
Fresh air reduces fumes and fire risk.
- Use exhaust fans and intake filters.
- Keep airflow steady and directed.
- Avoid still, closed rooms.
Keep Ignition Sources Away From Flammable Coatings
Many coatings and solvents ignite easily.
- No smoking, sparks, or open flames.
- Use explosion-safe lights and fans if needed.
- Store solvents in approved containers.
Follow the Manufacturer’s Instructions
Each gun and coating has unique needs.
- Read manuals and tech sheets.
- Follow mix ratios and flash times.
- Keep documents nearby for reference.
Never Use Your Hand to Check an Airless Spray
Airless jets can inject fluid under skin. This is a medical emergency.
- Test on cardboard only.
- Shut down and relieve pressure before tip work.
- Seek urgent care if injection occurs.
Frequently Asked Questions About Spray Gun Troubleshooting
Why Is My Spray Gun Sputtering?
Air is entering the fluid path, or paint flow is unstable. Check for a loose nozzle, blocked cup vent, dirty needle/nozzle, or thick paint. Tighten, clean, open the vent, and thin to spec.
Why Is My Spray Gun Spitting Paint?
Spitting comes from a dirty or damaged fluid nozzle and needle, loose nozzle, dried paint inside, or a mismatched tip. Clean, replace worn parts, check seals, and verify the correct needle/nozzle set.
Why Is My Spray Gun Not Spraying Paint?
The fluid control may be closed, or passages are blocked. Open the fluid knob, clean the nozzle and pickup tube, clear filters, thin heavy paint, and confirm the cup vent is open.
Why Does My Spray Gun Spray Unevenly?
Uneven patterns point to a dirty air cap, incorrect pressure, wrong viscosity, or bad distance and speed. Clean the cap, set pressure with the trigger pulled, match paint thickness, and keep distance steady.
Why Is My Spray Gun Spraying Too Much Paint?
Too much paint comes from an open fluid knob, thin paint, a large tip, close distance, slow movement, or low PSI. Close fluid a bit, thicken to spec, use a smaller tip, step back, speed up, and adjust pressure.
Why Is My Spray Gun Spraying Too Little Paint?
Look for a tight fluid knob, thick paint, too-small tip, high PSI, partial blockage, or poor cup venting. Open fluid, thin to spec, install a larger tip, lower PSI, clean the nozzle, and open the vent.
Why Does My Spray Gun Create Orange Peel?
Paint is too thick, air pressure is low, the gun is too far, or the paint dries too fast. Thin to spec, raise PSI, move closer, and use slower reducer or retarder if allowed.
Why Does My Spray Gun Create Runs and Drips?
Too much fluid, close distance, slow speed, or heavy overlap cause sags. Close fluid slightly, step back, speed up, and hold consistent 50% overlap.
Why Is My Spray Gun Producing Dry Spray?
High PSI, long distance, hot or dry air, or fast reducers dry paint mid-air. Lower PSI, move closer, spray in cooler conditions, and use slower reducers or add retarder.
Why Does My Spray Gun Keep Clogging?
Unstrained paint, drying inside the gun, or a small tip with heavy coatings causes clogs. Strain paint, clean right after use, and match tip size to the coating.
Why Is My Spray Gun Leaking Paint?
Worn seals, loose nozzle, bad cup gasket, or damaged needle packing cause leaks. Replace seals and gaskets, tighten parts to spec, and inspect the needle and seat.
Why Is Air Coming Out but No Paint?
The fluid system is blocked or closed. Open the fluid control, clear the cup vent, clean the pickup tube and nozzle, and thin or replace thick/dried paint.
Why Does My Spray Gun Lose Pressure?
Low compressor CFM, small hoses, leaks, dirty filters, or a bad regulator lower PSI at the gun. Use 3/8-inch hose, fix leaks, clean filters, and verify CFM matches the gun.
How Do I Fix a Clogged Spray Gun Nozzle?
Soak the nozzle in the right solvent, brush with soft tools, and strain paint before reassembly. Never use metal picks that damage the orifice.
How Often Should I Clean a Spray Gun?
Every time you spray. Flush between colors or coats if there is a long wait. Full clean at the end of the day.
When Should I Replace a Spray Gun Nozzle?
When the fan shows tails or the tip looks oval or worn. Replace at the first sign of pattern loss or after the maker’s rated gallons.
Can Thick Paint Damage a Spray Gun?
Yes. It strains seals, clogs passages, and wears tips fast. Thin to spec and use the right nozzle.
What Pressure Should I Use on a Spray Gun?
Follow the gun and product specs. Always set PSI with the trigger pulled. Adjust in small steps after a test spray.
Why Is My Spray Gun Leaving a Rough Finish?
Poor atomization, thick paint, overspray, dust, or fast drying are likely. Raise or lower PSI as needed, adjust viscosity, improve dust control, and correct technique.
Why Does My Spray Gun Have Too Much Overspray?
High PSI, long distance, wide fan, and thin paint cause overspray. Lower PSI, move closer, narrow the fan, and adjust viscosity. Improve masking and airflow.
3 Comments