How To Set Up Spray Gun For Auto Paint (Master Your Spray Gun Setup)
Set up an auto paint spray gun by choosing the right tip, thinning paint, setting pressure, and testing spray. A clean, even finish starts before you pull the trigger.
Learning how to set up spray gun for auto paint helps prevent runs, orange peel, dry spray, and wasted material. This guide explains the process in simple steps, based on common body shop practice, manufacturer guidance, and lessons learned from real paint prep mistakes.
Gather the Right Tools and Safety Gear
Before learning how to set up spray gun for auto paint, prepare your work area and tools. A spray gun cannot create a smooth finish if the air supply is dirty, the paint is wrong, or the surface is poorly prepared.
You will usually need:
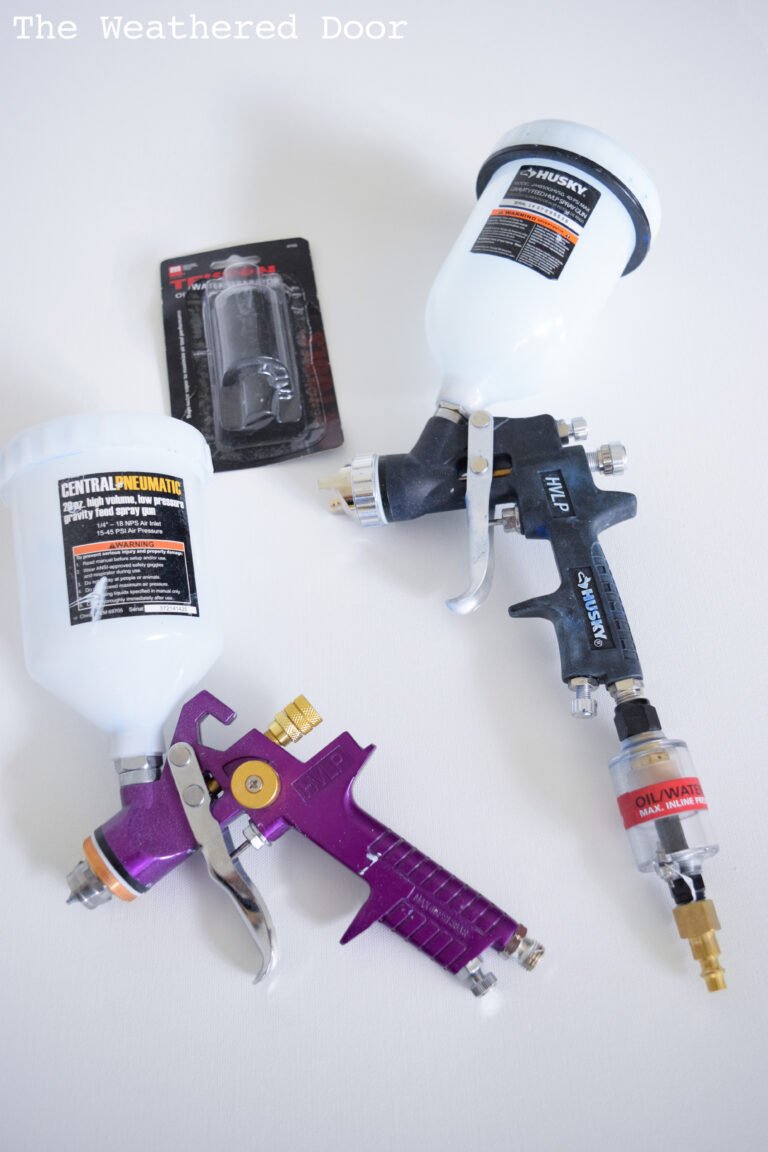
• HVLP or LVLP spray gun
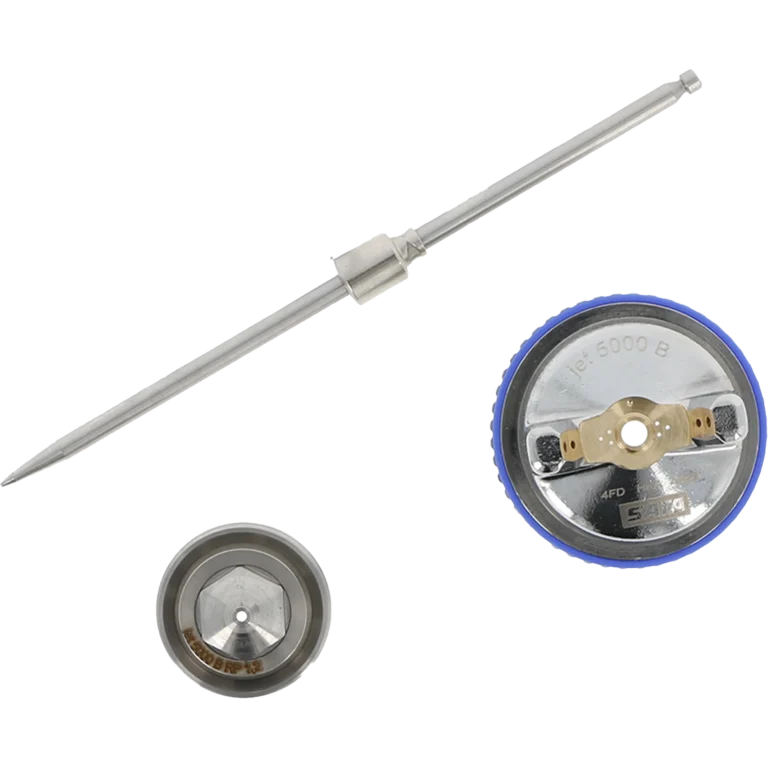
• Correct fluid nozzle and needle set
• Air compressor with enough airflow
• Air regulator and pressure gauge
• Clean air hose made for painting
• Paint mixing cups and strainers
• Manufacturer-approved reducer or thinner
• Paint filters
• Cleaning brushes and gun-cleaning solvent
• Respirator approved for automotive paint
• Chemical-resistant gloves and safety glasses
• Paint suit or other protective clothing
Use a proper spray booth or a well-ventilated approved area. Automotive coatings can release harmful vapors, and some two-component products contain isocyanates. A basic dust mask is not enough for these products. Always read the product safety data sheet before mixing or spraying.
Keep flames, heaters, cigarettes, and sparks away from the work area. Ground the compressor and follow local rules for ventilation and waste disposal.
Choose the Correct Spray Gun and Nozzle
The gun type and nozzle size have a major effect on how the coating atomizes. HVLP guns use a high volume of air at lower pressure. LVLP guns use less air and can work well with smaller compressors. Conventional guns can atomize very well but often use more air and create more overspray.
For most automotive work, a starting point looks like this:
• Sealer: 1.3 to 1.5 mm nozzle
• Basecoat: 1.2 to 1.4 mm nozzle
• Clearcoat: 1.2 to 1.4 mm nozzle
• Single-stage paint: 1.3 to 1.5 mm nozzle
• Primer surfacer: 1.6 to 2.0 mm nozzle
These are starting ranges, not fixed rules. Always check the paint maker’s technical data sheet. Some thick primers need a larger tip, while waterborne basecoats may work best with the size recommended by the brand.
Inspect the fluid nozzle, needle, and air cap. A small dent, dried paint spot, or loose part can distort the fan. One of the most useful lessons in how to set up spray gun for auto paint is to never blame the paint before checking the gun.
Prepare the Paint and Mixing Area
Paint must be mixed accurately. Guessing the ratio can cause poor hiding, slow drying, weak adhesion, or a dull clearcoat. Use clean mixing cups with printed ratio marks, or measure by weight when the product maker provides weight formulas.
Read the label or technical data sheet for:
• Paint-to-reducer ratio
• Hardener ratio, if required
• Recommended reducer speed
• Induction time
• Pot life
• Spray viscosity
• Flash time between coats
Stir each component before combining it. Mix slowly so you do not create extra bubbles. After mixing, strain the paint into the gun cup. A clean filter removes small lumps that could block the fluid tip.
Do not add reducer just because the paint looks thick. Too much reducer may cause sagging, poor coverage, solvent pop, or color problems. Temperature also matters. A fast reducer may work in cool conditions, while a slower reducer may help in warm conditions. The product maker’s guide should control the final choice.
Set Up the Air Compressor
Clean, dry air is the heart of how to set up spray gun for auto paint. Water or oil in the air line can leave spots, fisheyes, and rough areas in the finish.
Set up the air system in this order:
- Place the compressor on a stable surface with room for airflow.
- Install a drain or moisture separator near the compressor.
- Use a suitable air hose with enough inside diameter for the gun.
- Add a regulator close to the spray gun.
- Check the air filter and replace it if it is dirty.
- Drain moisture from the tank before painting.
Many spray guns need more airflow than a small compressor can provide. Check the gun’s CFM requirement and compare it with the compressor’s delivered CFM, not only its advertised peak rating. If the compressor cannot keep up, the fan may become weak and the atomization may change during a panel.
A useful shop test is to spray clean air through the gun onto a clean cloth. Watch for water, oil, or dirt. If you see contamination, stop and fix the air system before adding paint.
How to Set Up Spray Gun for Auto Paint
Now follow this basic setup process. The exact pressure and fluid settings vary by gun, paint, and nozzle, but the order stays nearly the same.
- Install the correct nozzle, needle, and air cap.
- Tighten the fluid nozzle gently with the proper tool.
- Attach the clean air hose.
- Fill the cup with a small amount of mixed and strained paint.
- Set the fan control near the middle position.
- Set the fluid control near the middle position.
- Set the air pressure according to the gun maker’s recommendation.
- Pull the trigger fully while adjusting pressure.
- Spray a test pattern on masking paper or cardboard.
- Adjust one control at a time.
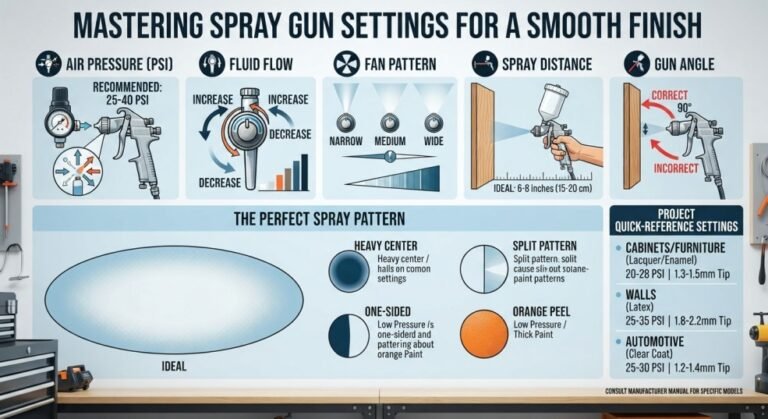
Pressure must be checked with the trigger pulled. Static pressure can look correct while the working pressure falls when air flows through the gun. Many HVLP guns operate near 20 to 30 PSI at the gun, but some models use different settings. The number printed on the gun or listed in its guide should take priority.
Hold the gun about 6 to 8 inches from the test surface. Keep it square to the surface. A good pattern should be even from top to bottom, with a soft and balanced edge. If the center is heavy, the gun may need more air, less fluid, or cleaning. If the ends are heavy, inspect the air cap and adjust the fan.
Learning how to set up spray gun for auto paint becomes much easier when you change only one setting at a time. Large adjustments make it hard to know what solved the problem.
Adjust the Spray Pattern
The spray pattern should look like a long oval. The paint should land as a fine mist, not as large wet dots. Move the gun across the test panel while holding the trigger fully open during the stroke.
Use these controls carefully:
• Fan control changes the width of the spray pattern.
• Fluid control changes how much paint leaves the gun.
• Air control changes atomization and spray force.
• Regulator control changes air pressure.
Start with the fan at a medium setting. Open it slowly until the pattern is wide and even. Then adjust fluid flow so the test coat looks wet but does not sag.
If the paint forms large droplets, increase atomizing air slightly or check for low pressure. If the finish looks dry and dusty, you may have too much air, too little fluid, too much distance, or an overly fast reducer. If the center is wet and the edges are dry, the paint may be too thick or the air cap may be dirty.
Avoid using air pressure as the only fix. High pressure can create excess overspray and dry the paint before it reaches the panel. Good atomization is a balance between fluid, air, distance, speed, and paint viscosity.
Practice the Correct Spray Technique
Even a perfectly adjusted gun can produce a poor finish if your hand movement is wrong. Think of the spray fan as a soft paint brush. Keep it parallel to the panel and move at a steady speed.
Use these basic technique rules:
• Start moving before pulling the trigger.
• Release the trigger just before stopping the stroke.
• Keep the gun square to the panel.
• Maintain the same distance throughout the pass.
• Overlap each pass by about 50 percent.
• Use steady arm movement instead of moving only your wrist.
• Keep the gun perpendicular around edges and curved areas.
Starting and stopping while pointed at the panel can create heavy spots. This is a common cause of runs near the beginning and end of a pass. The same issue appears when painters swing the gun in an arc. The distance changes, so the paint pattern changes too.
For a door, you might spray the upper section first, then the middle, and then the lower section. Keep a wet edge so the new pass blends into the last one. On large panels, plan the path before spraying. A calm, repeatable pattern is more valuable than speed.
When learning how to set up spray gun for auto paint, practice with water or an inexpensive compatible material when possible. This lets you learn hand speed and overlap without wasting expensive paint.
Apply Primer, Basecoat, and Clearcoat
Each coating needs a slightly different approach. Primer often needs more material and may use a larger nozzle. It should be sanded according to the product instructions before color is applied.
Basecoat is usually applied in several light, even coats. The first coat may look slightly transparent. Later coats build color and coverage. Do not try to make full coverage in one heavy pass because that can cause runs and solvent problems.
Allow the correct flash time between coats. Flash time depends on product, temperature, humidity, airflow, and film thickness. The surface should be ready for the next coat according to the technical data sheet, not simply because it looks dry.
Clearcoat usually needs controlled wet coats. A coat that is too dry can create texture and low gloss. A coat that is too wet can sag. Watch the panel under good lighting and keep your speed steady.
Before spraying a full vehicle, test the color and finish on a spray-out card. This is especially important for metallic and pearl colors. Gun setup, spray angle, overlap, and reducer choice can affect how metallic particles lie on the panel.
Troubleshoot Common Spray Gun Problems
A spray pattern can tell you a lot about the problem. Stop spraying and inspect the gun if the pattern suddenly changes.
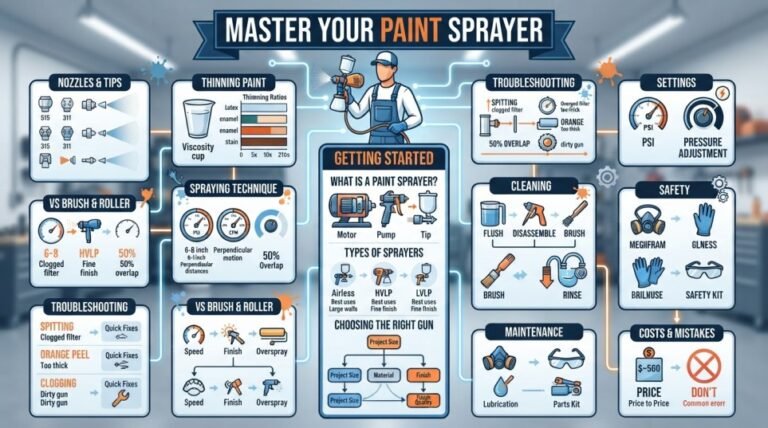
Orange peel
Orange peel looks like the skin of an orange. It may come from:
• Low air pressure
• Paint that is too thick
• Incorrect reducer
• Gun held too far away
• Slow hand movement
• Poor flash control
Try the smallest adjustment first. Confirm pressure with the trigger pulled, then check paint viscosity and gun distance. Do not simply flood the panel with more material.
Runs and sags
Runs usually mean too much wet material has collected in one area. Common causes include slow movement, too much fluid, short gun distance, or excessive overlap.
Let the coating cure as directed. Do not wipe a fresh run with a rag. Once cured, sand and repair it using the product system’s instructions.
Paint Sprayer Gun 101: (Types, Uses, and Expert Advice) Everything You Need to Know Before Buying
Dry spray
Dry spray feels rough and looks dull. It often occurs when the gun is too far away, the hand moves too fast, air pressure is too high, or the reducer evaporates too quickly.
Move closer within the recommended range, check the reducer choice, and confirm that the fan is not too wide for the available air.
Fisheyes
Fisheyes are small craters that may result from silicone, oil, wax, grease, or other contamination. Clean the panel with the correct surface cleaner and use clean gloves after preparation.
Contamination can also come from air lines, compressors, hand creams, polishes, or shop products. Never use silicone products near a paint area.
Uneven fan pattern
An uneven pattern often points to a dirty or damaged air cap, fluid tip, or needle. Remove and clean the parts with the correct solvent and soft brushes. Never use a hard wire that can enlarge the air holes.
Clean the Gun After Every Session
Cleaning is part of how to set up spray gun for auto paint because leftover material changes the next spray pattern. Dried paint can block the fluid tip and air cap, even when the gun looks clean from the outside.
Use this general cleaning routine:
- Empty unused paint into the approved waste container.
- Wipe the cup with the correct solvent.
- Add a small amount of cleaning solvent to the cup.
- Spray the solvent into an approved collection container.
- Remove the cup and clean the lid, tube, and seal.
- Remove the air cap and fluid nozzle as directed.
- Clean the needle and other parts with a soft brush.
- Dry the parts with clean air if allowed by the gun maker.
- Reassemble the gun without overtightening.
- Store it in a clean, dry place.
Do not soak the entire gun unless the manufacturer allows it. Solvent can damage seals and lubricants. Avoid immersing parts that contain seals unless they are designed for that use.
A small amount of approved gun lubricant may be useful on the needle packing or trigger points. Keep oil away from the air and fluid passages because it can contaminate the finish.
Mistakes to Avoid When Setting Up a Spray Gun
Many paint defects start with a rushed setup. These mistakes are easy to prevent:
• Spraying without a test pattern
• Using the wrong nozzle size
• Measuring paint by guesswork
• Ignoring the product data sheet
• Setting pressure without pulling the trigger
• Using a compressor that cannot supply enough air
• Painting in poor light
• Holding the gun at an angle
• Changing several controls at once
• Skipping air-line moisture checks
• Spraying over an unclean surface
• Leaving paint in the gun
One mistake I often see in beginner projects is opening the fluid control too far to make the panel look wet. The first few passes seem impressive, but the coating later sags or takes too long to dry. A lighter, controlled coat usually produces a better result than trying to force gloss immediately.
Temperature and humidity also matter. Cold paint may become thick and spray poorly. High humidity can affect drying and may create water-related defects in some systems. If conditions are outside the product maker’s limits, delay the job or improve the work area.
Spray Gun Settings: How to Adjust Pressure, Fluid, Air & Spray Pattern
A Simple Setup Checklist
Use this checklist before spraying any automotive panel:
• Read the paint system instructions.
• Confirm the nozzle size.
• Check the compressor and air hose.
• Drain moisture from the tank.
• Inspect the air filter and regulator.
• Mix the paint accurately.
• Strain the mixed material.
• Wear the correct protective equipment.
• Check the panel for dust, grease, and defects.
• Set working pressure with the trigger pulled.
• Test the fan on masking paper.
• Confirm distance, speed, and overlap.
• Spray a test card for color-sensitive finishes.
• Clean the gun immediately after use.
This checklist makes how to set up spray gun for auto paint repeatable. A repeatable process is the best way to improve. Write down the nozzle, pressure, reducer, temperature, and spray result. That record can save time on the next panel.
Frequently Asked Questions About How to Set Up Spray Gun for Auto Paint
What PSI should I use for automotive paint?
The correct PSI depends on the spray gun, nozzle, paint, and air cap. Many HVLP guns start around 20 to 30 PSI at the gun with the trigger pulled, but the manufacturer’s specification should always come first.
What size nozzle is best for automotive basecoat?
A 1.2 to 1.4 mm nozzle is a common starting range for basecoat. Check the paint maker’s technical data sheet because some products require a different size.
How far should I hold the spray gun from the panel?
A distance of about 6 to 8 inches is common for many automotive spray guns. Keep the gun square to the surface and maintain the same distance during the entire pass.
Why is my spray gun making a rough finish?
A rough finish may result from low pressure, thick paint, fast hand movement, excessive gun distance, or the wrong reducer. Check the test pattern, paint instructions, air supply, and gun cleanliness before changing several settings.
Should I thin automotive paint before spraying?
Only thin or reduce the paint when the product instructions call for it. Use the recommended reducer and ratio, since too much or too little can affect coverage, drying, gloss, and durability.
How do I stop runs when spraying clearcoat?
Use the recommended fluid setting, keep the gun moving, maintain the correct distance, and avoid excessive overlap. Apply controlled wet coats with the correct flash time instead of trying to create maximum gloss in one heavy pass.
Can I use a small compressor with an HVLP spray gun?
You can use one only if it delivers enough CFM for the gun during continuous spraying. If the compressor cannot keep up, pressure and atomization will drop, which can create an uneven finish.
Conclusion
Good results come from a controlled process. Choose the correct nozzle, use clean and dry air, mix the paint accurately, set pressure with the trigger pulled, and test the pattern before touching the vehicle. Keep the gun square, maintain a steady distance, and clean it after every session.
The best way to learn how to set up spray gun for auto paint is to make small adjustments and record what works. Practice on scrap panels, follow the coating maker’s instructions, and never compromise on ventilation or respiratory protection. If this guide helped, explore more automotive refinishing resources and share your spray gun tips in the comments.