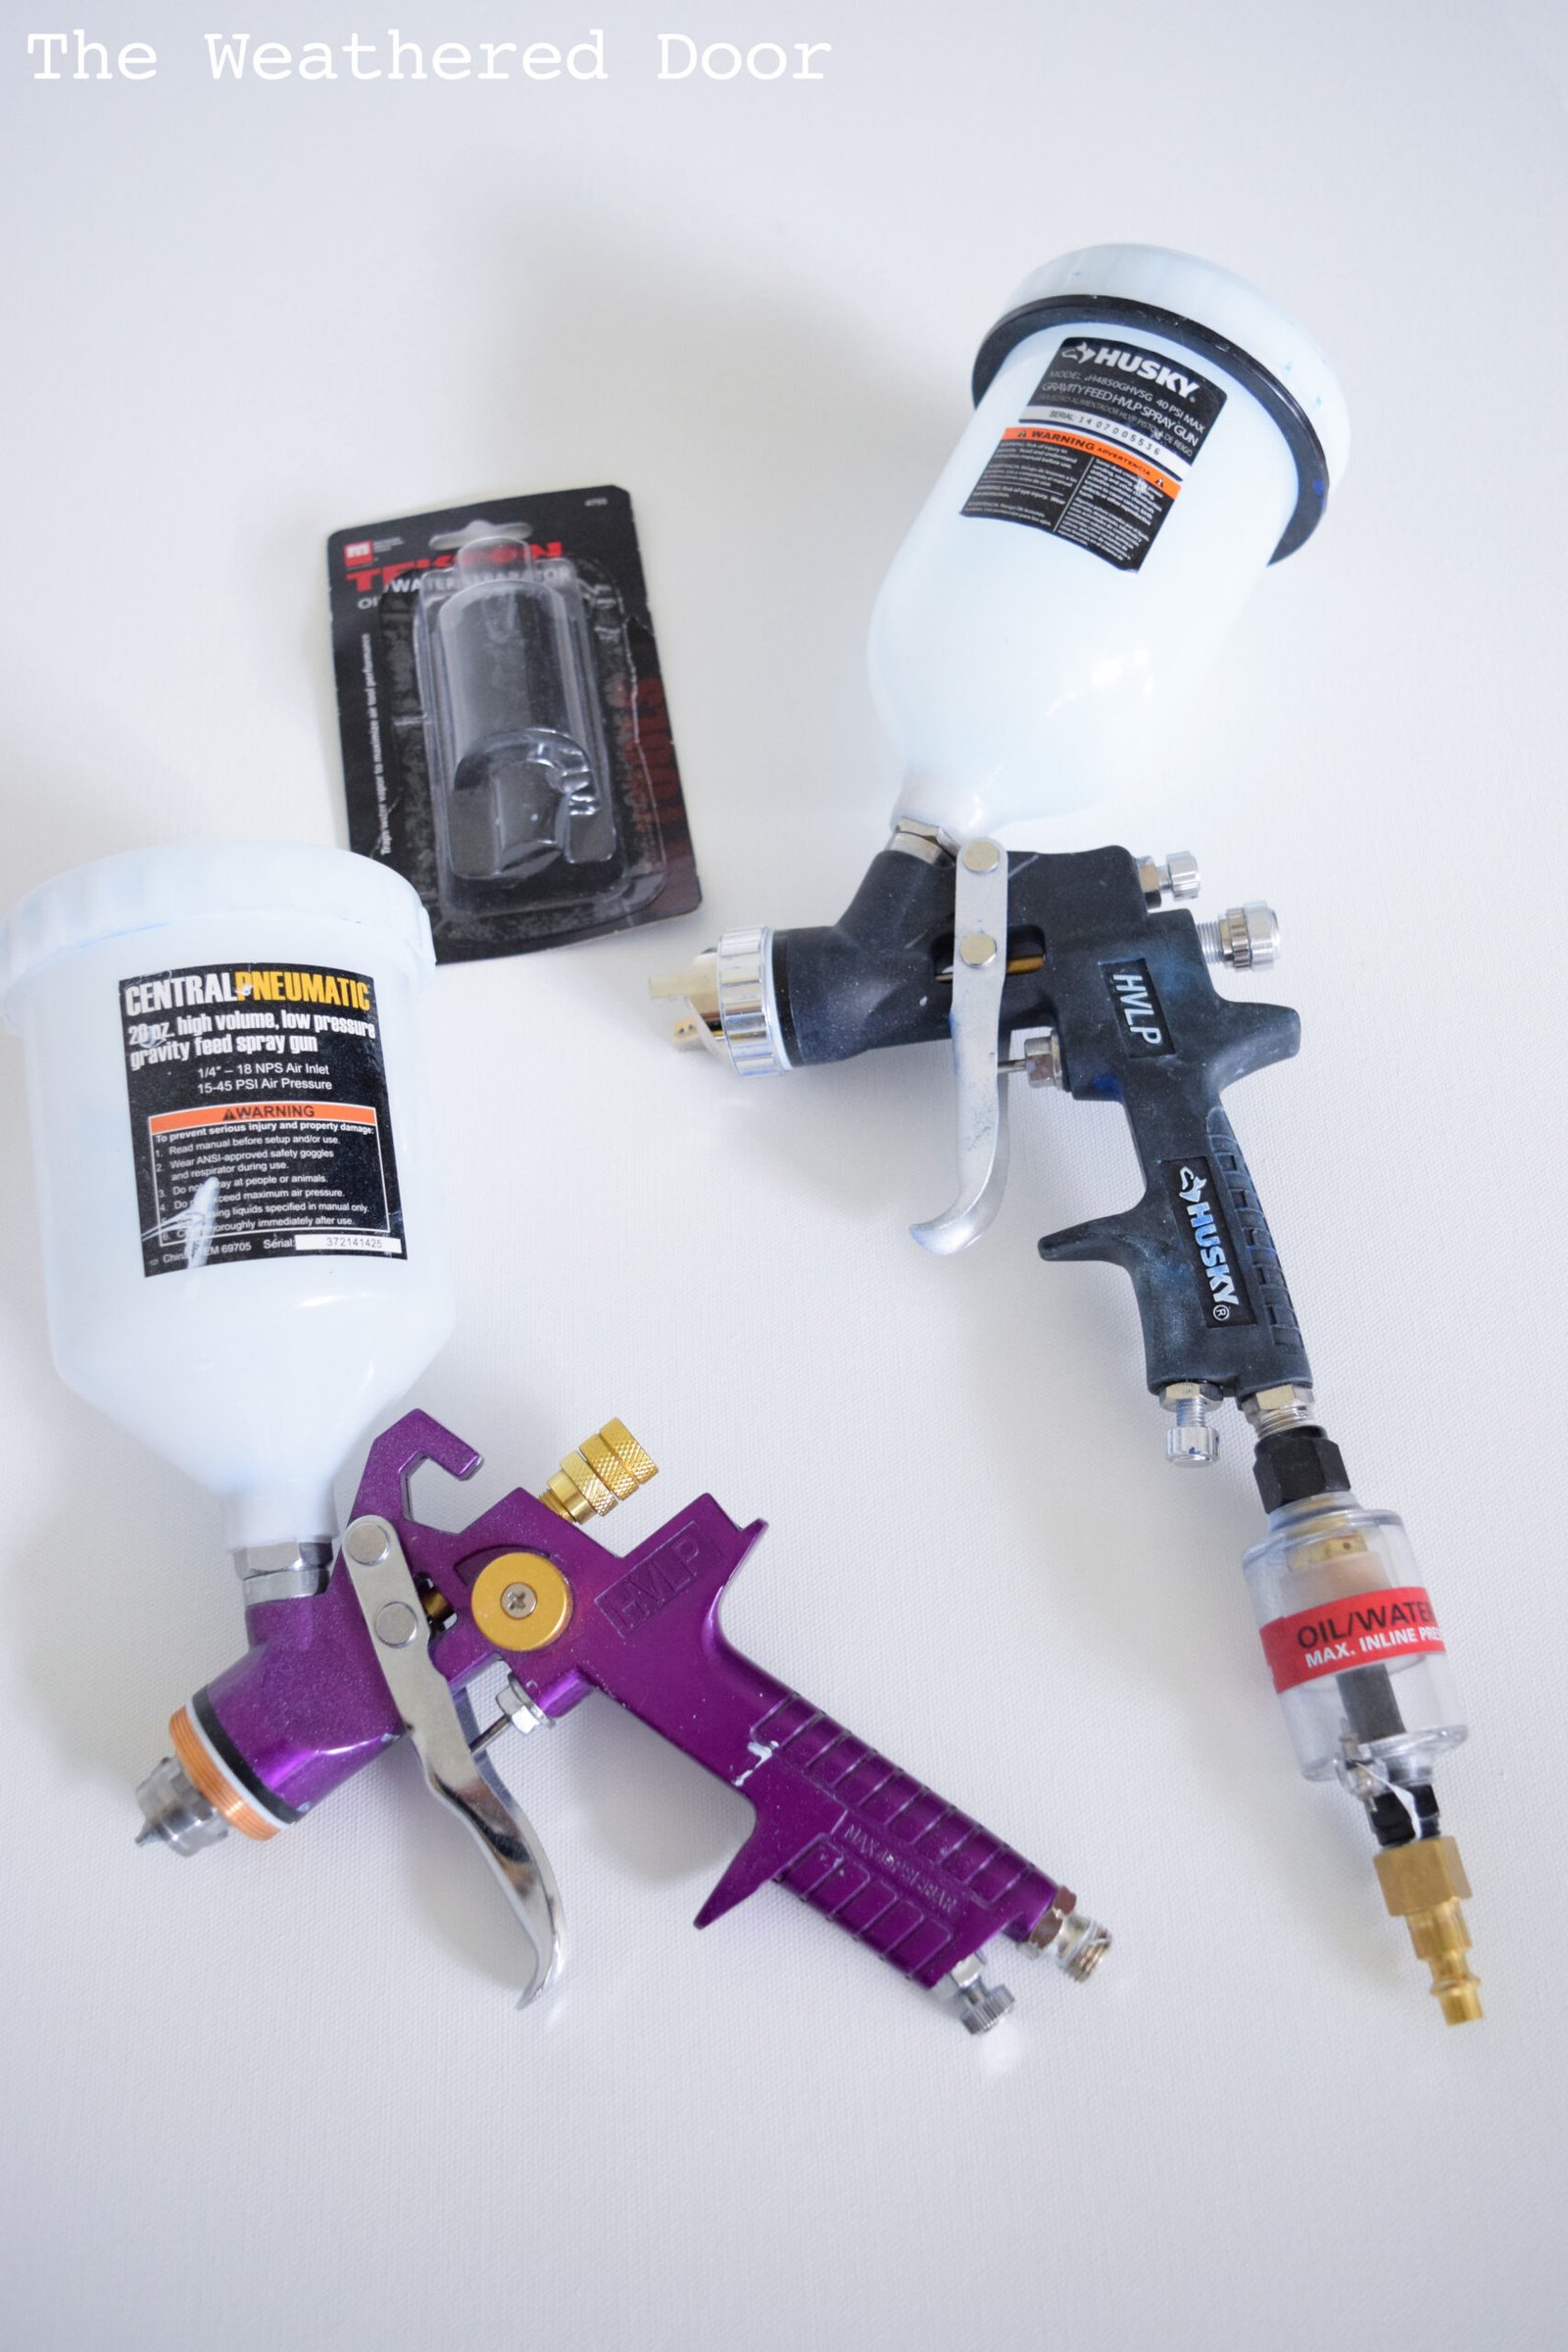
The Ultimate HVLP Spray Gun Settings Guide (Pressure, Fluid & Fan)
Proper HVLP spray gun settings balance air pressure, fluid flow, fan width, and spray distance. HVLP spray guns can produce a smooth finish with less overspray, but small setting changes make a big difference.
After years of testing spray patterns on furniture, trim, cabinets, and vehicle panels, I have learned that good HVLP spray gun settings come from matching the gun to the coating, surface, and job. This guide explains each adjustment in plain language, with practical steps to help you spray with less waste and fewer defects.
What Are HVLP Spray Gun Settings?
HVLP means “high volume, low pressure.” An HVLP spray gun uses a large volume of air at lower pressure to break liquid into fine droplets. This design can reduce overspray and improve transfer efficiency compared with many high-pressure spray systems.
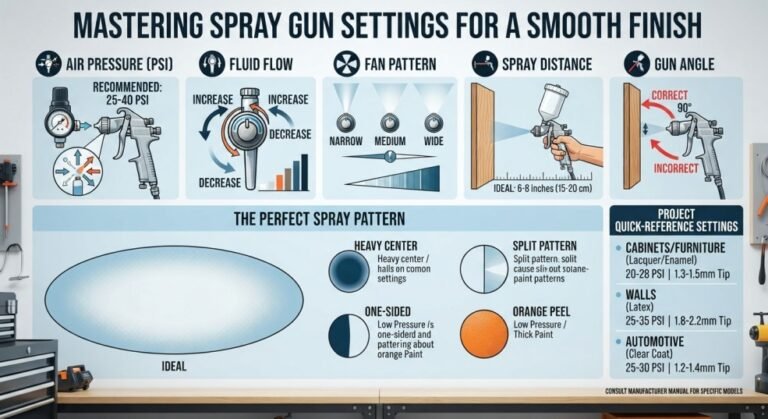
The main HVLP spray gun settings include:
• Air pressure controls the force that atomizes the coating.
• Fluid flow controls how much material leaves the nozzle.
• Fan width controls the shape and size of the spray pattern.
• Spray distance affects coverage, texture, and overspray.
• Needle and nozzle size must match the coating’s thickness.
Think of the spray gun as a small orchestra. Air, fluid, fan width, and distance must work together. If one part is too strong or too weak, the finish may show runs, dry spray, orange peel, or uneven coverage.
Most HVLP guns work best when you begin with the manufacturer’s recommended pressure. Then, make small changes after testing the spray pattern on cardboard or scrap material.
The Best Starting HVLP Spray Gun Settings
There is no single setting that works for every project. Paint type, nozzle size, compressor output, temperature, and spray technique all affect the result.
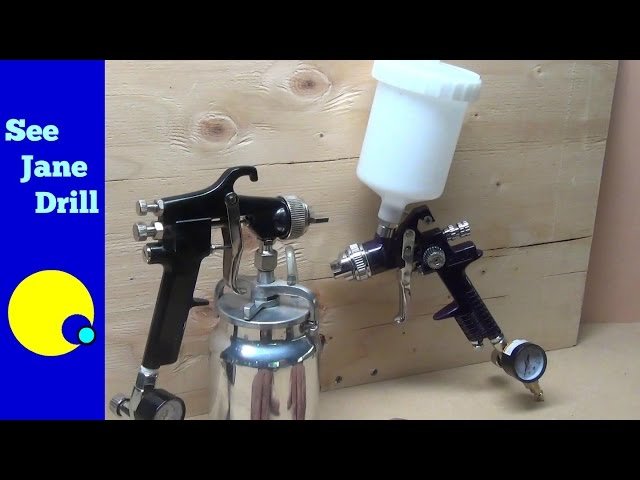
A useful starting point for many gravity-feed HVLP spray guns is:
• Air pressure at the gun: 20 to 30 PSI with the trigger fully pulled
• Fluid adjustment: Open gradually until the fan produces full coverage without flooding
• Fan adjustment: Open enough to create a wide, even oval pattern
• Spray distance: 6 to 8 inches from the surface
• Spray speed: Move at a steady pace that keeps the wet edge even
Always check your owner’s manual first. Some guns require 10 to 15 PSI at the air cap but need much higher pressure at the regulator. These readings are not the same.
How to set air pressure
Connect the regulator near the gun. Pull the trigger fully, which allows air to flow through the gun. Adjust the regulator while air is moving, not while the trigger is released.
Start at the lower end of the recommended range. Increase pressure in small steps until the pattern becomes smooth and evenly atomized. Too little pressure creates large droplets, while too much pressure creates dry spray and wasted material.
How to set fluid flow
Turn the fluid control clockwise to reduce material flow. Turn it counterclockwise to increase flow. Begin with a modest opening, then spray a test pattern.
The pattern should look wet enough to join smoothly but not so wet that the edges sag. If the gun spits or produces heavy droplets, inspect the fluid tip, needle, paint strain, and air pressure before simply opening the fluid control further.
How to Adjust the Spray Fan
The fan control changes the spray from a narrow round pattern to a wider oval pattern. A wide fan works well for doors, cabinets, walls, and vehicle panels. A narrow fan helps with edges, legs, rails, and small parts.
For large flat surfaces, open the fan control until the pattern is broad and even. Keep the gun square to the surface as you spray. Tilting the gun can make one side of the pattern heavier than the other.
Test the fan on paper or cardboard. Hold the gun at your planned working distance and pull the trigger for one second. Check for these signs:
• An even oval shows that the fan is balanced.
• Heavy ends suggest uneven atomization or a dirty air cap.
• A heavy center may mean too much fluid or too little air.
• A weak pattern may mean low pressure, thin material, or restricted air flow.
The ideal pattern has a soft edge with consistent material from top to bottom. It should not look like a narrow stream or a cloud of dry dust.
In my own work, I used to open the fan too far when spraying cabinet doors. That made the pattern look efficient, but the paint became thin at the edges. A slightly narrower fan and slower, controlled passes gave me better coverage with less sanding.
HVLP Spray Gun Settings by Material
The correct HVLP spray gun settings depend heavily on the coating. A thin stain needs very different adjustments from a thick primer.
Lacquer and clear coat
Lacquer and many clear coats atomize well with a medium fluid tip. A 1.3 to 1.4 mm nozzle is common for thin finishes, but always follow the coating label and gun manual.
Start with moderate air pressure and a medium fluid setting. Keep the gun moving before pulling the trigger. This helps prevent heavy spots at the beginning of each pass.
Water-based paint
Water-based paint often needs careful thinning and strong atomization. Some products spray well without thinning, while others need a small amount of clean water or manufacturer-approved reducer.
Use only the reduction amount listed on the product data sheet. Too much water can reduce coverage, weaken the film, or cause runs. A clean, fine-mesh filter can also prevent dried material from blocking the fluid tip.
Oil-based enamel
Oil-based enamel is often thicker and may require a larger nozzle. A 1.5 to 1.8 mm fluid tip is a common starting range, though the exact size depends on the product.
Use slow, steady passes and allow proper drying time. Thick enamel can look smooth at first but sag later if too much material is applied.
Primer
Primer usually needs more fluid flow than a finish coat. A 1.8 to 2.5 mm nozzle may work better for thick primers.
Apply primer in controlled coats instead of trying to cover the surface in one pass. Heavy primer coats can trap solvent, create texture, and make sanding harder.
Wood stain
Stain usually requires a smaller fluid opening and gentle air pressure. Too much air can blow stain away from edges or create uneven color.
Spray the stain, then wipe it according to the product instructions. Test on scrap wood first because wood species, grain, and porosity can change the final color.
Choosing the Right Nozzle and Needle Size
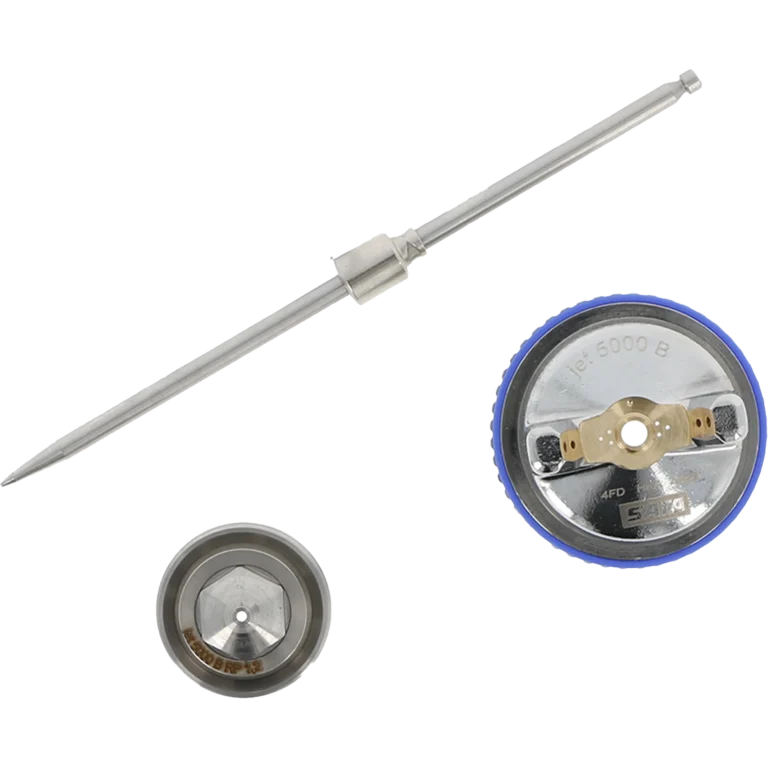
The nozzle, needle, and air cap form a matched set. Their size controls how much material the spray gun can handle.
A general guide looks like this:
• 1.0 to 1.2 mm works well for thin stains, dyes, and some detail coatings.
• 1.3 to 1.4 mm suits many lacquers, sealers, and clear coats.
• 1.5 to 1.8 mm handles many enamels and general-purpose paints.
• 1.8 to 2.5 mm works better for thick primers and heavy coatings.
These ranges are not universal. A coating manufacturer may recommend a different size, and professional spray guns often have specific requirements.
If the nozzle is too small, the gun may struggle to deliver material. You may see spitting, poor coverage, or a narrow pattern. If the nozzle is too large, the gun may flood the surface and create runs.
Never force a thick coating through a small tip by raising air pressure alone. Pressure cannot fully replace the correct nozzle size. Strain the coating, use the proper reducer, and choose a fluid tip designed for the product.

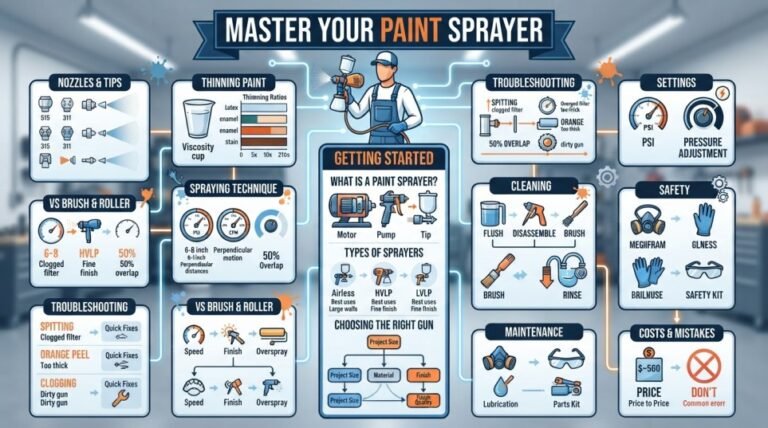
Spray Gun Settings: How to Adjust Pressure, Fluid, Air & Spray Pattern
Spray Distance, Speed, and Overlap
Even perfect HVLP spray gun settings cannot fix poor technique. Hold the gun 6 to 8 inches from the surface for many common applications. Some guns and coatings may work best slightly closer or farther away.
Keep the gun perpendicular to the surface. Do not swing your wrist in an arc. Arcing creates a heavier center and lighter edges because the spray distance changes during the pass.
Use a consistent movement:
- Start moving the gun before pulling the trigger.
- Pull the trigger and spray across the surface.
- Release the trigger just before reaching the end.
- Begin the next pass with a consistent overlap.
A 50 percent overlap is a reliable starting point. This means each pass covers about half of the previous pass. Some coatings need 60 to 75 percent overlap for even color, especially with metallic finishes.
Move too slowly, and the coating may run. Move too quickly, and the finish may become rough or dry. The correct speed leaves a smooth, wet film without puddles.
Temperature and humidity also matter. Warm, dry air can cause the coating to dry before it reaches the surface. Cool conditions can slow drying and increase sagging. Follow the product’s recommended application range whenever possible.
How to Test HVLP Spray Gun Settings
Testing takes less time than repairing a bad finish. Use a piece of cardboard, masking paper, or scrap material similar to the project surface.
Set the gun at the same distance and angle you will use during the job. Spray one short pass, then inspect the pattern and surface.
Look for:
• Fine, even droplets
• A balanced oval pattern
• No heavy center or dry edges
• No pulsing or spitting
• A wet but controlled finish
If the paint lands as large drops, increase air pressure slightly or thin the coating according to the product instructions. If the paint looks dusty, reduce the gun distance or lower the air pressure. If the surface becomes too wet, reduce fluid flow or increase your movement speed.
Make only one adjustment at a time. This is a lesson I learned after changing pressure, fluid, and fan settings together. The result improved, but I had no idea which adjustment helped. One change at a time makes the process easier to understand and repeat.
Common HVLP Spray Problems and Fixes
Orange peel
Orange peel looks like the texture of a citrus skin. It often comes from poor atomization, material that is too thick, low temperature, excessive spray distance, or fast gun movement.
Try these steps:
• Confirm that the coating is reduced correctly.
• Increase air pressure slightly within the recommended range.
• Move the gun closer while keeping the surface safe from flooding.
• Slow down enough to create a smooth wet film.
• Check that the nozzle and air cap are clean.
Runs and sags
Runs happen when too much coating collects in one area. Common causes include excessive fluid flow, slow movement, close spraying, or too much overlap.
Reduce fluid flow slightly and use lighter coats. If a run occurs, avoid wiping it while wet unless the product instructions allow it. Let it dry, sand it flat, and recoat as needed.
Dry spray
Dry spray feels rough and looks dull or powdery. It often results from spraying too far away, moving too quickly, using too much air, or working in hot, dry conditions.
Move closer, reduce air pressure slightly, or use the approved reducer. Do not solve every dry spray problem by adding more fluid, because that can create runs.
Spitting
Spitting may come from low material, a loose nozzle, blocked passages, dirty air caps, damaged seals, or an incorrect needle and nozzle match.
Clean the gun and check that the fluid tip is tight. Inspect the needle for damage and make sure the cup vent is open. A blocked vent can stop material from flowing smoothly.
Uneven coverage
Uneven coverage can result from poor overlap, changing distance, an unbalanced fan, or inconsistent gun speed. Use guide lines or visual markers on large panels until your passes become steady.
HVLP Compressor and Air Supply Requirements
An HVLP spray gun needs more air volume than many small air tools. Compressor size is often measured in CFM, or cubic feet per minute. Your compressor must provide enough CFM at the pressure required by the gun.
Do not rely only on the tank size. A large tank may offer a short burst of air, but the compressor still needs enough output to keep up during longer spraying.
Check these details:
• Compare the gun’s required CFM with the compressor’s delivered CFM.
• Use a hose with enough inside diameter for the gun.
• Keep the hose as short as practical.
• Drain moisture from the tank and air lines.
• Use a quality regulator and moisture separator.
Water in the air line can cause blushing, fisheyes, poor adhesion, and uneven atomization. In humid weather, inspect the separator more often.
If the compressor runs constantly and pressure drops during spraying, the gun may stop atomizing properly. You may see a rough finish even when the HVLP spray gun settings appear correct.
Cleaning and Maintenance After Spraying
Clean the spray gun as soon as possible after use. Dried coating can block the air cap, fluid tip, needle, and internal passages.
A basic cleaning process includes:
- Empty leftover material into the proper storage or waste container.
- Follow the coating label for the correct cleaning fluid.
- Rinse the cup and spray a small amount through the gun if permitted.
- Remove the air cap and fluid tip carefully.
- Clean the needle, nozzle, and air cap with the correct tools.
- Wipe the gun body and inspect seals.
- Store the parts clean and dry.
Do not use metal picks that can damage the nozzle. A small scratch can distort the spray pattern. Avoid soaking seals in solvents unless the gun manufacturer says it is safe.
Wear gloves, eye protection, and suitable respiratory protection. Spray in a ventilated area, and follow the coating safety data sheet. Many finishes release vapors that can harm your health or ignite near sparks and open flames.
Safety Tips for HVLP Spraying
HVLP systems reduce overspray compared with some high-pressure systems, but they do not make spraying risk-free. Fine particles and chemical vapors can still enter the lungs or settle on nearby surfaces.
Use these safety practices:
• Wear a properly selected respirator for the coating.
• Use eye protection and chemical-resistant gloves.
• Provide strong ventilation without creating turbulent air across the wet finish.
• Remove flames, sparks, heaters, and smoking materials.
• Keep the spray area clean and free of trip hazards.
• Store coatings in approved containers.
• Follow the product label and safety data sheet.
Local rules may require specific ventilation, protective equipment, or waste disposal methods. Professional shops should also review applicable workplace and fire safety requirements.
Safety is part of good technique. A clean, controlled spray area protects both your health and the quality of the finish.
A Simple HVLP Spraying Process
Use this process when you need repeatable HVLP spray gun settings.
- Prepare the surface by cleaning, sanding, and removing dust.
- Strain and reduce the coating only as directed.
- Select a nozzle size that matches the material.
- Check the compressor, hose, regulator, and moisture separator.
- Set the fan to a medium width.
- Set air pressure at the lower end of the recommended range.
- Adjust fluid flow until the test pattern is even.
- Spray a test piece before touching the project.
- Hold the gun square and maintain a steady distance.
- Apply light, overlapping coats.
- Allow the correct flash and drying time.
- Clean the spray gun immediately after use.
Keep a small record of your settings. Write down the coating, reducer amount, nozzle size, pressure, temperature, and result. This turns future projects into a repeatable process instead of a guessing game.
HVLP Spray Gun Settings for Common Projects
Cabinets and furniture
Use a fine to medium nozzle, moderate air pressure, and a wide fan. Spray the inside edges first, then the larger faces. Keep the finish light enough to avoid runs on vertical panels.
Automotive panels
Use the coating maker’s technical sheet as your main guide. Metallic and pearl finishes need consistent distance, overlap, and gun speed because uneven passes can change the color appearance.
Trim and doors
A medium fan with controlled overlap works well. Spray edges carefully, then move across the broad face. Watch the corners because material can build up there.
Small crafts and detail work
Use a smaller nozzle and narrow fan. Lower fluid flow helps prevent flooding small parts. Practice on scrap material because small errors become obvious on tiny surfaces.
The best HVLP spray gun settings are always project-specific. A setting that works beautifully for a cabinet may fail on a thick primer or a fast-drying lacquer.
Frequently Asked Questions About HVLP Spray Gun Settings
What PSI should I use for an HVLP spray gun?
Many HVLP guns start around 20 to 30 PSI at the gun with the trigger pulled. The correct value depends on the model, air cap, nozzle, and coating, so check the manufacturer’s specification first.
How far should an HVLP spray gun be from the surface?
A distance of 6 to 8 inches is a useful starting point for many coatings. Keep the distance steady and adjust it only after testing the spray pattern.
Why is my HVLP spray gun spraying unevenly?
Uneven spray can come from low air pressure, thick material, a dirty air cap, a blocked nozzle, or an inconsistent spraying angle. Clean the gun, strain the coating, and test one adjustment at a time.
Should I thin paint for an HVLP spray gun?
Some paints need thinning, while others are designed to spray without reduction. Follow the product data sheet and add only the approved reducer in the recommended amount.
What nozzle size is best for HVLP paint spraying?
A 1.3 to 1.4 mm nozzle often suits thin finishes, while thicker paints and primers may need 1.5 to 2.5 mm. The coating thickness and gun manufacturer’s recommendation should guide your final choice.
Why does my HVLP spray gun create orange peel?
Orange peel may result from thick paint, low air pressure, excessive distance, fast movement, or cool conditions. Improve atomization, use the correct reduction, and maintain a steady wet coat.
Can a small compressor run an HVLP spray gun?
A small compressor may run a touch-up gun, but full-size HVLP guns often require more CFM than compact compressors can provide. If pressure drops during spraying, the compressor is likely too small or the air system is restricted.
Conclusion
Good HVLP spray gun settings come from balance. Match the nozzle to the coating, set air pressure while the trigger is pulled, adjust fluid flow carefully, and keep the fan and spray distance consistent.
Always test before spraying the final surface. Small changes in pressure, speed, overlap, and distance can turn a rough finish into a smooth one. Clean the gun after every project, follow the coating manufacturer’s instructions, and protect yourself with proper ventilation and safety gear.
Start with a scrap panel today and record your results. With practice, you will build reliable HVLP spray gun settings for cabinets, furniture, trim, vehicles, and more. Share your own spraying tips or explore additional finishing guides to keep improving.