
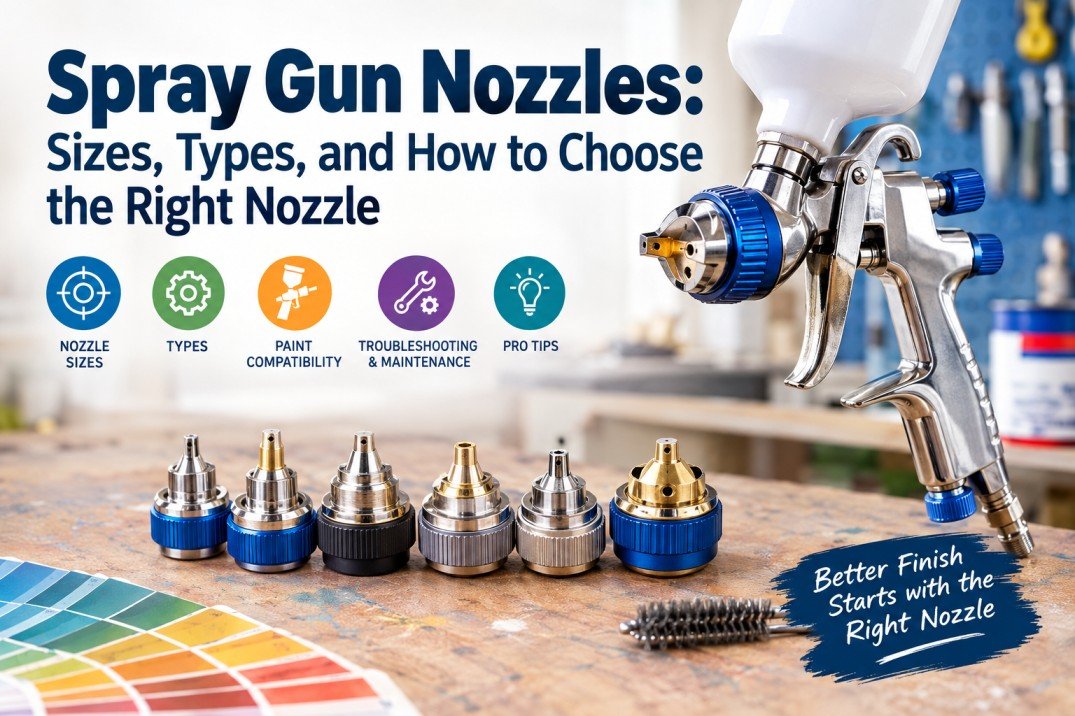
Decoding Spray Gun Nozzles: Sizes, Types, and How to Choose the Right Nozzle
If you have ever sprayed paint and fought with runs, orange peel, or a dry, dusty finish, the nozzle on your spray gun was likely part of the story. The nozzle is small, but it has a big job. It decides how much paint comes out. It also shapes the spray fan and helps turn wet paint into a clean, even mist. In this guide, we will break down spray gun nozzles in plain words. You will learn sizes, types, and how to choose the right one for your project, from cars to cabinets to walls.
What Is a Spray Gun Nozzle?
The spray gun nozzle is the part that the paint flows through as it leaves the gun. It sets the opening size for the paint stream. The nozzle also works with the needle and the air cap to control the spray pattern. Together, these parts decide how your coating looks on the surface.
What Does a Spray Gun Nozzle Do?
The nozzle controls paint flow and the first step of atomization. Think of it like the end of a garden hose. A small opening gives a thin stream. A large opening gives a heavy stream. With a spray gun, the air cap then breaks that stream into fine droplets. The nozzle size tells the gun how much paint it can feed into the air for that break-up.
Spray Gun Nozzle vs Fluid Tip vs Air Cap
People often say “nozzle” and “fluid tip” to mean the same part on a pneumatic spray gun. The air cap is a different part. It has holes that blow air across the paint. The air cap shapes the fan and helps atomize the paint. So, the fluid tip (nozzle) controls paint volume. The air cap controls air flow and pattern. Both must match for best results.
Why Nozzle Size Matters So Much
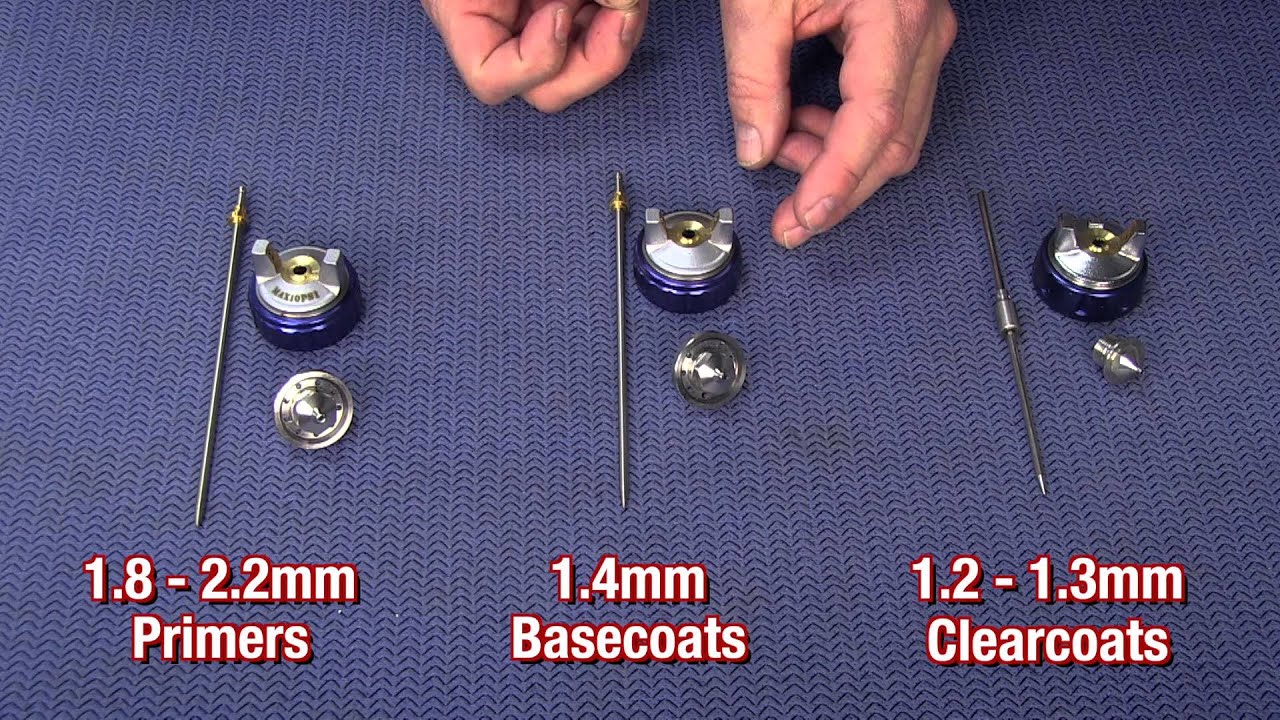
Nozzle size affects everything: atomization, finish, speed, and waste. A nozzle that is too big dumps paint. You get runs and sag. A nozzle that is too small starves the fan. You get dry spray and orange peel. The right size gives a smooth fan, even film, and fewer passes. It saves time and material.
How Do Spray Gun Nozzles Work?
A spray gun is a simple machine when you break it down. The needle pulls back. The nozzle opens a gap. Paint flows. The air cap blows air across that flow. That shears paint into tiny drops. The fan comes out flat and even when needle, nozzle, and air cap are in sync.
The Role of the Fluid Nozzle
The fluid nozzle sets the orifice size. It meters paint volume. If your paint is thick, you often need a larger orifice. If your paint is thin, a smaller orifice can help. The nozzle also seats against the needle tip. A clean, round orifice gives a clean fan. A damaged or dirty orifice makes a crooked or spitty fan.
The Role of the Needle
The needle is a tapered pin that moves back and forth inside the nozzle. When you pull the trigger, the needle lifts. That opens the path for paint. The needle and nozzle seat must match. If they do not match, the gun can leak, spit, or not seal well. The needle also helps fine-tune flow. Many guns let you adjust how far the needle can travel.
The Role of the Air Cap
The air cap has horn holes and atomization jets. It wraps air around the paint flow. This breaks paint into droplets and spreads them wide into a fan shape. Different air caps change the fan width and droplet size. High-flow caps can handle thicker paint. Fine caps give silky atomization for thin materials.
What Happens Inside the Spray Gun
Inside the gun, air and fluid paths run side by side. Your compressor sends air through the body to the air cap. Your cup or pressure pot feeds paint to the nozzle. When you pull the trigger, air flows first, then paint. The air jets slice the paint stream into mist. The fan spreads out as it hits the target. Each part must be clean and matched to avoid turbulence and gaps in the fan.
Spray Gun Nozzle Sizes Explained
Spray gun nozzles use millimeters to mark size. A 1.3 mm nozzle has a 1.3 mm hole, and so on. Small sizes are for thin coatings and detail. Large sizes are for thick coatings and fast build. Use the smallest size that still flows well. That gives fine atomization and better control.
0.8 mm Spray Gun Nozzle
Use 0.8 mm for very thin materials. This size is good for small craft work, inks, dyes, and some lacquers. It also works for tight detail on models. Flow is low, so progress is slow. But control is high.
1.0 mm Spray Gun Nozzle
A 1.0 mm nozzle handles thin clears, toners, and dyes. It can handle shellac and some thinned lacquers. It is also a nice size for fine touch-ups on small parts. It may struggle with any coating that has heavy solids.
1.2 mm Spray Gun Nozzle
A 1.2 mm nozzle is a bridge size. It can shoot thin basecoats and clear coats on small panels. It is also steady for waterborne stains and sealers. It is not ideal for thick primer or heavy enamel. But it gives great control on trim or narrow work when thinned right.
1.3 mm Spray Gun Nozzle
A 1.3 mm is a favorite for many basecoats and clear coats in auto work. It gives fine atomization with normal reducer. It is also great for pre-catalyzed lacquer on cabinets and furniture. If you want a smooth finish without too much build in one pass, 1.3 mm is a strong pick.
1.4 mm Spray Gun Nozzle
A 1.4 mm nozzle offers a bit more flow than 1.3 mm. It is common for single-stage auto paints and clear coats that need a hair more product. Many furniture finishes also like 1.4 mm when the shop is cooler, since paint may thicken as temp drops.
1.5 mm Spray Gun Nozzle
A 1.5 mm nozzle is a solid size for general use with thicker clears, some enamels, and light primers. It can speed up work on doors, cabinets, and fences when the paint is on the thick side. It may be too big for thin basecoats unless you reduce more.
1.7 mm Spray Gun Nozzle
A 1.7 mm nozzle is a common primer size. It can handle epoxy primers and high-build types with proper reduction. It moves product fast. Keep your passes steady. You can bury scratches and sand lines more quickly with this size.
2.0 mm Spray Gun Nozzle
A 2.0 mm nozzle is for very heavy primers, fillers, and thicker latex paints. It pushes a lot of material. Use it for high-build coats, MDF edge sealer, or heavy enamel on doors. Watch for runs. Fine atomization is possible with the right air cap and pressure. But it still leans to heavy build.
2.5 mm and Larger Spray Gun Nozzles
These sizes are for very thick coatings. Think texture, heavy latex, elastomeric, or gel coats. They are not for fine clear coats. Use them when speed and build matter more than a glass-like finish.
Spray Gun Nozzle Size Chart
A nozzle chart is a guide. It helps you pick a size range to test. It does not replace the coating’s data sheet. The maker of the paint tells you the best spread of sizes, reducers, and pressures. Always start there.
Spray Gun Nozzle Size Comparison
Here is a simple chart you can use as a first step:
- 0.8–1.0 mm: Dyes, inks, toners, fine detail
- 1.2–1.3 mm: Basecoats, thin clears, lacquers, sealers
- 1.3–1.4 mm: Automotive base/clear, cabinet lacquer, acrylics
- 1.4–1.5 mm: Single-stage auto, thicker clears, enamels
- 1.7–2.0 mm: Primers (epoxy, 2K), thicker enamels, latex (thinned)
- 2.2–2.5+ mm: High-build primers, latex, texture, elastomeric
Note: Check the paint’s technical data sheet (TDS). It overrides any generic chart. If the TDS says 1.3–1.4 mm, test both and choose by fan quality, not just flow.
Why Nozzle Size Charts Are Only Starting Points
Charts do not know your climate, gun, or compressor. A 1.3 mm in a hot shop can feel like a 1.2 mm, because thinner flashes fast. In cold weather, the same paint feels thicker. You might need a 1.4 mm. Your air cap and skill also change the result. That is why you always test on a sample panel first.
Spray Gun Settings: How to Adjust Pressure, Fluid, Air & Spray Pattern
How to Choose the Right Spray Gun Nozzle Size
A good nozzle choice starts with your paint. Then you match the surface and the finish you want. Your gun type and compressor play a part too. Do not guess. Check the TDS. Then test one size up and one size down. Choose the one that gives a smooth, even fan with no dry edge.
Start With the Paint or Coating
Look up the paint’s TDS. It will list a nozzle range and air pressure. Use that first. If the paint is very thick, warm it a bit (if allowed). Warm paint flows better. If the TDS allows thinning, thin to the listed viscosity and retest with the recommended tip.
Consider the Surface You Are Spraying
Small parts and tight spots need control. Go smaller to keep the fan narrow and light. Large flats like doors and hoods need flow and speed. Go larger to move product and keep a wet edge.
Consider the Finish You Want
For a glass-smooth clear coat or furniture finish, pick the smallest size that still gives a wet coat. For primer build or fence painting, you can go bigger. Use speed and coverage over atomization quality.
Consider Your Spray Gun Type
HVLP guns need more air volume. They tend to use a slightly larger nozzle for the same paint compared to some conventional guns. LVLP guns can do well with smaller tips since they atomize at lower air volumes. Match the nozzle to the cap and style of your gun.
Consider Your Air Compressor
If your compressor cannot feed enough air, the fan will suffer. You will see dry edges and tails. If your compressor is small, use an LVLP gun and a moderate nozzle. Large nozzles with HVLP caps need a strong compressor to atomize well.
What Spray Gun Nozzle Size Should You Use for Different Paints?
Picking a size for each paint type is simple once you know the goal. Thin coatings like stain need small nozzles. Thick primers need large ones. Always test and adjust one size up or down if your pattern is not right.
Nozzle Size for Automotive Paint
- Basecoat: 1.2–1.3 mm
- Clear coat: 1.3–1.4 mm
- Single-stage: 1.3–1.5 mm
Test fan quality and adjust pressure. You want a fine mist and a wet edge with no runs.
Nozzle Size for Primer
- Epoxy primer: 1.4–1.8 mm
- High-build primer: 1.7–2.0 mm
- Filler primer: 1.8–2.0+ mm
Aim for build without texture. If it looks pebbly, the nozzle may be too small or pressure too low.
Nozzle Size for Enamel Paint
Oil-based enamel often needs 1.4–1.8 mm, depending on reducer and temp. Warm the paint if allowed. Thin per TDS. Shoot test passes on a sample panel.
Nozzle Size for Latex Paint
Latex is thick. Even when thinned, it likes 1.8–2.5 mm on a conventional or HVLP gun. If your gun and compressor struggle, consider an airless sprayer with the right tip.
Nozzle Size for Acrylic Paint
Waterborne acrylics for cabinets often run well at 1.3–1.5 mm with a fine finish air cap. For wall paints, you may need 1.8–2.0 mm or move to airless.
Nozzle Size for Polyurethane
Clear poly, especially waterborne, often sprays well at 1.3–1.4 mm. Oil-based polys may like 1.4–1.5 mm. Use fine filters. Keep dust out.
Nozzle Size for Stain
Stains are thin. Use 0.8–1.3 mm depending on the brand. A smaller size helps prevent flooding the grain. Wipe excess when needed.
Nozzle Size for Lacquer
Lacquer is thin and flashes fast. 1.2–1.4 mm works well for most. Go smaller on fine work. Watch the dry edge. Add retarder as needed per TDS.
Spray Gun Nozzle Size for Automotive Painting
Auto work needs fine atomization and control. You want the right film load for each step. Base, clear, and primer all have different needs. Choose the nozzle that keeps a wet, even fan.
Nozzle Size for Automotive Basecoat
1.2–1.3 mm is a safe zone for base. Most basecoats are thin and need fine mist. You want even color coat, no mottling, no stripes. If your fan is heavy, drop to 1.2 mm or lower the fluid.
Nozzle Size for Automotive Clear Coat
Clear is thicker than base. A 1.3–1.4 mm nozzle helps you lay a smooth, glossy film. Use a consistent speed and a 50% overlap. If you get dry spots, lift your pressure a bit or warm the clear.
Nozzle Size for Automotive Primer
For epoxy and high-build primers, 1.7–2.0 mm is typical. This puts down build so you can block sand later. If you get spitting, clean the nozzle and strain your primer.
Nozzle Size for Automotive Touch-Up Paint
Use 0.8–1.0 mm for small chips and blends. Keep the fan narrow. Feather the edge. Go light and slow.
Spray Gun Nozzle Size for Primer
Primer is thicker and has high solids. It fills scratches. It seals bare spots. It needs a larger nozzle. But do not go huge. Balance flow and atomization.
High-Build Primer Nozzle Size
1.8–2.0 mm is common. This size pushes material fast. It hides sand scratches. Watch your overlaps and distance to avoid sags.
Epoxy Primer Nozzle Size
1.4–1.8 mm works with most epoxies. If the epoxy is thick in cold weather, warm it or use a 1.7–1.8 mm. Follow the induction time listed by the maker.
Filler Primer Nozzle Size
Filler primer is heavy. It often needs 1.8–2.0+ mm. Read the TDS for reduction. Spray a test dog-bone pattern. Adjust fluid in small steps.
Why Primer Clogs Small Nozzles
Primer has solids that can settle and lump. If you do not strain it, small nozzles clog fast. Also, primer dries quick at the tip. Thin coats can flash and turn into grains at the nozzle.
How to Reduce Primer Properly
Use the reducer or activator named on the TDS. Do not guess with random solvents. Mix by weight or by the ratio on the can. Strain through a fine mesh (125–190 microns). Test for fan quality.
Spray Gun Nozzles for HVLP and LVLP Guns
HVLP and LVLP both can lay nice coats. They use air in different ways. Nozzle choice must match the cap and the air you have.
HVLP Spray Gun Nozzle Sizes
HVLP runs high volume, low pressure. It moves a lot of air to atomize gently. For a given paint, an HVLP may prefer a 0.1–0.2 mm larger nozzle than a conventional gun. Example: clear coat at 1.3–1.4 mm.
LVLP Spray Gun Nozzle Sizes
LVLP runs low volume, low pressure. It can work with small compressors. It often handles thin to medium coatings with 1.2–1.4 mm. For thick paints, you may need to thin more or move to airless.
Are HVLP and LVLP Nozzles Interchangeable?
Not usually. Many brands sell matched sets. The nozzle, needle, and cap are tuned to each other. Mixing parts from other lines or brands often gives poor results.
HVLP vs LVLP Nozzle Selection
- Thin coatings: both can use 1.2–1.4 mm
- Thick coatings: HVLP can use 1.5–1.8 mm if air volume is strong
- Small compressors: LVLP with 1.2–1.4 mm and careful reduction
Choose based on your air supply and the finish goal.
Spray Gun Types: A Complete Guide to 9 Different Paint Sprayers
Spray Gun Nozzle vs Tip: Are They the Same?
Words can confuse here. On a pneumatic gun, the “nozzle” or “fluid tip” is the paint orifice. On an airless sprayer, the “tip” is a replaceable metering piece at the guard. They are not the same part or system.
Pneumatic Spray Gun Nozzles
These are the fluid tips on HVLP, LVLP, and conventional guns. They work with a needle and an air cap. Size is in millimeters.
Airless Spray Tips
Airless tips use numbers like 515 or 310. The first digit times two is the fan width in inches at 12 inches from the surface. The last two digits are the orifice in thousandths of an inch.
Airless Tip Numbering Explained
A 515 tip means a 10-inch fan (5 × 2) and a 0.015 in orifice. A 310 tip means a 6-inch fan (3 × 2) and a 0.010 in orifice. Larger numbers move more paint. Use smaller tips for thin paint and detail.
Why Spray Gun Terminology Causes Confusion
Different tools use different words. “Tip” on an airless is not the same as the “nozzle” on a pneumatic gun. Always check the manual and parts list for your gun type.
Can You Use a Bigger Spray Gun Nozzle?
Yes, you can. A larger nozzle can speed work and help with thick paint. But it can also cause issues. Pick it with care. Test before you spray your project.
Benefits of a Larger Nozzle
- Faster coverage
- Better flow with thick paint
- Fewer passes on large flats
This is great for primer and big jobs.
Problems With an Oversized Nozzle
- Runs and sags
- Texture or orange peel from heavy droplets
- More overspray and waste
If the fan looks “chunky,” the nozzle may be too big or pressure too low.
When Should You Move to a Larger Nozzle?
If you must open the fluid knob all the way, and the fan still looks dry, move up one size. If your compressor can handle it and the TDS allows it, a larger nozzle can fix starved spray.
Can You Use a Smaller Spray Gun Nozzle?
Yes, but do it for thin coatings or detail. A small nozzle gives control. It can also improve atomization with delicate finishes.
Benefits of a Smaller Nozzle
- Better control on edges and trim
- Finer atomization on thin materials
- Less risk of runs on vertical parts
Great for basecoat and fine clear coats.
Problems Caused by an Undersized Nozzle
- Dry spray, pebbly look
- Tails at the fan edges
- Slow progress and poor wet edge
If you see a dusty look or a rough feel, the nozzle is likely too small.
Signs Your Nozzle Is Too Small
You need very high pressure to get a smooth fan. The center is thin but the edges look dry. Your passes leave a scratchy sound. The surface feels sandy, not slick.
What Happens When You Use the Wrong Spray Gun Nozzle?
The wrong nozzle shows up fast. Look at the fan. Feel the coat. Watch how the paint lays down. Your eyes and hands will tell you the truth in seconds.
Orange Peel
Orange peel looks like a textured skin. It can come from low atomization, too thick paint, or too large a nozzle. Fix by raising air pressure a bit, warming or reducing paint per TDS, or moving to a smaller nozzle.
Runs and Sags
Runs happen when too much paint hits the surface. A large nozzle or slow hand can cause this. Reduce flow, step down a size, or speed up your pass.
Dry Spray
Dry spray is a dusty, rough coat. Often the nozzle is too small, pressure is too low, or the gun is too far from the surface. Increase pressure in small steps or move up a size.
Spitting
Spitting is sudden bursts of paint. It can come from a damaged or dirty nozzle, mismatched needle, or loose nozzle. Clean, match parts, and tighten to spec.
Uneven Spray Pattern
A lopsided fan comes from a plugged air horn hole or a damaged nozzle. Clean the cap holes with a soft brush. Check for a nick on the nozzle seat. Replace if needed.
Excessive Overspray
Too much overspray can be from high pressure, a large nozzle, or poor gun distance. Drop pressure, move closer, or step down one size if the paint is thin.
Poor Atomization
Big droplets mean poor atomization. Raise pressure, shorten distance, or use a finer air cap. If paint is thick, warm or reduce it. Or step down to a smaller nozzle within the TDS range.
Slow Material Flow
If nothing seems to come out, the nozzle may be too small, the cup vent blocked, or the filter clogged. Open the vent, clean the filter, and test with a larger nozzle.
Spray Gun Nozzle and Paint Viscosity
Viscosity is the thickness of a liquid. It changes with temperature and solvent. It has a huge impact on nozzle choice. Thick paint needs a larger orifice, more pressure, or proper thinning.
What Is Paint Viscosity?
Viscosity is how fast paint flows. Thin paint flows fast. Thick paint flows slow. You can measure it with a viscosity cup. The TDS of most paints lists a target flow time.
How Viscosity Affects Nozzle Choice
High viscosity needs more room to flow. Pick a larger nozzle or reduce to the target viscosity. Low viscosity works better with smaller nozzles. That helps control film build and improves atomization.
How Temperature Changes Paint Viscosity
Paint gets thicker in cold weather and thinner in heat. Warm paint flows easier. Store coatings at the temperature listed by the maker. Use a warming cabinet if needed. Never overheat.
When Paint Thinning Is Appropriate
Thin only as the TDS allows. Start small. Mix well and strain. Test the fan. If the fan looks good but the flow is low, step up a nozzle size before you over-thin.
Why Over-Thinning Causes Problems
Too much thinner hurts build and bite. It can increase overspray and cause runs. It can also change color or gloss. Always follow the TDS for limits.
Paint Sprayer Gun 101: (Types, Uses, and Expert Advice) Everything You Need to Know Before Buying
How to Change a Spray Gun Nozzle
Changing a nozzle is simple if you follow a few steps. Unload the gun. Keep parts clean. Match the needle and cap to the new nozzle size.
Tools You May Need
- Wrench set or gun spanner
- Soft nylon brushes
- Nozzle cleaning needles (plastic or soft brass only)
- Lint-free cloths
- Thread lube (as the maker recommends)
How to Remove the Old Nozzle
- Disconnect air and empty paint.
- Remove the air cap first.
- Back out the fluid adjustment to free the needle.
- Use the correct wrench to loosen the nozzle. Turn gently.
- Do not scratch the seat or orifice.
How to Install a New Nozzle
- Clean the seat and threads.
- Install the matching needle.
- Thread the new nozzle by hand first. Then snug with the wrench to the maker’s torque.
- Reinstall the air cap matched for that nozzle.
- Check trigger movement and seal.
How to Test the New Nozzle
Fill with clean thinner or water (for waterborne). Test the fan on cardboard. Look for an even pattern and no spits. Then load paint and test again.
Mistakes to Avoid When Changing a Nozzle
- Mixing a 1.3 mm nozzle with a 1.4 mm needle
- Over-tightening the nozzle
- Using pliers that scratch sealing faces
- Skipping a pattern test
Do Spray Gun Nozzles Wear Out?
Yes. Nozzles wear with use. Abrasive solids, poor cleaning, and drops can damage them. Worn nozzles make poor fans. Replace them when you see signs of wear.
Signs of a Worn Spray Gun Nozzle
- Lopsided fan
- Spitting at low flow
- Leaks at the tip when closed
- Rough ring around the orifice
What Causes Nozzle Wear?
- Scraping with metal tools
- Dried paint crystals
- Abrasive pigments in primers
- Cross-threading during install
How Nozzle Damage Affects Spray Quality
A nicked orifice distorts the spray. You get thick spots, tails, and runs. Your finish will look uneven even with perfect technique.
When Should You Replace a Spray Gun Nozzle?
Replace when cleaning does not fix pattern issues. If the seat is scratched, the needle and nozzle should be changed as a set. Many pros keep a spare set ready.
How to Clean Spray Gun Nozzles
Clean as soon as you finish. Do not let paint dry in the tip. Use the right solvent or water for the coating. Be gentle. The orifice edge is delicate.
How to Clean a Nozzle After Water-Based Paint
- Flush with warm water.
- Soak for a few minutes if needed.
- Use a soft brush and plastic picks.
- Rinse and dry with compressed air at low pressure.
How to Clean a Nozzle After Solvent-Based Paint
- Use the correct reducer or cleaning solvent listed in the TDS.
- Soak shortly, agitate with a soft brush.
- Blow dry with low air.
- Lightly oil threads if the maker says so.
How to Remove Dried Paint From a Nozzle
- Soak longer in the right solvent.
- Use soft brass wires designed for nozzles.
- Never force a hard steel pin inside the orifice.
- If paint will not come out, replace the nozzle.
Tools to Avoid When Cleaning a Nozzle
- Steel picks or nails
- Drill bits
- Sandpaper on the orifice
These can change the size or scratch the seat.
How to Inspect the Nozzle After Cleaning
Hold it up to the light. The opening should be a clean circle. No burrs or chips. Run a cotton swab around the seat. If it snags, there may be damage.
Note: A simple nozzle-maintenance diagram helps. Keep one in your shop binder for quick checks.
How to Tell If Your Spray Gun Nozzle Is Clogged
A clogged nozzle causes sudden pattern changes. It may spit or shoot a narrow streak. You might see the fan tilt to one side. Catch it early to avoid a bad coat.
Common Symptoms of a Clogged Nozzle
- Sudden spitting
- Narrow stream in the center of the fan
- One horn heavy, the other light
- Trigger feels sticky at the start of flow
Partial vs Complete Nozzle Blockage
A partial clog gives a bad fan and rough feel. A full clog stops flow even with air. If you suspect a clog, stop. Clean before you continue.
How to Safely Unclog a Spray Gun Nozzle
- Stop spraying.
- Remove the air cap.
- Use a soft brush and solvent or water to clean.
- Push debris out from the back, not into the orifice.
- Strain paint before refilling.
How to Prevent Nozzle Clogs
- Strain all coatings.
- Clean between coats if the flash is long.
- Use retarder per TDS in hot, dry air to stop tip-dry.
- Keep a clean rag to wipe the tip face lightly.
Spray Gun Nozzle Problems and Troubleshooting
Most spray issues trace back to four things: wrong nozzle size, wrong pressure, dirty gun, or wrong distance. Fix those first. Then check material mix.
Why Is My Spray Gun Spitting Paint?
Because the nozzle or needle seat leaks, or the nozzle is loose, or clogged. Clean, tighten, and make sure needle and nozzle sizes match.
Why Is My Spray Gun Spraying Too Much Paint?
Your nozzle is too big or your fluid knob is wide open. Close the fluid 1–2 turns and test. If still heavy, drop a size.
Why Does My Spray Gun Not Spray Paint?
Check the cup vent, fluid filter, and nozzle. A blocked vent stops flow. A clogged filter starves the gun.
Why Is My Spray Pattern Uneven?
Clean the air cap horn holes. Check for a nicked nozzle. Make sure the air cap is aligned and tightened.
Why Is My Spray Gun Creating Orange Peel?
The paint is too thick or the nozzle too big. Increase pressure slightly, reduce per TDS, or step down a nozzle size. Spray closer and keep a steady speed.
Why Is the Spray Gun Producing Dry Spray?
Nozzle is too small, pressure too low, or the gun is too far away. Raise pressure, step up a size, or move closer.
Why Is Paint Coming Out in Bursts?
Air leaks, loose nozzle, or clogged vent can cause bursts. Also check the cup gasket. Replace if cracked.
What I check first (quick triage)
- Is the nozzle tight and the right size?
- Are the air cap holes clean?
- Is the paint strained and at the right viscosity?
- Is the compressor giving steady pressure?
- Did I test on a scrap panel first?
How to Match the Spray Gun Nozzle, Needle, and Air Cap
These three parts form a set. They must match in size and design. Mixing parts from other sets leads to leaks, poor atomization, and odd fans.
Why the Nozzle and Needle Must Match
The needle seals in the nozzle. A mismatch leaves a gap or jams the needle. You can get leaks, spitting, or no flow. Always buy matched sets.
Why the Air Cap Matters
The air cap moves and shapes air. Some caps are for fine finish. Others are for high build. The cap must match the nozzle size and your goal.
What Happens When Spray Gun Components Are Mixed
Patterns go lopsided. Seals leak. You need odd pressures to spray. You waste paint. In short, it is not worth it.
How to Identify Your Spray Gun Model
Check the handle and case. Look for a part number. Download the manual. It lists nozzle, needle, and cap sets that fit.
Best Spray Gun Nozzle Size for Common Painting Jobs
These are starting points you can trust. Always adjust based on your paint brand, weather, and air supply. Test on scrap before the real job.
Best Nozzle Size for Cars
- Base: 1.2–1.3 mm
- Clear: 1.3–1.4 mm
- Primer: 1.7–2.0 mm
Use fine filters and clean the cap between coats.
Best Nozzle Size for Cabinets
- Sealer/lacquer: 1.3–1.4 mm
- Waterborne enamel: 1.3–1.5 mm
- Primer: 1.7–1.8 mm
Aim for smooth film and minimal sanding.
Best Nozzle Size for Furniture
- Dye/stain: 0.8–1.2 mm
- Clear coat: 1.2–1.4 mm
- Build coat: 1.4–1.5 mm
Thin per TDS for warmth and clarity.
Best Nozzle Size for Doors
- Enamel or acrylic: 1.4–1.8 mm
- Primer: 1.7–1.8 mm
Spray horizontal if you can to reduce runs.
Best Nozzle Size for Walls
- Latex (pneumatic): 1.8–2.5 mm, or use airless with a 515–517 tip
- Primers: 1.8–2.2 mm
Airless is faster for whole rooms.
Best Nozzle Size for Trim
- Enamel: 1.3–1.5 mm
- Primer: 1.5–1.7 mm
Use light coats and a narrow fan for detail.
Best Nozzle Size for Fences
- Stain: 1.0–1.4 mm
- Acrylic or latex: 1.8–2.5 mm
Keep wind in mind to reduce overspray.
Best Nozzle Size for Metal Surfaces
- Rust primers: 1.7–2.0 mm
- Epoxy: 1.4–1.8 mm
- Topcoat enamel: 1.4–1.6 mm
Wipe with solvent to remove oil before spraying.
Best Nozzle Size for Small Crafts
- Acrylics and stains: 0.8–1.2 mm
- Clear finishes: 1.0–1.2 mm
Test on scrap to avoid flooding small parts.
Should You Have More Than One Spray Gun Nozzle?
Yes. Most pros keep at least three sizes. One for thin coats, one for general finish, and one for primer or heavy build. This gives you range without fighting the gun.
Useful Nozzle Sizes for DIY Painters
- 1.3 mm for clear and lacquer
- 1.5 mm for enamel and acrylic
- 1.8–2.0 mm for primer and latex
Useful Nozzle Sizes for Automotive Painting
- 1.2–1.3 mm for base
- 1.3–1.4 mm for clear
- 1.7–2.0 mm for primer
Useful Nozzle Sizes for Furniture Painting
- 1.2–1.3 mm for dyes and sealers
- 1.3–1.4 mm for clears
- 1.4–1.5 mm for build coats
How to Build a Simple Nozzle Collection
Start with a 1.3 mm and a 1.8 mm set. Add a 1.5 mm later. That covers most projects in a small shop. Label each set. Keep matched needle and nozzle in a small case.
How Air Pressure Affects Spray Gun Nozzle Performance
Nozzle size is only half the story. Air pressure drives atomization. Too low, and you get tails and dry spray. Too high, and you get overspray and bounce-back.
What Happens With Low Air Pressure?
The fan narrows. The edges look rough. Droplets grow large. The finish feels gritty. You may see a hissy, irregular sound at the cap.
What Happens With High Air Pressure?
The fan widens. You get more overspray. Paint can bounce off and dust the surface. The gun may sound sharp and loud.
How to Set Air Pressure at the Spray Gun
Use a gauge at the gun handle. Pull the trigger and set “dynamic” pressure. Start at the maker’s setting and test. Adjust 2–3 psi at a time.
Why Compressor Pressure and Gun Pressure Differ
Hoses, fittings, and regulators cause pressure drop. A 90 psi setting at the tank might be 25 psi at the gun cap. Use wide hoses and short runs to reduce loss.
Spray Gun Nozzle Testing: A Simple Hands-On Method
Before any big job, test on scrap. Use cardboard, a test hood, or an old door. A five-minute test will save hours of sanding later.
How to Create a Spray Test Pattern
- Hold the gun 6–8 inches from the surface.
- Trigger for one full pass across 12 inches.
- Look at the band of paint. Is it even from top to bottom?
- Do a vertical pass too and compare.
What to Look for in the Test Pattern
- Evenness: No heavy center, no dry edges
- Droplet size: Fine mist, not blobs
- Fan shape: Flat and full, not crescent
- Sound: A smooth, steady hiss—not sputter or sharp blasts
How to Compare Two Nozzle Sizes
Do side-by-side passes with, say, a 1.3 mm and a 1.4 mm. Note the look and sound. With the right size, the fan looks silky. The paint feels wet and slick under a gloved finger, not gritty. With the wrong size, you see heavy streaks or a dusty edge.
Real test-panel example (from my shop):
- Task: Clear coat on a sedan hood, Saturday morning
- Gun: HVLP with matched 1.3 mm and 1.4 mm sets
- Air: 26 psi at the gun with trigger pulled
- 1.3 mm pass: Fan looked even, a soft hiss, droplets very fine. The surface felt slick right after the pass. No dry edge.
- 1.4 mm pass: Fan was wider and heavier. Sound was sharper. The coat looked wet, but I saw a slight wave on vertical edges. On the second coat, a small sag formed near a body line. I switched back to 1.3 mm and the problem stopped.
For that clear and that temp (72°F), the 1.3 mm gave the better finish with less risk. The 1.4 mm would have worked with a faster hand or a small pressure tweak, but it gave me less margin.
How to Record Your Spray Settings
Write down nozzle size, pressure, distance, speed, temp, and humidity. A small notebook by the compressor helps a lot. Snap a phone picture of your test panel with notes.
Common Spray Gun Nozzle Mistakes Beginners Make
These mistakes show up all the time. Avoid them and your finish will jump up a level fast.
Choosing a Nozzle by Size Alone
Do not pick a size because someone on a forum said so. Check the TDS. Test. Make your decision on fan quality and the feel of the coat.
Using a Small Nozzle for Thick Paint
If you push a small nozzle to spray heavy paint, you will get dry spray and tails. Move up a size or reduce to target viscosity.
Ignoring Manufacturer Recommendations
TDS sheets exist for a reason. They list proven mixes and sizes. Follow them first, then tune by test.
Mixing Incompatible Nozzle and Needle Sets
Different brands or lines do not always fit. A mismatch causes leaks and spit. Buy matched sets from the same line.
Cleaning With Metal Tools
Metal picks scratch. A single scratch ruins the fan. Use soft brushes and plastic or soft brass tools.
Never Testing the Spray Pattern
Always test on cardboard or scrap. One minute of testing can save hours of sanding.
Assuming a Bigger Nozzle Is Always Better
Bigger moves more paint, but not better paint. Choose the smallest size that still gives a wet, even film.
Spray Gun Nozzle Maintenance Tips
Good habits protect your nozzles and your finish. Maintain them like your best chisel or your favorite wrench.
Clean the Nozzle After Every Use
Do not leave paint in the gun. Flush, soak briefly, brush soft, and dry. This keeps the orifice clean and round.
Inspect the Nozzle Before Spraying
Check for chips, burrs, or clogs. Hold to the light. If it is not perfect, swap it out.
Store Spray Gun Nozzles Safely
Keep them in a small case with foam. Label each size. Do not toss them in a drawer.
Label Different Nozzle Sizes
Put a tag or color dot on each set. It saves time and prevents mix-ups.
Keep Matching Needle and Nozzle Sets Together
Store each set as a pair with its air cap. Mixing parts leads to bad patterns.
Frequently Asked Questions About Spray Gun Nozzles
Below are quick answers to common questions. Always check your paint’s TDS and your gun manual for final guidance.
What Is the Best Spray Gun Nozzle Size?
There is no single best. The best size is the one that gives an even fan and proper film with your coating. For many clear coats, 1.3–1.4 mm is common. For primers, 1.7–2.0 mm works well.
What Size Nozzle Is Best for Automotive Paint?
Base: 1.2–1.3 mm, Clear: 1.3–1.4 mm, Primer: 1.7–2.0 mm.
What Size Nozzle Is Best for Primer?
Epoxy: 1.4–1.8 mm. High-build and filler: 1.8–2.0+ mm, as the TDS allows.
What Size Nozzle Is Best for Clear Coat?
Most clears like 1.3–1.4 mm. Some thick clears may prefer 1.4–1.5 mm.
What Size Nozzle Is Best for Latex Paint?
On a pneumatic gun, 1.8–2.5 mm or more, with thinning as allowed. On airless, use tip sizes like 515–517.
What Size Nozzle Is Best for Enamel Paint?
Often 1.4–1.8 mm, based on reducer and temperature.
What Size Nozzle Is Best for Furniture?
Seal and clear: 1.2–1.4 mm. Build coats: 1.4–1.5 mm.
Is a Bigger Spray Gun Nozzle Better?
Not always. Larger means more paint, but not better finish. Choose the smallest size that still lays a wet film.
Can You Use a Smaller Nozzle for Thick Paint?
You can, but you will fight dry spray and tails. It is better to reduce per TDS or move up a size.
Are Spray Gun Nozzles Universal?
No. Nozzles, needles, and caps are often brand- and model-specific.
Do Spray Gun Nozzles Fit All Spray Guns?
No. Use parts made for your exact gun model.
Do Nozzle and Needle Sizes Have to Match?
Yes. They are a set. Using mismatched parts causes leaks and poor patterns.
How Often Should Spray Gun Nozzles Be Replaced?
When they show wear signs. Heavy primer use can wear them faster. Keep a spare set ready.
How Do You Clean a Clogged Spray Gun Nozzle?
Soak in the correct solvent or warm water. Use soft brushes and plastic picks. Do not force metal into the orifice.
Why Is My Spray Gun Spitting?
Likely a loose nozzle, damaged seat, or clog. Tighten, clean, or replace the matched set.
Why Is My Spray Gun Spraying Too Much Paint?
Too large a nozzle or too much fluid. Reduce fluid or step down a size.
Why Does My Spray Gun Have an Uneven Pattern?
Dirty air cap holes, clogged nozzle, or damaged orifice. Clean or replace as needed.
Can a Damaged Nozzle Cause Orange Peel?
Yes. Damage can disrupt atomization and cause texture.
Can You Change a Spray Gun Nozzle Size?
Yes, but also change the matching needle and use the right air cap.
What Nozzle Size Should Beginners Use?
For general finishes, start with 1.3–1.4 mm. For primer, start with 1.7–1.8 mm. Then test and adjust.
Final Practical Checklist for Choosing a Spray Gun Nozzle
This checklist turns the guide into action. Keep it by your spray bench.
Spray Gun Nozzle Selection Checklist
- Read the paint’s TDS. Note the nozzle range and pressure.
- Check your gun manual for matched sets.
- Warm or reduce paint as allowed. Strain it.
- Pick the smallest nozzle in the TDS range that still flows well.
- Set gun pressure at the handle with the trigger pulled.
- Spray a test pattern on scrap. Check for even fan, fine mist, and wet edge.
- If dry spray: increase pressure slightly, move closer, or step up a size.
- If heavy or runs: reduce fluid, raise speed, or step down a size.
- Note the settings in a log.
Paint-to-Nozzle Decision Path
- Thin materials (dye, stain, lacquer sealer): 0.8–1.3 mm
- Auto base/clear, cabinet lacquer: 1.2–1.4 mm
- Enamel, acrylic, waterborne furniture topcoats: 1.4–1.5 mm
- Epoxy primer, high-build primer: 1.7–2.0 mm
- Latex and very thick coatings: 1.8–2.5+ mm or move to airless
Test the Nozzle Before Spraying the Finished Surface
Always. Use a spare cabinet door on a Saturday afternoon. Or a scrap car fender before a weekend project. The test takes minutes. It tells you how the fan looks and sounds. Fine atomization makes a soft hiss and a smooth, wet look. Heavy droplets click and patter and leave a rough feel. Trust what you see and feel. Adjust from there.
One Comment
Comments are closed.