How To Choose The Right Spray Gun Nozzle Size (The Ultimate Guide)
You spend all Saturday painting a fence, cabinet, or bedroom wall. Then you step back and see a rough, patchy finish with runs, dry spots, or tiny bumps. It is easy to blame the paint or the spray gun. Yet the nozzle may be the real cause.
The wrong nozzle size can create poor atomization, uneven paint flow, heavy overspray, and wasted paint. A nozzle that is too small may struggle to move thick paint. A nozzle that is too large may flood the surface with too much material. Both problems can ruin an otherwise good project.
A spray gun nozzle size is based on the size of its fluid opening, also called the orifice. A larger orifice allows more coating to pass through. The fan width is the shape and width of the spray pattern. Paint viscosity is the thickness of the paint. These three factors work together.
This guide explains how to choose the right spray gun nozzle size for paint, primer, stain, clear coat, furniture, walls, fences, and vehicles. You will also learn how nozzle size changes with HVLP, LVLP, and airless sprayers. Choosing a nozzle for kitchen cabinets is very different from choosing one for a garden fence. Cabinets need control and a smooth finish. A fence needs speed and broad coverage.
What Is a Spray Gun Nozzle Size?
A spray gun nozzle size is the diameter of the opening through which paint leaves the gun. It is often listed in millimeters, such as 1.3 mm, 1.8 mm, or 2.5 mm. Some airless spray tips use a three-digit code instead of a simple millimeter number.
The nozzle controls how much fluid can leave the gun. It also affects how well the paint breaks into small droplets. The correct size helps the gun create an even pattern with good coverage and low waste.
What the Nozzle Does Inside a Spray Gun
Inside a conventional, HVLP, or LVLP spray gun, the fluid nozzle guides paint toward the air cap. The needle sits inside the nozzle and controls when paint can flow. When you pull the trigger, the needle moves back and opens the fluid path.
Air from the air cap hits the paint stream. This breaks the paint into small droplets. This process is called atomization. Good atomization creates a soft, even spray instead of large drops.

What Do Spray Gun Nozzle Numbers Mean?
A nozzle marked 1.4 mm has an opening that is about 1.4 millimeters wide. A 2.0 mm nozzle has a larger opening and can pass more paint. The number does not tell you the fan width or the air pressure.
With airless spray tips, a code such as 515 usually means a 10-inch fan at about 12 inches from the surface and a 0.015-inch orifice. The first number helps estimate fan width. The last two numbers show the orifice size in thousandths of an inch.
Nozzle Orifice Diameter vs. Spray Fan Width
The orifice diameter controls fluid flow. The fan width controls how wide the spray pattern becomes. These are related, but they are not the same thing.
A small nozzle can still create a wide fan on some spray guns. An airless tip with a 0.015-inch opening may produce a 10-inch fan when the first digit is 5. Always read the full product code and the gun maker’s instructions.
How the Fluid Nozzle, Air Cap, and Needle Work together
the fluid nozzle, air cap, and needle are a matched set. The nozzle controls the paint path. The needle opens and closes that path. The air cap shapes the spray and adds air to the paint.
These parts must match the spray gun model. A nozzle from one brand may look similar to another brand’s nozzle but still fit poorly. A poor fit can cause leaks, uneven flow, or a weak spray pattern.
Why a Bigger Nozzle Does Not Always Mean Better Coverage
A larger nozzle moves more paint, but more paint does not always mean better coverage. It can create runs, sags, heavy edges, and long drying times. It may also raise paint use and overspray.
Coverage comes from the right balance of flow, atomization, gun speed, distance, and overlap. A smaller nozzle with good control can produce a better finish than a large nozzle used without care.
How to Choose the Right Spray Gun Nozzle Size
Choosing the right spray gun nozzle size is a matching task. Match the nozzle to the coating, the spray gun, the surface, and the finish you want. Do not choose a size only because it is the largest one in the box.
Start with the coating maker’s recommendation. Then check your spray gun manual. If both sources agree, use that size as your first test. If they differ, use the gun maker’s limits and test the coating on scrap material.

Step 1: Identify the Paint or Coating You Will Use
Read the label before you fill the cup. Look for terms such as thin, medium, thick, high-build, water-based, solvent-based, or ready to spray. These words give clues about the nozzle size.
Thin coatings need less fluid capacity. Thick coatings need a larger opening or more thinning. Some products should not be thinned at all, so follow the technical data sheet.
Latex and Water-Based Paint
Latex paint is often thicker than stain or lacquer. Many spray guns need a larger nozzle, a strong air supply, or careful thinning for latex paint. A common starting range is about 1.8 to 2.5 mm for HVLP guns.
Some modern trim paints are made for spraying and may work with a smaller nozzle. Always strain the paint and test it. Thick latex can clog a small nozzle very quickly.
Acrylic Paint
Acrylic paint can range from thin craft paint to thick wall paint. Thin acrylics may work with a 1.0 to 1.4 mm nozzle. Heavier acrylic coatings may need 1.6 to 2.0 mm.
Use the product sheet as your guide. If the spray looks grainy, the paint may need more reduction, more air, or a larger nozzle. Change one factor at a time.
Oil-Based Paint and Enamel
Oil-based paint and enamel often spray well through a medium nozzle. A range of 1.3 to 1.8 mm is common for many products. Thick enamel may need a larger size.
Solvent-based coatings can produce strong fumes. Use proper ventilation, a suitable respirator, gloves, and eye protection. Keep all ignition sources away from flammable coatings.
Primer and Undercoat
Primer is often thicker than finish paint. High-build primer may need a 1.8 to 2.5 mm nozzle. Finer primers and sealers may work with 1.4 to 1.8 mm.
A large nozzle helps move primer, but it can leave a rough surface if atomization is weak. Sanding between coats may still be needed for a smooth result.
Clear Coat, Stain, and Varnish
Stain, clear coat, and varnish are usually thinner than primer or latex paint. Many work well with a 1.0 to 1.4 mm nozzle. A 1.3 mm nozzle is a common starting point for clear finishes.
Thin finishes can run easily. Use light coats and keep the gun moving. A small nozzle gives better control, but only when the coating is clean and fluid.
Automotive Paint and Specialty Coatings
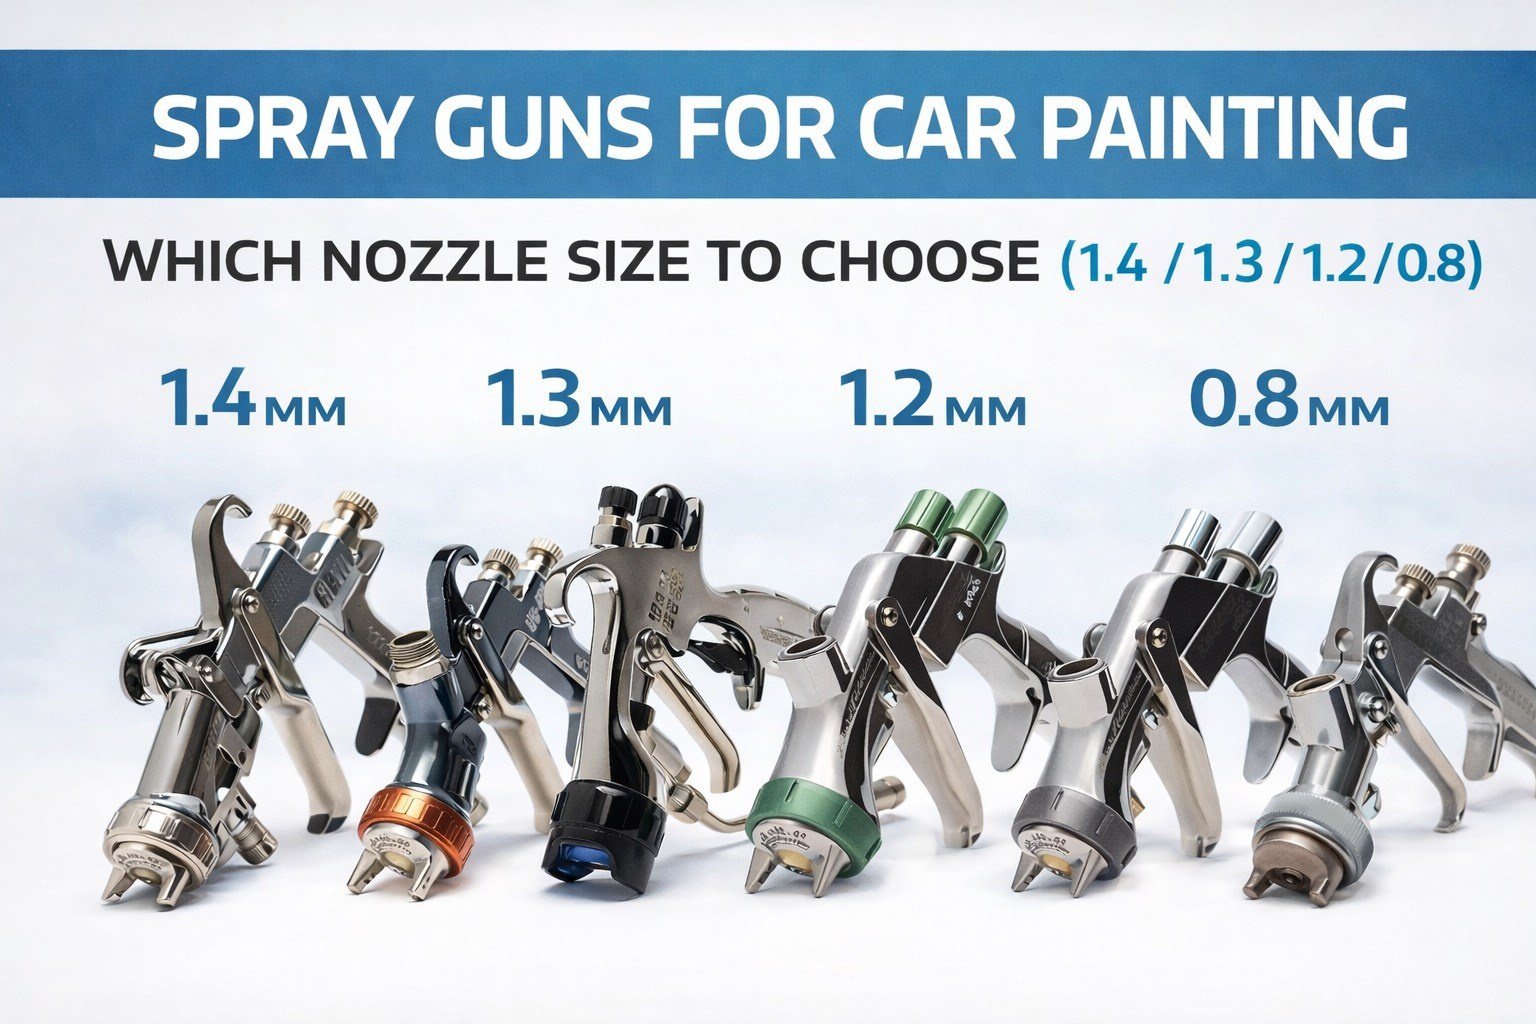
Automotive base coat often uses a 1.2 to 1.4 mm nozzle. Clear coat commonly uses about 1.3 to 1.4 mm, though some products call for 1.2 or 1.5 mm.
Specialty coatings vary widely. Bed liner, textured coatings, metallic paint, and ceramic products may require special tips or guns. Follow the product maker’s data sheet rather than guessing.

Step 2: Check the Paint Manufacturer’s Recommended Nozzle Size
The coating maker has tested the product under set conditions. The technical data sheet may list nozzle size, pressure, reduction ratio, number of coats, and drying time.
Treat this information as your best starting point. A recommendation such as “1.3 to 1.5 mm at 25 to 30 PSI” is more useful than a general chart. Record the settings that produce the best result.
Step 3: Match the Nozzle to Your Spray Gun Type
HVLP, LVLP, and airless sprayers use different systems. A 1.4 mm HVLP nozzle is not the same as an airless 515 tip. The numbers and performance cannot be compared directly.
Check whether your gun uses a fluid nozzle, a spray tip, or a reversible airless tip. Confirm the exact model, thread, seal, and supported size range before buying a replacement.

Step 4: Consider the Size and Shape of Your Project
Large, flat surfaces reward speed and a wider pattern. Small parts need control and a smaller fan. A fence can accept a faster spray and a little more texture. A cabinet door shows every defect.
Think about the finish standard. A shed wall may need simple coverage. A dining table may need fine atomization and careful overlap.

Step 5: Check Paint Viscosity and Required Thinning
Viscosity describes how easily the paint flows. Thick paint moves slowly. Thin paint moves quickly. You can check viscosity with a viscosity cup or by following the product’s flow test.
Do not thin paint by guesswork. Too much thinner can reduce coverage, change color, weaken the film, or increase runs. Use only the correct reducer and the stated amount.
Step 6: Test the Spray Pattern Before Painting the Full Surface
Spray a test panel made from cardboard, scrap wood, metal, or the same material as the project. Hold the gun at the recommended distance. Use a steady speed and overlap each pass by about 50 percent.
The pattern should look even from end to end. Heavy edges, gaps, large drops, or dry spray show that you need to adjust the setup before starting the real work.
Spray Gun Nozzle Size Chart for Different Paints and Projects
The chart below gives general starting points. It is not a universal specification. Paint formulas, spray gun design, air pressure, temperature, and reduction can change the best nozzle size.
Use the coating maker’s instructions first. Then use the chart to narrow your choices and plan a test.
Common Spray Gun Nozzle Sizes and Their Uses
Small nozzles from about 0.8 to 1.2 mm suit thin materials and detailed work. Medium sizes from 1.3 to 1.8 mm suit many finishes, enamels, and light primers. Large sizes from 1.8 to 2.5 mm suit thicker primers, latex, and high-build coatings.
A large opening is not a shortcut for poor preparation. Paint still needs to be mixed, strained, and applied in controlled coats.
Nozzle Size Chart for Latex and Emulsion Paint
Latex and emulsion paint often need a 1.8 to 2.5 mm nozzle on an HVLP gun. Some spray-ready trim paints may work with 1.5 to 1.8 mm. Airless sprayers often use a 0.015 to 0.021-inch tip.
Use a larger size for thick wall paint and a smaller size for thin trim paint. A test pattern will show whether the paint is atomizing well.
Nozzle Size Chart for Primer and Undercoat
General-purpose primer often works with a 1.6 to 2.0 mm nozzle. High-build primer may need 1.8 to 2.5 mm. Thin sealer may work with 1.3 to 1.5 mm.
If the primer leaves a rough, dry texture, check the pressure and distance before moving to a larger nozzle. The problem may be poor atomization rather than a small opening.
Nozzle Size Chart for Enamel, Stain, and Varnish
Enamel commonly works with a 1.3 to 1.8 mm nozzle. Stain often works with 1.0 to 1.4 mm. Varnish and clear finishes often use 1.2 to 1.5 mm.
Thin products can flood a surface when the fluid control is open too far. Begin with light coats and build coverage slowly.
Nozzle Size Chart for Automotive Base Coat and Clear Coat
Automotive base coat often uses a 1.2 to 1.4 mm nozzle. Clear coat often uses 1.2 to 1.4 mm. Some high-solid clear coats call for 1.3 to 1.5 mm.
The exact size depends on the product system. Base coat, reducer, hardener, temperature, and spray pressure all affect the finish.
Nozzle Size Chart for Furniture, Cabinets, Walls, and Fences
Furniture and cabinets often use a 1.3 to 1.8 mm nozzle for paint and a 1.0 to 1.4 mm nozzle for stain or clear coat. Walls and ceilings may use an airless tip between 0.015 and 0.021 inches.
Fences often use a 0.015 to 0.021-inch airless tip or a larger HVLP setup for thick exterior paint. Select for coverage, not fine detail.
How to Read Nozzle Recommendations Without Confusing Millimeters and Inches
Millimeter sizes usually describe the opening on a conventional, HVLP, or LVLP gun. Airless tips use thousandths of an inch. A 0.015-inch tip is about 0.38 mm, but it does not perform like a 0.38 mm HVLP nozzle because the systems work in different ways.
Never convert the numbers and assume they are equal in use. Match the size to the spray technology and the maker’s guide.
| Nozzle diameter or tip | Typical coating | Suitable project | Compatibility notes |
|---|---|---|---|
| 0.8–1.2 mm | Stain, dye, thin clear | Small parts and detail work | Common on detail HVLP or LVLP guns |
| 1.3–1.5 mm | Enamel, acrylic, base coat, clear | Cabinets, furniture, vehicles | Check the gun’s fluid set |
| 1.6–1.8 mm | Latex trim paint, light primer | Doors, trim, furniture | May need extra air or reduction |
| 1.8–2.5 mm | Thick primer, latex, high-build coating | Walls, furniture, fences | Needs a compatible gun and air supply |
| 0.013–0.015 in. airless tip | Thin paint, stain, enamel | Trim, doors, small surfaces | Tip code and sprayer pressure matter |
| 0.015–0.019 in. airless tip | Interior wall paint | Walls and ceilings | Common general-purpose range |
| 0.019–0.021 in. airless tip | Exterior latex and thicker paint | Fences, siding, large walls | Confirm sprayer capacity |
| 0.011–0.013 in. airless tip | Fine finish coatings | Cabinets and doors | Requires a fine-finish airless setup |
These are general starting points, not universal specifications. Always check the coating label and equipment manual.
A Complete Guide To HVLP Spray Gun: Everything You Need to Know for Your Next Project
How to Choose a Nozzle Size for an HVLP Spray Gun
HVLP means high volume, low pressure. The gun uses a large amount of air at lower pressure to atomize the coating. HVLP guns can provide good control and low overspray when they have enough air.
They are popular for furniture, cabinets, trim, doors, and small projects. The right nozzle size depends on the paint thickness and the gun’s fluid set.
What Is an HVLP Spray Gun Nozzle?
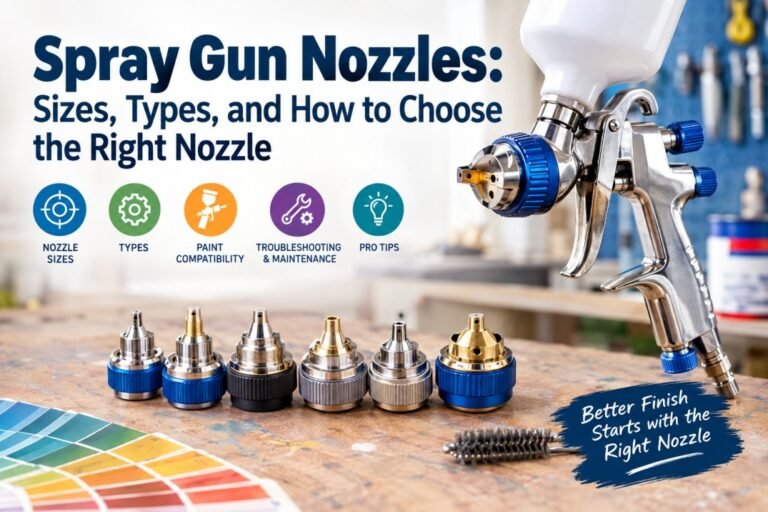
An HVLP spray gun nozzle is the fluid opening used with an HVLP air cap and needle. Many HVLP guns use replaceable fluid sets. These sets often include the nozzle, needle, and air cap.
A 1.4 mm set may suit thin paint and clear coat. A 2.0 mm set may suit thicker primer or latex. Use a complete matched set when possible.
Best HVLP Nozzle Size for Paint and Primer
For many finish paints, 1.3 to 1.5 mm is a useful starting range. For general primer, 1.6 to 1.8 mm is common. High-build primer or thick latex may need 2.0 mm or more.
Do not force thick paint through a tiny nozzle. You may raise the pressure and still get poor atomization. The result can be rough and dry instead of smooth.
Choosing an HVLP Nozzle for Furniture and Kitchen Cabinets
Cabinet paint often works well with a 1.3 to 1.8 mm HVLP nozzle. Use the smaller end for thin, spray-ready coatings. Use the larger end for thicker water-based paint or primer.
Cabinet work needs clean spray control. Strain the paint, use a clean air cap, and spray several light coats. A test door is worth the small amount of extra time.
Choosing an HVLP Nozzle for Stains and Clear Finishes
Stain and clear finishes usually need a 1.0 to 1.4 mm nozzle. A smaller nozzle helps control fluid on wood edges and narrow parts. It also reduces the chance of flooding the grain.
Keep the gun moving before you pull the trigger. Release the trigger before you stop moving. This simple habit prevents heavy spots at the start and end of each pass.
How Air Pressure and Paint Viscosity Affect HVLP Nozzle Performance
Too little air can create large droplets and an uneven fan. Too much air can create dry spray, overspray, and wasted coating. Thick paint also needs more air to break apart.
Set pressure at the gun while the trigger is pulled. Static pressure can give a false reading. Start low, then raise the pressure only until the pattern becomes smooth.
Common HVLP Nozzle Sizing Mistakes
A common mistake is using a small nozzle for thick paint and then raising air pressure too far. Another is using a large nozzle for thin clear coat and applying too much fluid.
People also forget that compressor capacity matters. A small compressor may run constantly and lose pressure. This can change the spray pattern halfway through a panel.
How to Choose a Nozzle Size for an Airless Paint Sprayer
Airless sprayers do not use a traditional fluid nozzle in the same way as HVLP guns. They pressurize paint and force it through a small spray tip. The tip shapes the fan and controls flow.
Airless systems are fast and useful for walls, ceilings, siding, fences, and large surfaces. They can also spray cabinets and trim with a fine-finish tip and careful pressure control.
What Do Airless Spray Tip Numbers Mean?
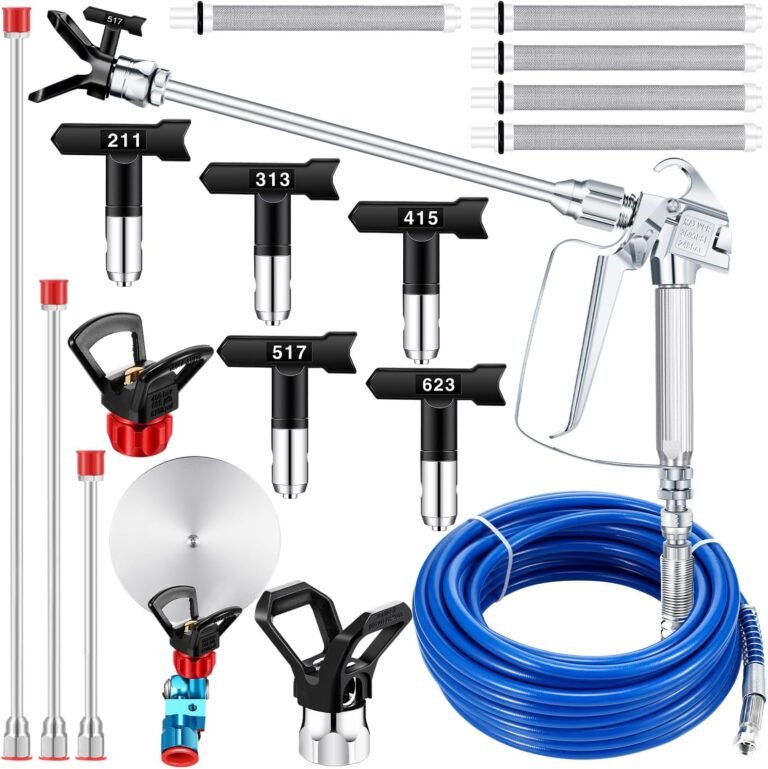
An airless spray tip code often has three numbers. A tip marked 515 usually creates an approximate 10-inch fan at 12 inches from the surface. The 15 means a 0.015-inch orifice.
A 413 tip creates about an 8-inch fan and has a 0.013-inch orifice. These figures are estimates. Actual fan width changes with pressure, paint, distance, and tip wear.
How to Read an Airless Spray Tip Code
The first digit is doubled to estimate the fan width. The last two digits show the orifice size in thousandths of an inch. For example, 517 suggests a 10-inch fan and a 0.017-inch opening.
This system is useful, but brand codes can vary. Check the package details. Confirm the tip works with your guard, sprayer, pressure range, and coating.
Best Airless Tip Size for Interior Walls and Ceilings
Interior wall paint often works with a 515 or 517 tip. Thin paint may work with a 413 or 515. Heavy wall paint may need a 517 or 519 if the sprayer can support it.
A wider fan can speed up large rooms. Use the lowest pressure that gives a full pattern. Excess pressure creates more overspray and can make the edges weak.
Choosing an Airless Tip for Exterior Paint and Fences
Exterior latex paint and fence coatings often use a 515, 517, or 519 tip. The best choice depends on paint thickness and the sprayer’s output. A thicker coating needs a larger orifice.
For a fence, coverage and speed usually matter more than a perfect fine finish. Protect nearby plants, siding, vehicles, and windows from overspray.
Best Airless Tip Size for Cabinets, Doors, and Trim
Cabinets, doors, and trim often need a fine-finish tip. Common sizes include 308, 310, 312, or 313, depending on the product and sprayer.
Use a smaller fan and lower pressure than you would use on a wall. Fine-finish tips can produce a smooth result, but they clog more easily and must be cleaned well.
How to Match an Airless Tip to Paint Thickness and Sprayer Capacity
The tip must match both the paint and the sprayer. A large tip may demand more gallons per minute than a small sprayer can deliver. The result may be a weak or uneven fan.
Check the sprayer’s maximum tip size and output rating. Do not assume that a powerful-looking motor can support every tip.
Airless Spray Tip Size vs. HVLP Nozzle Size
Airless tips and HVLP nozzles are not interchangeable measurements. Airless tips use pressure to break up paint. HVLP guns use air from an air cap.
A 0.015-inch airless tip and a 1.5 mm HVLP nozzle do not provide the same flow. Compare each system only within its own size chart.
How to Choose a Nozzle Size for an LVLP Spray Gun
LVLP means low volume, low pressure. LVLP guns use less air than many HVLP guns. They can be helpful for small compressors and home workshops.
The trade-off is speed. An LVLP gun may spray more slowly and may struggle with thick coatings. It works best when the coating is suitable and the compressor can maintain the needed airflow.
How an LVLP Nozzle Differs From an HVLP Nozzle
The fluid opening may look similar, but the air cap and air demand differ. An LVLP nozzle set must match the LVLP gun model. Do not assume an HVLP air cap will work correctly on an LVLP body.
The gun maker’s fluid-set chart is the safest guide. Use the correct needle and air cap with the nozzle.
Best LVLP Nozzle Size for Thin Paint and Clear Coats
Thin paint, stain, and clear coat often work with a 1.0 to 1.4 mm LVLP nozzle. These sizes provide control and suit the lower air output of many small setups.
Keep coats light. If the finish looks dry, check the air pressure, distance, and reduction before choosing a larger nozzle.
Choosing an LVLP Nozzle for Small DIY Projects
For a chair, shelf, small cabinet, or metal part, a 1.3 or 1.4 mm nozzle is often a useful starting point. It offers a balance between coverage and control.
LVLP is less suited to very large walls or thick exterior paint. It can work, but the process may be slow and tiring.
How to Check Whether Your Compressor Can Support the Spray Gun
Look at the gun’s CFM requirement and compare it with the compressor’s delivered CFM at the working pressure. Do not compare only the tank size. A large tank can still have a weak pump.
Leave a safety margin. If the compressor runs nonstop, the gun may lose atomization during the job. That can create a changing finish across the same surface.
When an LVLP Spray Gun Is Not the Right Choice
An LVLP gun may not be ideal for thick latex, large exterior walls, or high-speed production work. It may also struggle with high-build coatings that need a large fluid opening.
Choose an airless sprayer for large surfaces and heavy paint. Choose HVLP or LVLP for better control on smaller parts.
How to Choose a Spray Gun Nozzle for Different Paint Types
Paint type is one of the strongest clues when choosing nozzle size. Thin products need less fluid capacity. Thick products need more room to flow.
The same paint name can cover many formulas. “Acrylic,” “latex,” and “enamel” describe broad groups. Read the label and technical sheet for the exact product.
What Nozzle Size Works Best for Latex Paint?
Latex paint often needs a 1.8 to 2.5 mm HVLP nozzle or a 0.015 to 0.021-inch airless tip. Some spray-ready latex products work with smaller sizes.
Strain latex before spraying. Even a small skin or lump can block a fine nozzle.
What Nozzle Size Works Best for Acrylic Paint?
Thin acrylic paint may work with a 1.0 to 1.4 mm nozzle. Medium acrylic coatings often use 1.4 to 1.8 mm.
Check the label for reduction instructions. Too much water or reducer can weaken the finish and change the color.
What Nozzle Size Works Best for Primer?
Many primers work with 1.6 to 2.0 mm. High-build primer may need 2.0 to 2.5 mm. Airless users often choose a 0.015 to 0.021-inch tip.
If the primer is gritty, clean the gun first. Then check pressure and distance before changing size.
What Nozzle Size Works Best for Enamel Paint?
Enamel often works with a 1.3 to 1.8 mm nozzle. A 1.4 mm size is a common starting point for thin or medium enamel.
Apply even passes. Enamel can level well, but heavy coats may take a long time to dry and can sag.
What Nozzle Size Works Best for Wood Stain?
Wood stain often works with a 1.0 to 1.4 mm nozzle. Some thin stains can work with a smaller detail nozzle.
Spray with care around edges and end grain. Wipe or brush excess stain if the product instructions call for it.
What Nozzle Size Works Best for Varnish and Polyurethane?
Varnish and polyurethane often work with a 1.2 to 1.5 mm nozzle. Water-based products may need different settings than solvent-based products.
A clean work area matters as much as nozzle size. Dust can ruin a clear finish even when the spray pattern is perfect.
What Nozzle Size Works Best for Automotive Base Coat?
Automotive base coat commonly uses a 1.2 to 1.4 mm nozzle. The exact size depends on the paint system and the spray gun.
Use the correct reducer for the shop temperature. Keep the gun parallel to the panel to avoid uneven color.
What Nozzle Size Works Best for Automotive Clear Coat?
Automotive clear coat often uses a 1.2 to 1.4 mm nozzle. High-solid clear may call for a slightly larger size.
Clear coat needs a balanced pattern. Too little material can create dry spray. Too much can create runs and solvent pop.
What Nozzle Size Works Best for Thick or High-Viscosity Coatings?
Thick coatings often need a 1.8 to 2.5 mm nozzle or a larger airless tip. Some textured or specialty products require a dedicated gun.
Do not keep increasing pressure to force a coating through a small nozzle. Use the correct fluid set and follow the coating maker’s limits.
How to Choose a Spray Gun Nozzle for Different Projects
The best nozzle for a project depends on the surface size, finish level, and coating. A small project gives you time to use a narrow pattern. A large project rewards a wider fan and faster flow.
Surface preparation still comes first. A spray gun cannot hide dirt, grease, loose paint, dents, or poor sanding.
Best Nozzle Size for Painting Kitchen Cabinets
A 1.3 to 1.8 mm HVLP nozzle is common for cabinet paint. Use 1.3 to 1.5 mm for thin spray-ready products and 1.6 to 1.8 mm for thicker paint or primer.
Remove doors and spray them flat when possible. Use light coats and allow proper drying time between coats.
Best Nozzle Size for Furniture and Wooden Chairs
Furniture paint often works with a 1.3 to 1.8 mm nozzle. Stain and clear coat usually need 1.0 to 1.4 mm.
Furniture has many edges and curves. A controlled, medium-size nozzle helps reduce heavy spots on spindles and corners.
Best Nozzle Size for Doors, Skirting Boards, and Trim
Doors and trim often work with a 1.3 to 1.8 mm nozzle. An airless fine-finish tip such as 310 or 312 may also work with suitable paint.
Use a narrow fan for narrow trim. A wide pattern can waste paint and make it hard to keep the gun at the right distance.
Best Nozzle Size for Interior Walls and Ceilings
An airless 515 or 517 tip is a common starting point for interior wall paint. Thin coatings may work with a smaller tip.
Use masking film and keep the gun moving. Even a good tip can create heavy spots if you pause at the end of a pass.
Best Nozzle Size for Exterior Walls and Fences
Exterior latex often works with a 515, 517, or 519 airless tip. Thick fence stain may use a different tip based on the product.
Fences have rough surfaces and gaps. Aim for full coverage without soaking the wood. Back-brushing may improve penetration for some stains.
Best Nozzle Size for Decks and Garden Furniture
Deck stain often works with a small airless tip or a 1.0 to 1.4 mm spray gun nozzle. Garden furniture paint may need 1.3 to 1.8 mm.
Protect nearby plants and outdoor furniture. Wind can carry overspray farther than you expect.
Best Nozzle Size for Cars, Motorcycles, and Metal Parts
Automotive and metal parts often use a 1.2 to 1.4 mm nozzle for base coat and clear coat. Primer may need 1.6 to 2.0 mm.
Degrease the surface and remove dust. A clean nozzle cannot fix oil contamination or poor sanding.
Best Nozzle Size for Small Crafts and Detailed Work
Small crafts often use a 0.8 to 1.2 mm nozzle. An airbrush may be better for very fine lines and tiny parts.
Use thin paint and low fluid flow. Practice on paper before spraying the final piece.
How Nozzle Size Affects Spray Pattern and Paint Finish
Nozzle size changes the amount of paint that reaches the surface. It also affects the balance between paint and air. That balance shapes the pattern and finish.
Think of the nozzle as a faucet. A small opening gives a controlled stream. A large opening gives more flow, but control becomes more important.
How Nozzle Size Affects Paint Flow Rate
A larger nozzle generally increases fluid flow. This can shorten the time needed to cover a surface. It can also overload the surface if the gun moves too slowly.
A smaller nozzle reduces flow. This can improve control, but it may require more passes and careful paint reduction.
How Nozzle Size Affects Atomization
Atomization breaks paint into droplets. If the nozzle is too large for the available air, droplets may stay too large. If it is too small for thick paint, the gun may struggle to move the coating.
The best result comes from a matched nozzle, paint viscosity, and pressure setting.
How Nozzle Size Affects Fan Width and Coverage
Nozzle size helps influence coverage, but fan width also depends on the air cap or airless tip design. A wider fan covers more area but may use more paint.
Use a narrow fan on small parts. Use a wider fan on walls and broad panels when the sprayer can maintain an even pattern.
How Nozzle Size Affects Overspray and Paint Waste
A large nozzle can put more paint into the air when pressure is too high. A small nozzle can also create overspray if you raise air pressure to compensate for thick paint.
Use the lowest pressure that creates a full pattern. Keep the gun at the correct distance and move at a steady speed.
How Nozzle Size Affects Orange Peel, Runs, and Sags
Orange peel looks like a textured citrus skin. It can come from poor atomization, thick paint, low pressure, fast drying, or too much distance. A nozzle that is too small may add to the problem.
Runs and sags usually mean too much wet material reached one area. A large nozzle, slow movement, or too much fluid can cause this.
How Nozzle Size Affects Surface Texture and Finish Quality
A well-matched nozzle creates even droplets. The droplets flow together without flooding the surface. This creates a smoother film.
A poor match can leave dry grit, heavy texture, or uneven sheen. Always judge the test panel after the coating has dried.
Why the Same Nozzle Can Produce Different Results With Different Paints
Paints have different solids, solvents, pigments, and drying speeds. Two products with the same color can spray in very different ways.
Temperature also matters. Cold paint becomes thicker. Warm paint becomes thinner and may dry faster. Store and spray materials within the maker’s stated temperature range.
What Happens When You Use the Wrong Spray Gun Nozzle Size?
The wrong nozzle can make the gun seem broken. You may see spitting, weak flow, uneven edges, large drops, or a rough finish.
Before replacing the gun, check the nozzle, needle, air cap, paint filter, pressure, and viscosity. Many spray problems have simple causes.
Signs Your Nozzle Is Too Small for the Paint
Common signs include low flow, narrow coverage, a dry finish, and poor atomization. The gun may need very high pressure to produce a usable pattern.
Thick paint may also cause the needle to stick. Move to a larger nozzle only after confirming that the paint is mixed and strained.
Signs Your Nozzle Is Too Large for the Project
A large nozzle may release too much paint. You may see runs, sags, wet edges, slow drying, and high paint use.
The spray may look smooth in the air but still flood the surface. Reduce fluid flow, increase gun speed, or choose a smaller nozzle.
Why Your Spray Gun Spits or Splutters
Spitting can come from a clogged nozzle, loose nozzle, damaged needle, low paint level, blocked vent, or poor seal. It is not always a size problem.
Stop spraying and inspect the fluid path. Do not keep spraying over spitting. It creates thick spots that are hard to repair.
Why Your Spray Pattern Looks Narrow or Uneven
A narrow pattern can come from low air pressure, a blocked air cap, a damaged tip, or incorrect fan control. On airless guns, a worn tip can change the pattern.
Clean the air holes with the maker’s recommended tools. Never use a hard wire that can enlarge the holes.
Why Paint Comes Out in Large Droplets
Large droplets mean poor atomization. The paint may be too thick, the pressure too low, or the nozzle too large for the gun.
Check the paint temperature and viscosity. Then adjust pressure in small steps. Avoid solving every problem by adding more pressure.
Why Your Spray Gun Leaves Runs and Sags
Runs happen when too much wet coating reaches one area. The gun may be too close, moving too slowly, or releasing too much fluid.
Keep the gun square to the surface. Start moving before pulling the trigger. Use overlapping passes instead of trying to cover in one heavy coat.
Why Your Spray Gun Struggles With Thick Paint
Thick paint may exceed the nozzle, air cap, or compressor capacity. It may also contain lumps or dried material.
Use the correct thinner only when approved. A larger nozzle may help, but the gun still needs enough air or fluid pressure.
How to Tell Whether the Problem Is the Nozzle, Pressure, or Paint
Use a simple process. First, clean and inspect the gun. Next, strain the paint and check its viscosity. Then test pressure and spray distance.
If a clean gun sprays water or a known coating well, the original paint may be the issue. If every coating sprays badly, inspect the gun and air supply.
How to Test and Adjust Your Spray Gun Nozzle Setup
Testing saves paint and prevents repair work. A small test panel can reveal a bad setup in seconds. It is far cheaper than discovering the problem after painting a cabinet door.
Use the same surface, paint, and temperature as the real project when possible. Let the test dry before making a final judgment.
Prepare a Scrap Board or Test Panel
Use cardboard for a quick pattern check. Use scrap wood, metal, or a spare panel for a finish check. Mark the panel with the paint name and settings.
Make several passes with different settings. This creates a small record of what works.
Check the Nozzle, Needle, and Air Cap for Damage
Look for dents, cracks, dried paint, bent needles, and blocked air holes. A small defect can distort the spray pattern.
Do not force the needle into the nozzle. Replace damaged parts as a matched set when the manufacturer recommends it.
Set the Correct Air Pressure or Fluid Pressure
Follow the coating and gun instructions. For air spray guns, measure pressure at the gun with the trigger pulled. For airless sprayers, begin near the low end and increase only as needed.
Too much pressure creates mist and waste. Too little pressure creates a weak or uneven fan.
Adjust the Paint Flow and Fan Control
Start with limited fluid flow and a medium fan. Open the fluid control slowly until the pattern becomes useful.
A full fan is not always best. A smaller fan gives more control on legs, rails, corners, and narrow trim.
Test the Spray Pattern From the Correct Distance
Many spray guns work best about 6 to 10 inches from the surface, but follow the manual. Airless guns are often used around 12 inches away.
Too far creates dry spray. Too close creates heavy coverage. Keep the gun square and move at a steady speed.
Read the Pattern for Heavy Edges, Gaps, and Uneven Flow
A good fan is even from top to bottom. Heavy edges may mean poor air balance, a dirty cap, or incorrect fluid flow. Gaps may mean low pressure or a blocked opening.
Turn the air cap or tip as directed to check whether the problem follows the part. This can help locate the cause.
Make One Adjustment at a Time
Change only one setting, such as pressure, fluid flow, paint reduction, or distance. If you change everything at once, you will not know what fixed the problem.
Small changes are easier to control. Keep notes for the next project.
Record the Settings That Work for Your Paint
Write down the nozzle size, paint brand, reduction, pressure, fan setting, distance, and temperature. Take a photo of the test panel if useful.
Your notes become a personal spray guide. They can save hours on future work.
Can You Use a Different Nozzle Size Than the Manufacturer Recommends?
You can sometimes use a slightly different size, but the change should be controlled. A small shift may work when the coating is close to the suggested viscosity and the gun has enough adjustment.
Do not assume every nozzle will work. The coating maker’s recommendation protects the finish, drying time, film thickness, and performance.
When a Slightly Different Nozzle Size May Work
A 1.4 mm nozzle may work instead of a recommended 1.3 mm size if the paint is strained and the gun is adjusted well. A 1.8 mm nozzle may work instead of 1.7 mm for a slightly thicker primer.
Always test first. A small change in diameter can create a larger change in flow.
When You Should Not Change the Recommended Nozzle
Do not change the size casually for automotive coatings, industrial coatings, catalyzed products, or products with strict film requirements. These materials need exact application conditions.
If the label lists a required tip or nozzle, follow it. A poor finish may affect durability, color, gloss, or chemical resistance.
How Paint Thinning Affects Nozzle Choice
Thinning lowers viscosity and may allow a smaller nozzle. It can also increase flow and reduce the coating’s solids content.
Use the correct reducer and mixing ratio. Keep track of how much thinner you add so the next batch behaves the same way.
Why Thinning Paint Is Not Always the Best Fix
Thinning may solve poor flow but create weak coverage, runs, longer drying, or color changes. Some paints lose performance when reduced beyond the stated limit.
A larger nozzle or stronger sprayer may be the better answer. Follow the product sheet before adding solvent or water.
How to Check Your Spray Gun’s Supported Nozzle Range
Read the manual or the manufacturer’s parts chart. Look for compatible fluid sets, tip sizes, pressure ranges, and air requirements.
The smallest and largest sizes may depend on the air cap. Buying a nozzle alone may not provide the result you expect.
When Should You Replace a Spray Gun Nozzle?
Replace a nozzle when it is worn, damaged, or no longer produces a clean pattern after proper cleaning. Wear changes the opening and can increase fluid flow.
Airless tips often wear faster than conventional gun nozzles because paint passes through them at high pressure. A worn tip wastes paint and reduces control.
Signs of a Worn or Damaged Nozzle
Signs include a split fan, heavy edges, poor shutoff, uneven flow, and a pattern that changes after cleaning. A damaged opening may look oval instead of round.
Do not sand or drill the opening. Replace the part with the correct model.
How a Clogged Nozzle Differs From a Worn Nozzle
A clogged nozzle often improves after proper cleaning. A worn nozzle remains uneven and may produce too much material even when clean.
Test the pattern after cleaning. If the problem remains, compare the part with a new nozzle.
Can You Clean and Reuse a Spray Gun Nozzle?
Yes, many nozzles can be cleaned and reused. Clean them soon after spraying so paint does not harden inside the opening.
Use the correct solvent for the coating. Follow the spray gun maker’s cleaning instructions.
How to Clean a Nozzle Without Damaging the Orifice
Remove the nozzle when safe and soak it only in an approved cleaner. Use a soft brush and clean fluid. Rinse and dry the part before reassembly.
Do not scrape the opening with a nail, drill bit, knife, or stiff wire. Even a tiny scratch can change the spray pattern.
Why Using the Wrong Cleaning Tool Can Ruin the Spray Pattern
Hard tools can enlarge or deform the orifice. They can also damage air holes in the cap. The gun may then spray unevenly forever.
Use a soft nozzle brush or the cleaning tool supplied by the maker. Work gently.
How Often Should You Replace Spray Gun Tips and Nozzles?
Replacement time depends on paint type, pressure, cleaning, and use. Abrasive coatings wear parts faster. Airless tips may need replacement after many gallons, while a clean HVLP nozzle can last much longer.
Replace the part when the pattern changes, not only when it looks visibly broken.
Best Tools and Accessories for Choosing and Maintaining Spray Gun Nozzles
The right accessories make nozzle selection easier. They also protect the parts that control your finish. A clean gun is often more important than a costly gun.
Buy parts that match your actual setup. Avoid universal kits unless you confirm compatibility with the model.
Spray Gun Nozzle and Needle Sets
A matched nozzle and needle set helps maintain the correct seal and fluid control. This is useful when changing from clear coat to primer.
Check the gun model and fluid-set size before ordering. Do not mix random parts from different brands.
Airless Spray Tips for Different Coatings
Keep separate airless tips for wall paint, fine finish work, stain, and thicker exterior coatings. Label each tip so you know its history.
A reversible tip can help clear a temporary blockage. It does not replace cleaning or fix a worn tip.
Spray Gun Cleaning Kits and Nozzle Brushes
A cleaning kit may include soft brushes, picks, wrenches, seals, and storage tools. Choose a kit made for your gun type.
Avoid sharp metal picks inside precision openings. The wrong tool can create permanent damage.
Viscosity Cups for Checking Paint Flow
A viscosity cup gives a simple flow-time reading. It does not replace the coating maker’s instructions, but it helps you repeat a mixture.
Use the same cup, temperature, and method each time. Record the result with your spray settings.
Paint Strainers for Removing Lumps and Debris
Strainers remove dried skin, pigment lumps, dust, and other debris. They are cheap insurance against clogs.
Use a strainer suited to the coating. A very fine filter may slow thick paint too much.
Pressure Gauges and Air Regulators
A regulator helps control air pressure at the gun. A gauge shows whether pressure changes while you spray.
For consistent results, check pressure with the trigger open. Static pressure can read higher than working pressure.
Replacement Seals, Needles, and Nozzle Kits
Seals and needles wear with use. A small leak can change the fluid path and create poor atomization.
Buy replacement parts by model number. Keep a spare seal and nozzle for important projects.
What to Check Before Buying a Replacement Nozzle Online
Before buying, confirm:
- Spray gun brand and model
- Fluid-set or tip part number
- Nozzle diameter or airless tip code
- Air cap compatibility
- Seal and needle requirements
- Coating and project type
- Seller return policy
- Customer reviews for the exact part
For compatible products, start with the manufacturer’s parts page. You can also compare model-specific options on Amazon’s spray gun nozzle search page. For airless work, see Amazon’s airless spray tip options. These links may be affiliate links; verify compatibility before ordering.
Do not buy a universal nozzle kit just because it contains many sizes. A smaller, matched fluid set may serve you better than a box of parts that do not fit your gun.
Real-World Spray Gun Nozzle Examples: What Works and What Does Not?
Real projects show why nozzle choice matters. The best answer depends on the material and the finish goal. The same spray gun may need different fluid sets for different jobs.
Use these examples as starting points. Test every coating before spraying the final surface.
A Weekend Cabinet Project: Choosing a Nozzle for a Smooth Finish
A homeowner wants to repaint kitchen cabinet doors with water-based cabinet paint. A 1.4 to 1.8 mm HVLP nozzle is a reasonable starting range, depending on the product thickness.
A 2.5 mm nozzle may move the paint quickly but can make the doors look flooded. A 1.0 mm nozzle may struggle and leave a rough finish. Thin coats, proper sanding, and a clean test panel lead to better results.
Painting a Garden Fence: Why Coverage Matters More Than Fine Detail
A fence is large, rough, and full of gaps. Fine atomization is helpful, but fast and even coverage matters more. An airless sprayer with a 515, 517, or 519 tip may suit many exterior paints.
Protect the ground, plants, windows, and nearby buildings. Keep the gun moving to prevent heavy stripes on the fence boards.
Spraying a Bedroom Wall: Matching an Airless Tip to the Paint
For common interior wall paint, a 515 or 517 tip is often a useful starting point. Choose based on paint thickness and the sprayer’s approved tip range.
A tiny tip may clog or create a weak pattern. A very large tip may waste paint and produce excessive overspray.
Applying Clear Coat to a Car Panel: Avoiding Texture and Runs
Automotive clear coat often works with a 1.2 to 1.4 mm nozzle. Use the correct reducer, air pressure, and fluid-set combination from the product sheet.
A small nozzle with too little air can create orange peel. A large nozzle with too much fluid can create runs. Test on a panel before coating the car.
What to Do When the First Test Pattern Looks Terrible
Stop and inspect the setup. Check the paint mix, filter, nozzle, needle, air cap, pressure, and distance. Do not spray the full project while hoping the pattern improves.
Make one change at a time. Clean the gun first, then adjust pressure, flow, and distance. If the coating is still too thick, use the approved reduction or a larger matched nozzle.
A Simple Decision Guide for Choosing Nozzle Size
Use this short process when you need a fast answer:
- Identify the coating.
- Read the coating maker’s nozzle or tip recommendation.
- Confirm the spray gun type and model.
- Check paint viscosity and strain the coating.
- Choose the middle of the recommended range.
- Test on scrap material.
- Adjust pressure and fluid flow.
- Change nozzle size only if the test still fails.
This process works because it avoids random changes. It also helps you find the real cause of a poor spray pattern.
Safety Tips When Choosing and Using Spray Gun Nozzles
Spraying creates airborne droplets and fumes. Wear eye protection, gloves, and a respirator rated for the coating. Use strong ventilation and follow the product safety sheet.
Never point an airless gun at your skin. Airless spray can inject material under the skin, which is a medical emergency. Relieve pressure before cleaning or changing an airless tip.
Keep solvent-based products away from flames, sparks, heaters, and unapproved electrical tools. Store paint and thinner in their proper containers.
Frequently Asked Questions
Is a Bigger Spray Gun Nozzle Better for Thick Paint?
Often, yes, but only when the gun and air supply can support it. A larger nozzle helps thick paint flow. It does not guarantee good atomization or a smooth finish.
Check the coating instructions and test before painting.
What Is the Most Common Spray Gun Nozzle Size?
A 1.3 to 1.5 mm nozzle is common for many finish paints, enamel, base coat, and clear coat. It is not the best size for every product.
Primer and latex often need a larger size.
Can I Spray Latex Paint With a 1.4 mm Nozzle?
You may be able to spray thin, spray-ready latex with a 1.4 mm nozzle. Thick latex usually needs more reduction, more air, or a larger nozzle.
Follow the paint maker’s instructions. Do not over-thin the paint.
What Nozzle Size Should I Use for Cabinet Paint?
Start around 1.3 to 1.8 mm on an HVLP gun. Choose the exact size based on the cabinet paint’s instructions and viscosity.
A 1.4 mm nozzle is common for thinner cabinet coatings.
What Airless Tip Is Best for Interior Walls?
A 515 or 517 tip is a common starting point for interior wall paint. Thin coatings may use a smaller tip. Thick paint may need a larger one.
Confirm that your sprayer supports the selected tip.
How Do I Stop My Spray Gun From Spitting?
Clean the nozzle and air cap. Check the needle, seals, paint level, cup vent, and paint filter. Make sure the nozzle is tight but not over-tightened.
Spitting is often caused by dirt, air leaks, or a damaged part.
How Do I Know if My Nozzle Is Worn?
A worn nozzle may create heavy edges, a split pattern, poor shutoff, or excess flow. If cleaning does not solve the issue, compare it with a new nozzle.
Airless tips often show wear as a wider or uneven fan.
Should I Thin Paint to Use a Smaller Nozzle?
Not always. Thinning may help flow, but it can weaken coverage and alter drying or color. Use only the approved reducer and amount.
A larger matched nozzle may be safer than excessive thinning.
Conclusion
Choosing the right spray gun nozzle size is less about finding one perfect number and more about creating a good match. Match the nozzle to the paint thickness, spray gun type, project size, surface, and desired finish.
Use small nozzles for thin coatings and detail work. Use medium nozzles for many paints, enamels, furniture finishes, and automotive coatings. Use larger nozzles or airless tips for primer, latex, high-build products, and large surfaces.
Always start with the manufacturer’s recommendation. Strain the paint, test the spray pattern, and adjust one setting at a time. When the nozzle, pressure, viscosity, and technique work together, the spray gun becomes easier to control—and the finish becomes far more consistent.